前言
本文具有强烈的个人感情色彩,如有观看不适,请尽快关闭. 本文仅作为个人学习记录使用,也欢迎在许可协议范围内转载或分享,请尊重版权并且保留原文链接,谢谢您的理解合作. 如果您觉得本站对您能有帮助,您可以使用RSS方式订阅本站,感谢支持!
先上成品看看效果
深入CAGradientLayer
最近开发功能,视觉设计同学对QQ音乐的桌面歌词预览图的流体渐变动画很感兴趣,想让开发这边实现这个效果.
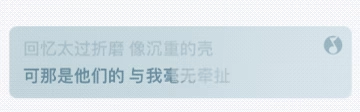
仔细观察歌词背景( 若不是我左右眼都是5.0 我第一次看到QQ音乐的效果我以为没动画.幼稚被教育了),会有一个类似柔光的效果像个灯光一样照射并移动.视觉设计同学把这个效果称为流体过渡动画.
为了研究这个效果我深入了解了一下CAGradientLayer,发现这里面有几个重要的类型和大家介绍一下
CAGradientLayer中有一个成员变量叫type
1
@property(copy) CAGradientLayerType type; //objc中的成员变量
1
open var type: CAGradientLayerType  //swift中的成员变量
这里拿Objc举例
- kCAGradientLayerAxial 这种叫做轴向梯度或者线性渐变
- kCAGradientLayerRadial 这种叫做径向渐变
- kCAGradientLayerConic 这种叫做锥形渐变
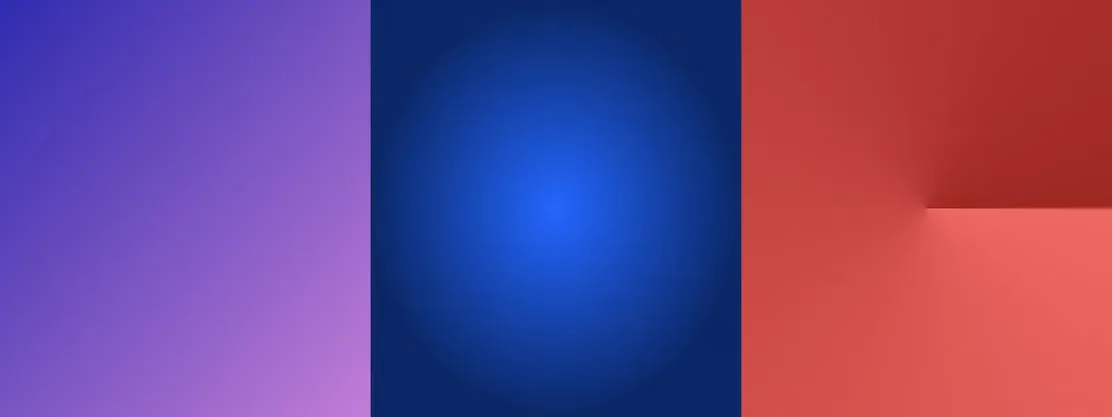
kCAGradientLayerAxial
这种Linear (Axial) Gradients 如图 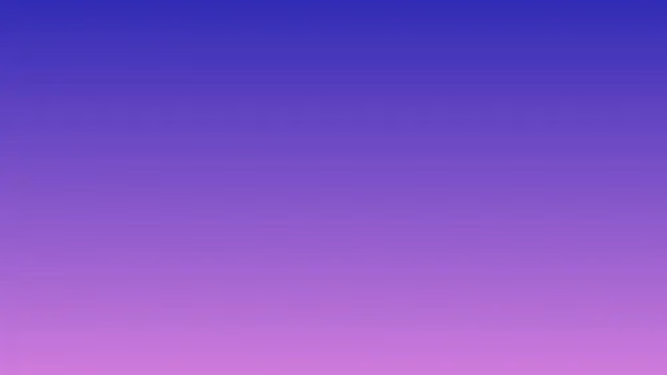
1
2
3
4
5
6
7
8
9
// Objective C

gradientLayer.type = kCAGradientLayerAxial;
gradientLayer.colors =
@[
    (id)[UIColor colorWithRed: 48.0/255.0 green: 35.0/255.0 blue: 174.0/255.0 alpha: 1.0].CGColor,
    (id)[UIColor colorWithRed: 200.0/255.0 green: 109.0/255.0 blue: 215.0/255.0 alpha: 1.0].CGColor
];
1
2
3
4
5
6
7
// Swift
gradientLayer.type = .axial;
gradientLayer.colors =
[
    UIColor(red: 48.0/255.0, green: 35.0/255.0, blue: 174.0/255.0, alpha: 1.0).cgColor,
    UIColor(red: 200.0/255.0, green: 109.0/255.0, blue: 215.0/255.0, alpha: 1.0).cgColor
]
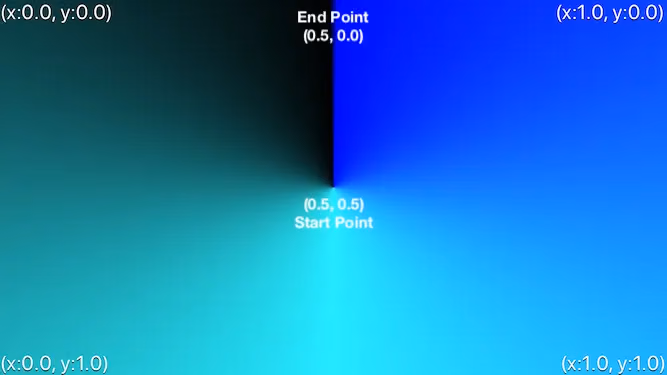
为了研究明白这几种类型有啥区别之前我们要复习一下渐变layer的开始点和结束点.
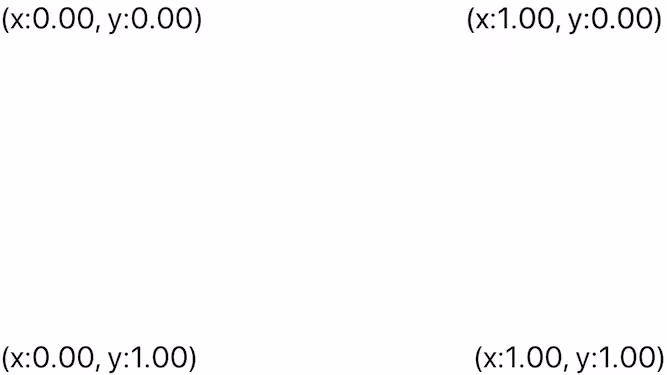
Start Point and End Point
这个开始点和结束点可以改变渐变方向. 默认
startPoint = (0.5, 0),endPoint = (0.5, 1.0)
如果把这个渐变变成左右横向的可以参考下面图示和代码.
可以参考下图
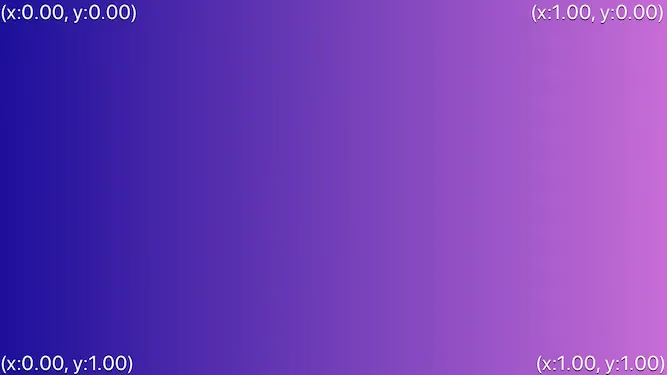
示例代码如下:
1
2
3
4
5
6
7
8
9
10
11
12
13
// Objective C

// Set type (Axial is already the default value)
gradientLayer.type = kCAGradientLayerAxial;
// Set the colors (these need to be CGColor's, not UIColor's)
gradientLayer.colors =
@[
    (id)[UIColor colorWithRed: 48.0/255.0 green: 35.0/255.0 blue: 174.0/255.0 alpha: 1.0].CGColor,
    (id)[UIColor colorWithRed: 200.0/255.0 green: 109.0/255.0 blue: 215.0/255.0 alpha: 1.0].CGColor
];
// Set the start and end points
gradientLayer.startPoint = CGPointMake(0, 0);
gradientLayer.endPoint = CGPointMake(1, 0);
1
2
3
4
5
6
7
8
9
10
11
12
13
// Swift

// Set type (Axial is already the default value)
gradientLayer.type = CAGradientLayerType.axial
// Set the colors (these need to be CGColor's, not UIColor's)
gradientLayer.colors =
[
    UIColor(red: 48.0/255.0, green: 35.0/255.0, blue: 174.0/255.0, alpha: 1.0).cgColor,
    UIColor(red: 200.0/255.0, green: 109.0/255.0, blue: 215.0/255.0, alpha: 1.0).cgColor
]
// Set the start and end points
gradientLayer.startPoint = CGPoint(x: 0, y: 0)
gradientLayer.endPoint = CGPoint(x: 1, y: 0)
多颜色和位置控制
研究明白渐变方向先别着急,我们需要了解一下多个颜色的控制和渐变段的位置是如何设置的.
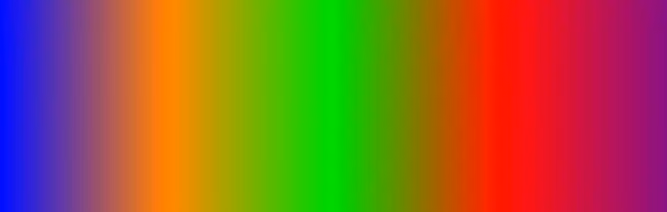
gradientLayer的成员变量colors是个数组,可以接收多个颜色值.通常我们使用2个颜色做渐变,如果复杂的话可以设置多个
下面代码示例多种颜色渐变和响应的代码
1
2
3
4
5
6
7
8
gradientLayer.colors =
@[
    (id)[UIColor blueColor].CGColor,
    (id)[UIColor orangeColor].CGColor,
    (id)[UIColor greenColor].CGColor,
    (id)[UIColor redColor].CGColor,
    (id)[UIColor purpleColor].CGColor
];
下图是演示关键渐变的位置设置 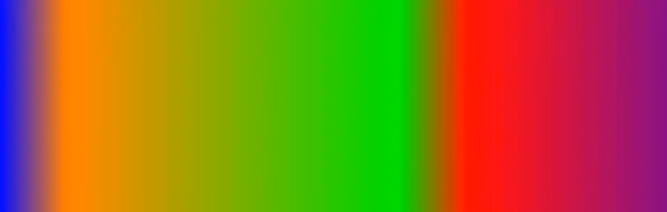
位置设置代码如下
1
2
3
4
5
6
7
8
// ObjC
gradientLayer.locations = @[
    @0,   // blueColor
    @0.1, // orangeColor
    @0.6, // greenColor
    @0.7, // redColor
    @1    // purpleColor
];
1
2
3
4
5
6
7
8
// Swift
gradientLayer.locations = [
    0,   // blueColor
    0.1, // orangeColor
    0.6, // greenColor
    0.7, // redColor
    1    // purpleColor
]
可以简单理解为locations实际控制的是渐变的位置大小,相对于前后的距离(也可能是各种方向).
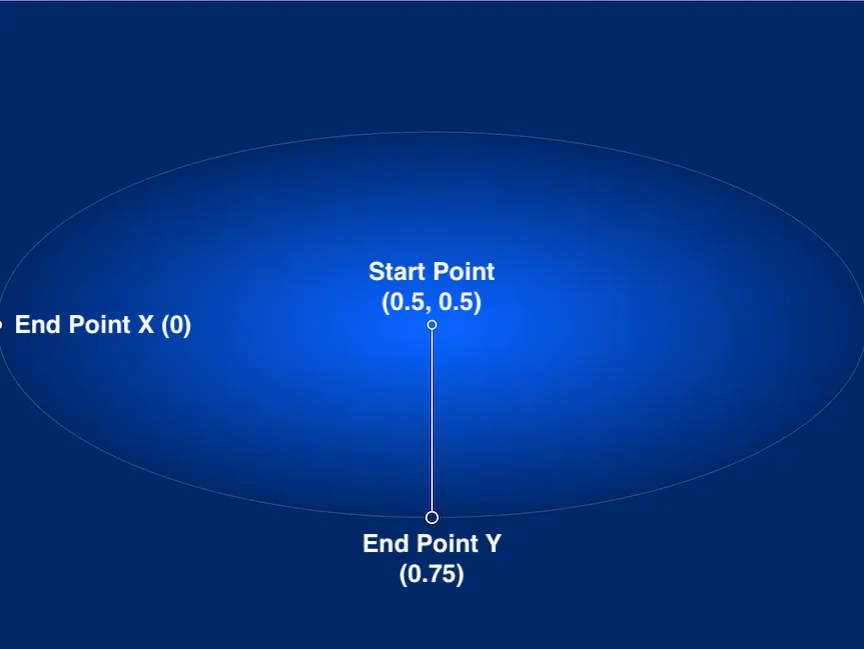
Radial Gradients径向渐变
明白了颜色和位置 下面我们看看 什么是径向渐变?
当我们使用kCAGradientLayerRadial 类型的时候 我们需要关注一下径向渐变需要的开始点和结束点. 下图演示的是一个椭圆的渐变layer.当然可以设置圆形.
1
2
3
4
5
6
7
8
9
10
11
12
13
// Objective C

// Set the type
gradientLayer.type = kCAGradientLayerRadial;
gradientLayer.colors =
@[
    (id)[UIColor colorWithRed: 0.0/255.0 green: 101.0/255.0 blue: 255.0/255.0 alpha: 1.0].CGColor,
    (id)[UIColor colorWithRed: 0.0/255.0 green: 40.0/255.0 blue: 101.0/255.0 alpha: 1.0].CGColor
];
// Start in the center
gradientLayer.startPoint = CGPointMake(0.5, 0.5);
// End at the outer edge of the view
gradientLayer.endPoint = CGPointMake(0, 0.75);
1
2
3
4
5
6
7
8
9
10
11
12
13
14
// Swift

// Set type to radial
gradientLayer.type = CAGradientLayerType.radial
// Set the colors
gradientLayer.colors =
[
    UIColor(red: 0.0/255.0, green: 101.0/255.0, blue: 255.0/255.0, alpha: 1.0).cgColor,
    UIColor(red: 0.0/255.0, green: 40.0/255.0, blue: 101.0/255.0, alpha: 1.0).cgColor
]
// Start point of first color in the middle of the view
gradientLayer.startPoint = CGPoint(x: 0.5, y: 0.5)
// End points to the edges of the view
gradientLayer.endPoint = CGPoint(x: 0, y: 0.75)
锥形渐变kCAGradientLayerConic
锥形渐变仅支持
@available(iOS 12.0, *)
注意观察开始点和结束点位置
1
2
3
4
5
6
7
8
9
10
11
12
13
14
// Objective C

gradientLayer.type = kCAGradientLayerConic;
// Set the colors
gradientLayer.colors =
@[
    (id)[UIColor blueColor].CGColor,
    (id)[UIColor colorWithRed: 50.0/255.0 green: 251.0/255.0 blue: 255.0/255.0 alpha: 1.0].CGColor,
    (id)[UIColor blackColor].CGColor
];
// Start point of first color in the middle of the view
gradientLayer.startPoint = CGPointMake(0.5, 0.5);
// End points to the edges of the view
gradientLayer.endPoint = CGPointMake(0.5, 0);
1
2
3
4
5
6
7
8
9
10
11
// Swift

gradientLayer.type = CAGradientLayerType.conic
gradientLayer.colors =
[
    UIColor.blue,
    UIColor(red: 50.0/255.0, green: 251.0/255.0, blue: 255.0/255.0, alpha: 1.0).cgColor,
    UIColor.black
]
gradientLayer.startPoint = CGPoint(x: 0.5, y: 0.5)
gradientLayer.endPoint = CGPoint(x: 0.5, y: 0)
实现Q音效果的思路
我们先观察一下QQ音乐的效果
我们的思路
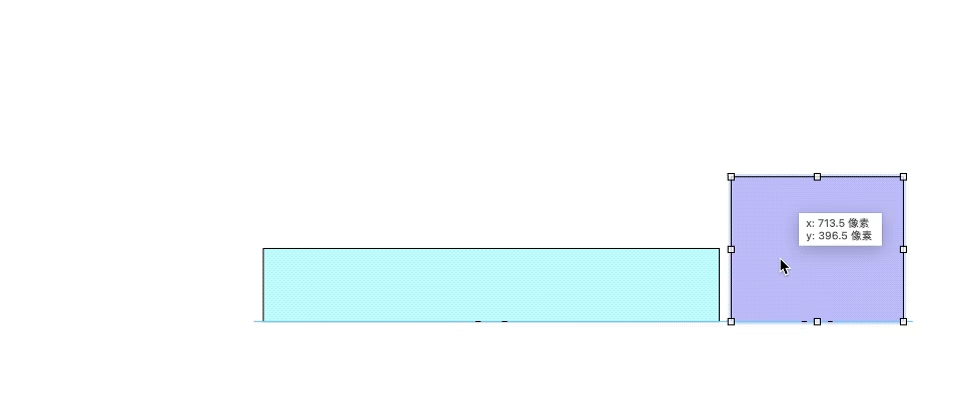
- 创建一个径向渐变图层
- 放在视图外部通过加
CABasicAnimation实现position.x从右向左移动动画 - 注意颜色配置
- 移动结束为止一定要在屏幕外部
下面看下 实现思路示意图
代码如下
1
2
3
4
5
6
7
8
9
10
11
12
13
14
15
16
17
18
19
20
21
22
23
24
25
26
27
28
29
30
31
32

var backgroundView: UIView!
var gradientLayer: CAGradientLayer!

...

override func viewDidLoad() {
    super.viewDidLoad()
    self.backgroundView = UIView(frame: .zero)
    let bgColor = UIColor(red: 231.0/255, green: 223.0/255, blue: 239.0/255, alpha: 1) //要想过渡自然必须保证背景颜色和渐变主颜色一致
    self.backgroundView.backgroundColor = bgColor
    self.view.addSubview(self.backgroundView)
    self.backgroundView.snp.makeConstraints { make in
        make.centerX.equalTo(self.view)
        make.centerY.equalTo(self.view)
        make.size.equalTo(CGSize(width: 360, height: 70))
    }
    //径向渐变layer
    self.gradientLayer = CAGradientLayer()
    self.gradientLayer.frame = CGRect(x: 360 * 1.15, y: -70, width: 360 * 1.15, height: 70 * 2)
    self.gradientLayer.contentsScale = UIScreen.main.scale
    self.gradientLayer.startPoint = CGPoint(x: 0.5, y: 0.5)
    self.gradientLayer.endPoint = CGPoint(x: 0, y: 1)
    self.gradientLayer.type = .radial
    self.gradientLayer.locations = [0.25, 1]
    self.gradientLayer.colors = [UIColor(red: 203.0/255, green: 190.0/255, blue: 224.0/255, alpha: 1).cgColor, bgColor.cgColor]
    self.backgroundView.layer.addSublayer(self.gradientLayer)
    self.backgroundView.layer.cornerRadius = 5
    self.backgroundView.layer.maskedCorners = [.layerMinXMinYCorner,.layerMinXMaxYCorner,.layerMaxXMinYCorner,.layerMaxXMaxYCorner];
    self.backgroundView.layer.masksToBounds = true
}
添加动画效果
1
2
3
4
5
6
7
8
9
10
11
12
13
14
15
private func addPositionAnimation ()
{
    if ((self.gradientLayer.animationKeys()?.contains("kAnimationKey")) != nil) {
        return;
    }
    let width = CGRectGetWidth(self.backgroundView.frame)
    let gradientWidth = CGRectGetWidth(self.gradientLayer.frame)
    let locationAniamtion: CABasicAnimation = CABasicAnimation(keyPath: "position.x")
    locationAniamtion.fromValue = gradientWidth + self.gradientLayer.anchorPoint.x * width
    locationAniamtion.toValue = -gradientWidth
    locationAniamtion.duration = 7
    locationAniamtion.repeatCount = Float.infinity
    locationAniamtion.fillMode = .forwards;
    self.gradientLayer.add(locationAniamtion, forKey: "kAnimationKey")
}
实现完成不超过80行代码,去掉无用冗余代码也就40行代码
遇到问题
- 1.颜色不同很奇怪
- 2.超出范围后要截掉
解决问题1颜色不同很奇怪
1
2
3
4
5
6
7
let bgColor = UIColor(red: 231.0/255, green: 223.0/255, blue: 239.0/255, alpha: 1) //要想过渡自然必须保证背景颜色和渐变主颜色一致
self.backgroundView.backgroundColor = bgColor

...

self.gradientLayer.colors = [UIColor(red: 203.0/255, green: 190.0/255, blue: 224.0/255, alpha: 1).cgColor, bgColor.cgColor]
解决问题2超出范围后要截掉
1
2
3
self.backgroundView.layer.cornerRadius = 5 //设置倒角半径
self.backgroundView.layer.maskedCorners = [.layerMinXMinYCorner,.layerMinXMaxYCorner,.layerMaxXMinYCorner,.layerMaxXMaxYCorner]; //设置圆角方向
self.backgroundView.layer.masksToBounds = true //超出屏幕截掉
这里我用了一个iOS11以后的api maskedCorners可以导不同方向的角.很多人都会有疑问,设置倒角半径和masksToBounds 容易触发离屏渲染,导致带来额外的开销. 如果你有这个疑问请参考一下我的UIView不同方向的导角
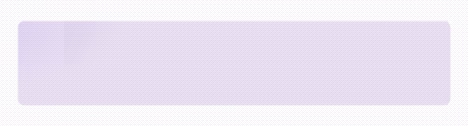
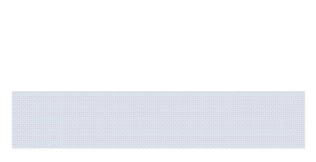
下面看下做完的效果
总结
首先声明这里不是为了炫耀技术,这个东西也没有多少技术含量,只是缺少我们不断探究技术的精神,在这里例子中我们学到如何利用径向渐变实现2D下类似流体灯光的效果.这个过程中希望大家能学到有用的技术知识,好了文章就写到这里,Demo和参考我放在下文的链接里面,感兴趣可以看看,感谢观看.