前言
本文具有强烈的个人感情色彩,如有观看不适,请尽快关闭. 本文仅作为个人学习记录使用,也欢迎在许可协议范围内转载或分享,请尊重版权并且保留原文链接,谢谢您的理解合作. 如果您觉得本站对您能有帮助,您可以使用RSS方式订阅本站,感谢支持!
SwiftUI课程
最近在听B站以为来自祖国宝岛台湾省的一个女博主(声音很嗲dia)讲解SwiftUI课程,讲的不错把学习的内容记录下来:
主要内容包含
1-5 第一章补充:some View、排版规则、设计细节 - SwiftUI 新手入门
- SwiftUI基本架构
- View 和 调整器(就是一些视图的函数方法)
- @State 属性封装器
- 变形和转场动画 SwiftUI默认有转场和变形的显示动画
- View的身份
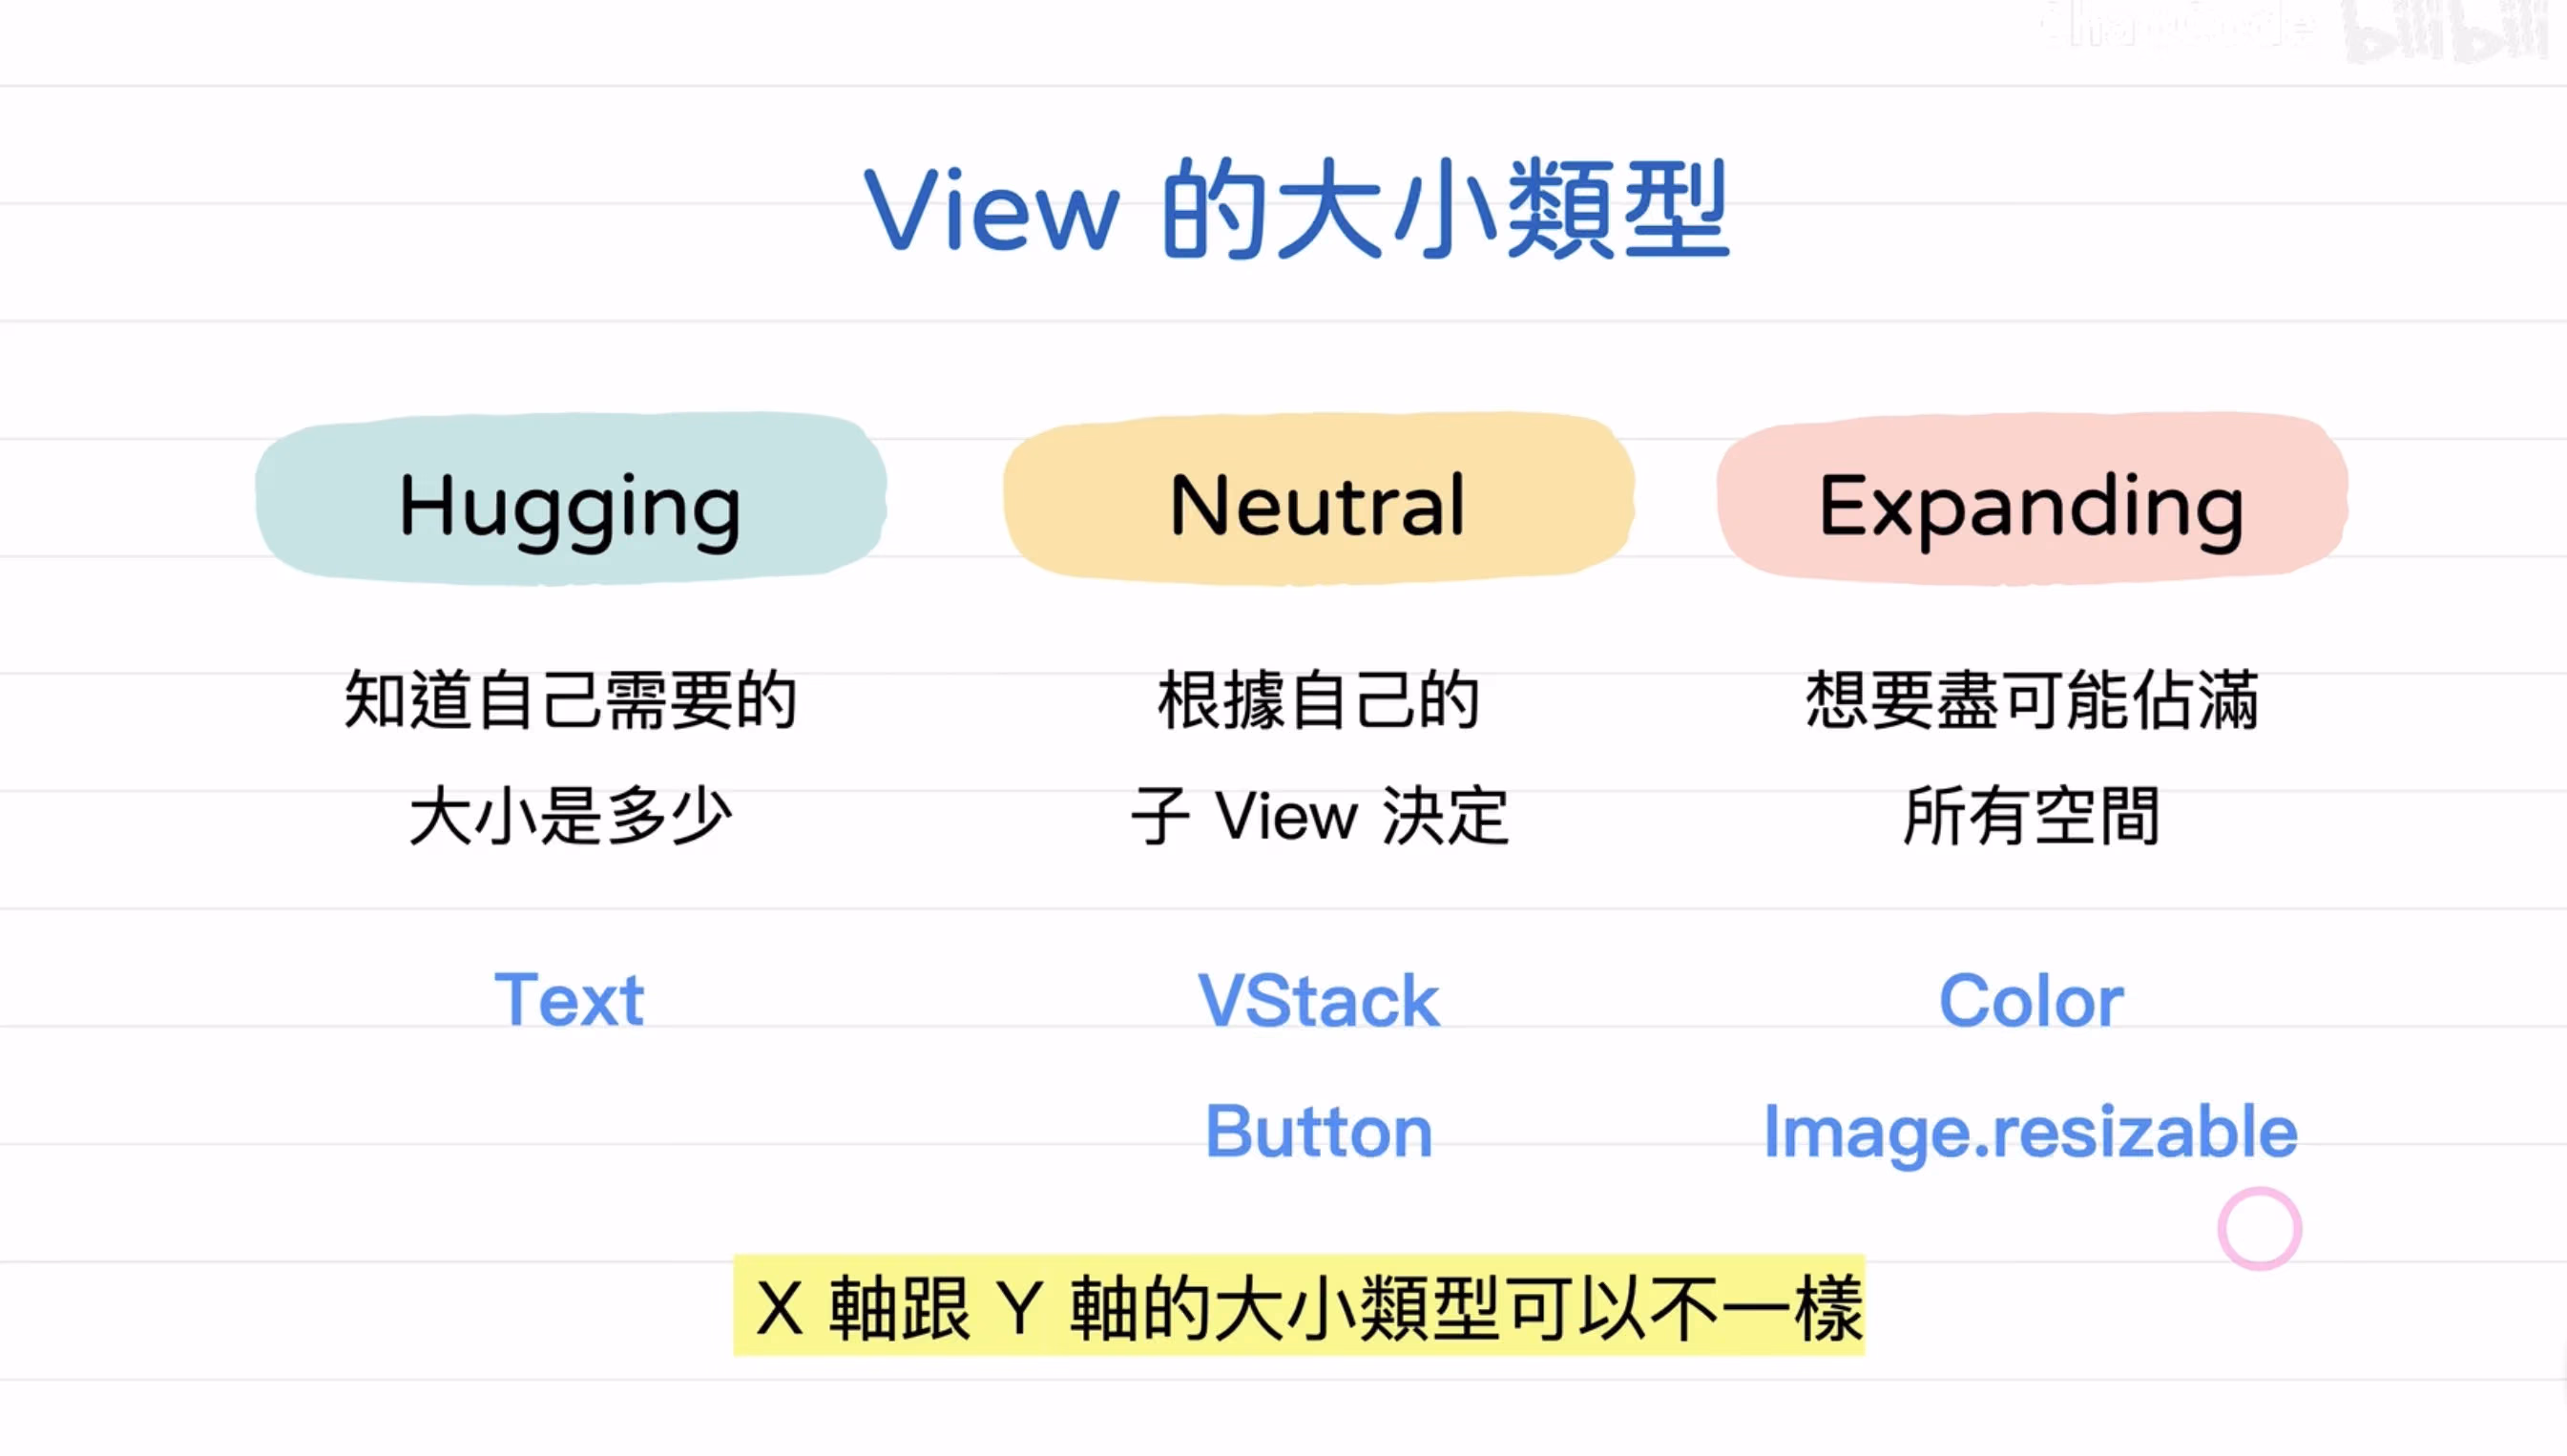
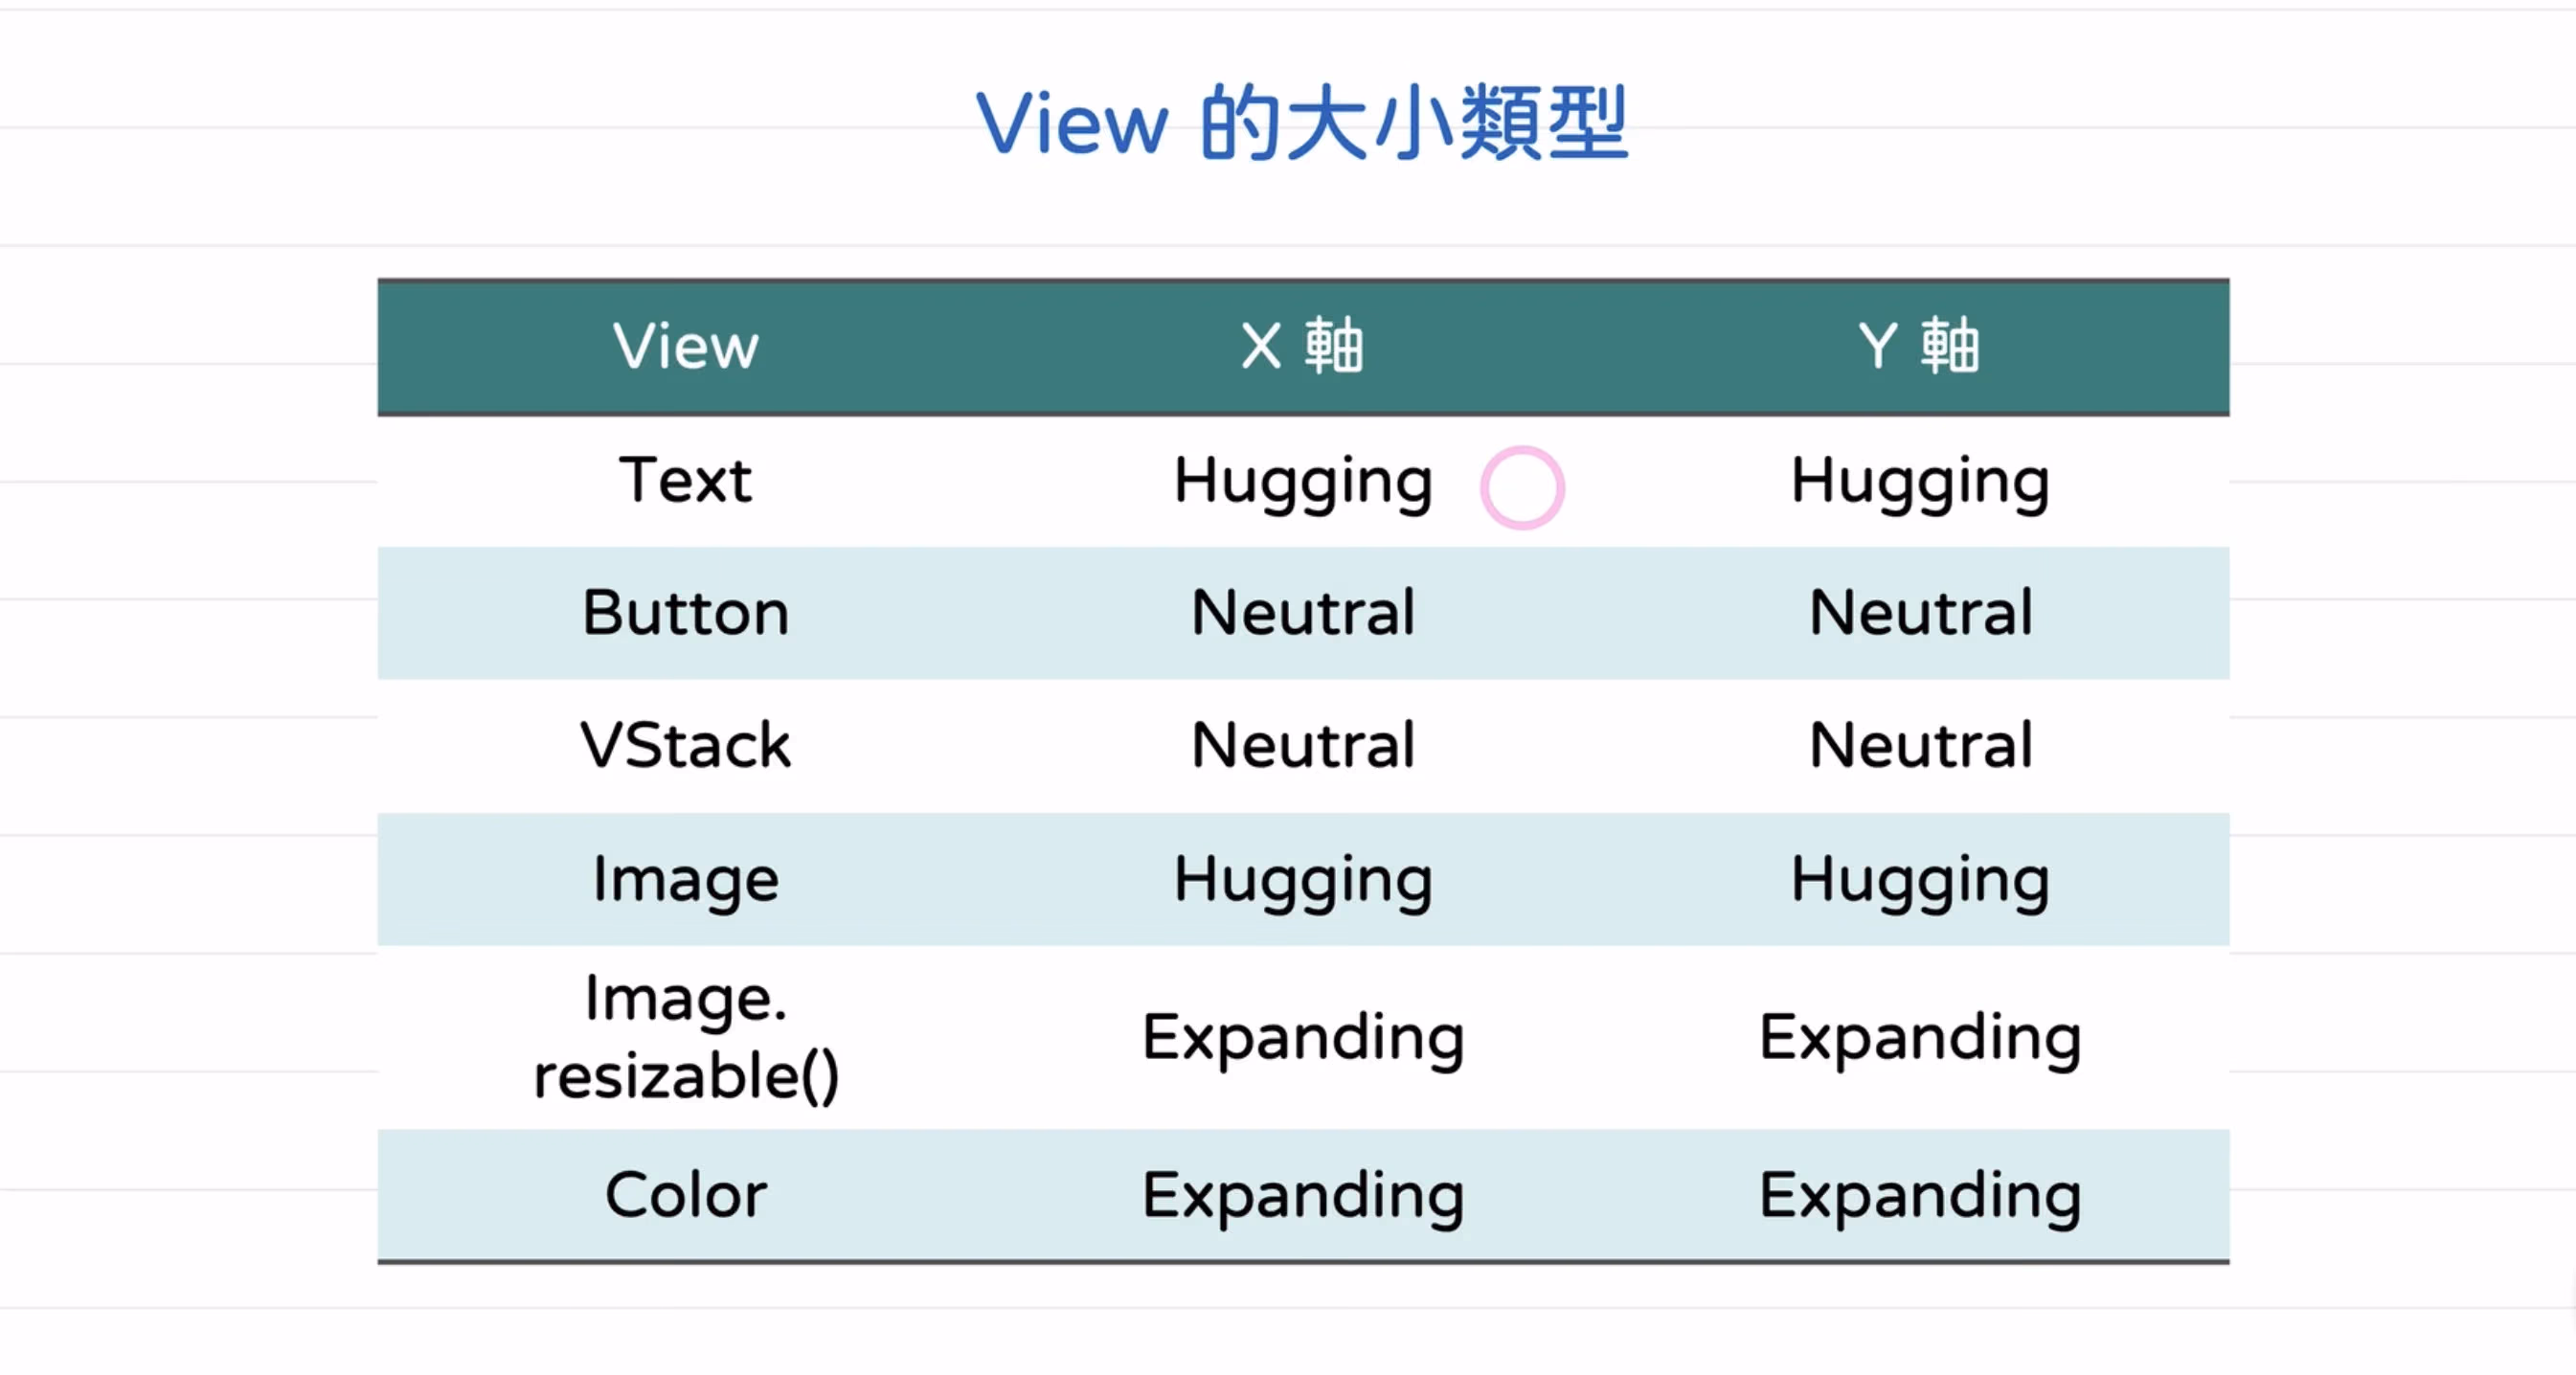
- SwiftUI 如何排版和 View的带下类型 尤其是
some View是咋回事
讲的比较不错
代码记录
1
2
3
4
5
6
7
8
9
10
11
12
13
14
15
16
17
18
19
20
21
22
23
24
25
26
27
28
29
30
31
32
33
34
35
36
37
38
39
40
41
42
43
44
45
46
47
48
49
50
51
52
53
54
55
56
57
58
59
60
61
62
63
64
65
66
67
68
//
// ContentView.swift
// FoodPicker
//
// Created by sunyazhou on 2023/4/16.
//
import SwiftUI
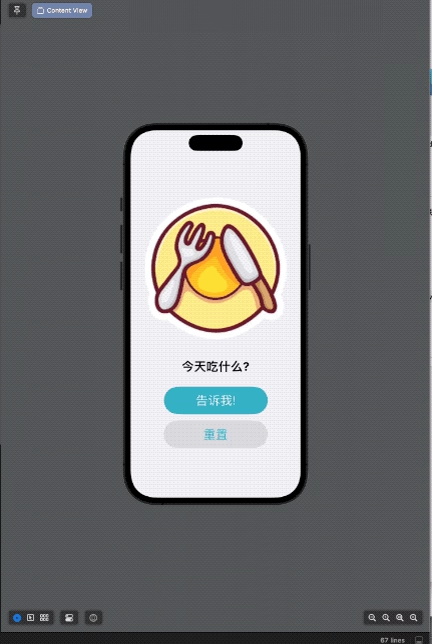
struct ContentView: View {
let food = ["汉堡", "沙拉", "披萨", "意大利面", "鸡腿便当", "刀削面", "火锅", "牛肉面", "关东煮"]
@State private var selectedFood: String?
var body: some View {
VStack(spacing: 30) {
Image("dinner")
.resizable()
.aspectRatio(contentMode: .fit)
Text("今天吃什么?")
.bold()
if selectedFood != .none {
Text(selectedFood ?? "")
.font(.largeTitle)
.bold()
.foregroundColor(.green)
.id(selectedFood)
.transition(.asymmetric(
insertion:.opacity
.animation(.easeInOut(duration: 0.5).delay(0.2)),
removal:.opacity
.animation(.easeInOut(duration: 0.4))))
}
Button {
// withAnimation {
// }
selectedFood = food.shuffled().filter {$0 != selectedFood }.first
} label: {
Text(selectedFood == .none ? "告诉我!": "换一个").frame(width: 200, alignment: .center)
.animation(.none, value: selectedFood)
.transformEffect(.identity)
}.padding(.bottom, -15)
Button {
// withAnimation {
// selectedFood = .none
// }
selectedFood = .none
} label: {
Text("重置").frame(width: 200)
}.buttonStyle(.bordered)
}
.padding()
.frame(maxHeight: .infinity)
.background(Color(.secondarySystemBackground))
.font(.title)
.buttonStyle(.borderedProminent)
.buttonBorderShape(.capsule)
.controlSize(.large)
.animation(.easeInOut(duration: 0.6), value: selectedFood)
}
}
struct ContentView_Previews: PreviewProvider {
static var previews: some View {
ContentView()
}
}
这里有几个比较重要的内容
- 1.动态字体大小 Dynamic type Human Interface Guildlines
- 2.屏幕缩放系数 屏幕大小和 Scale factor
这里的一些动画很好,这里不展开细节讨论了,记录一些代码demo我放在下方链接
总结
工作时间很紧张,周末有时间记录一些重要容易被遗忘的内容,很水,希望大家不要介意.