前言
本文具有强烈的个人感情色彩,如有观看不适,请尽快关闭. 本文仅作为个人学习记录使用,也欢迎在许可协议范围内转载或分享,请尊重版权并且保留原文链接,谢谢您的理解合作. 如果您觉得本站对您能有帮助,您可以使用RSS方式订阅本站,感谢支持!
背景
最近这几年,移动端工程的开发模式逐渐变成面向pod开发,就是工程大了以后每个模块和业务就变成了单独的pod. 在这种使用pod的背景下,我们的开发资源例如图片、文本文件、plist、音频文件等等会被创建后放到相应的pod下的bundle目录里
当放到bundle下后就不支持@2x和@3x的后缀名支持了,取图片的时候注意下下面代码
1
2
3
4
5
NSBundle *mainBundle = [NSBundle bundleForClass:self.class];
NSString *resourcePath = [mainBundle pathForResource:@"YZTools" ofType:@"bundle"];
NSBundle *resourceBundle = [NSBundle bundleWithPath:resourcePath] ?: mainBundle;
NSString *imagePath = [resourceBundle pathForResource:@"power" ofType:@"jpg"];
UIImage *image = [UIImage imageWithContentsOfFile:imagePath];
1.pod不出意外的时候基本都会被编译成framework,那对应bundle最后编译完后会放到framework的目录下这时候就不能用传统的mainBundle去取了,因为它的默认bundle已经不是主工程bundle了,应该取自当前某个核心class所在的目录下的bundle.
2.并且图片名如果带@2x或者@3x 直接取得时候必须得写上绝对名称 如下例子
上述显然不能满足我们的需求.
图片都是带2x3x的图,怎么从默认的pod里面取到相关的图片呢?.
这时候我们要做几件事
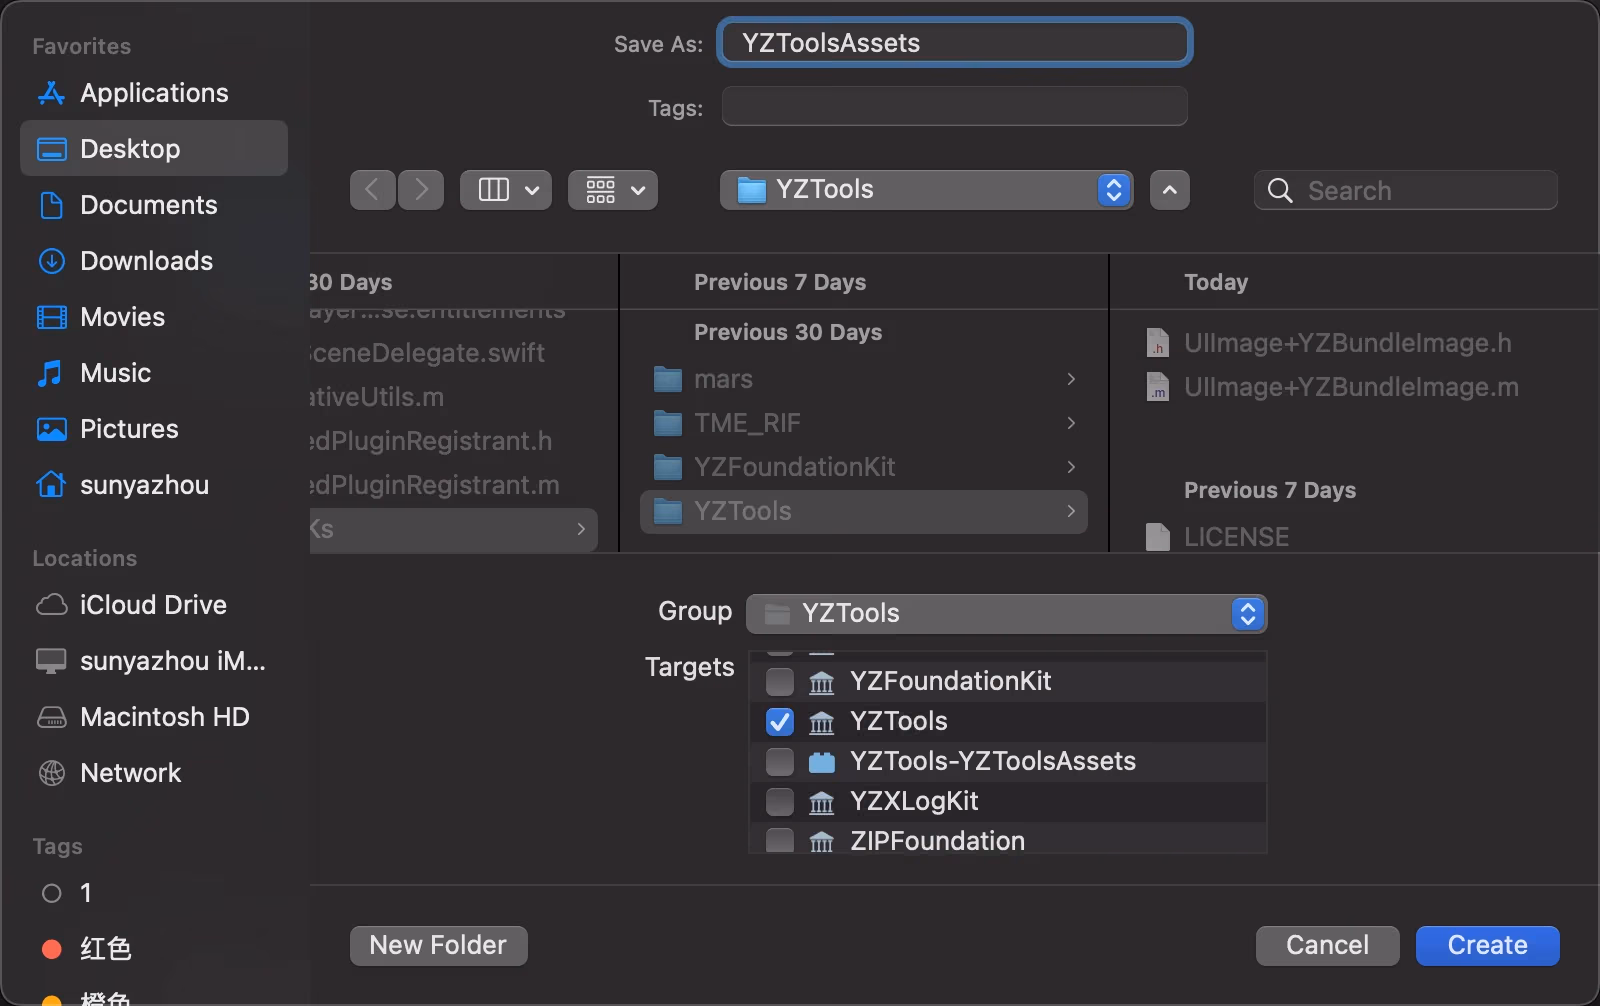
- 创建XCAssets
- 在podspec中声明好相关名称
- 创建为图片 创建好category 从这个pod的的XCAssets取出
创建XCAssets
如下图
podspec中声明
1
spec.resource_bundles = {'YZToolsAssets' => ['Resources/*.xcassets']}
这里的YZToolsAssets和YZTools.podspec里的spec.resource_bundles 中的’YZToolsAssets’要完全对应.
下图中是相关的文档
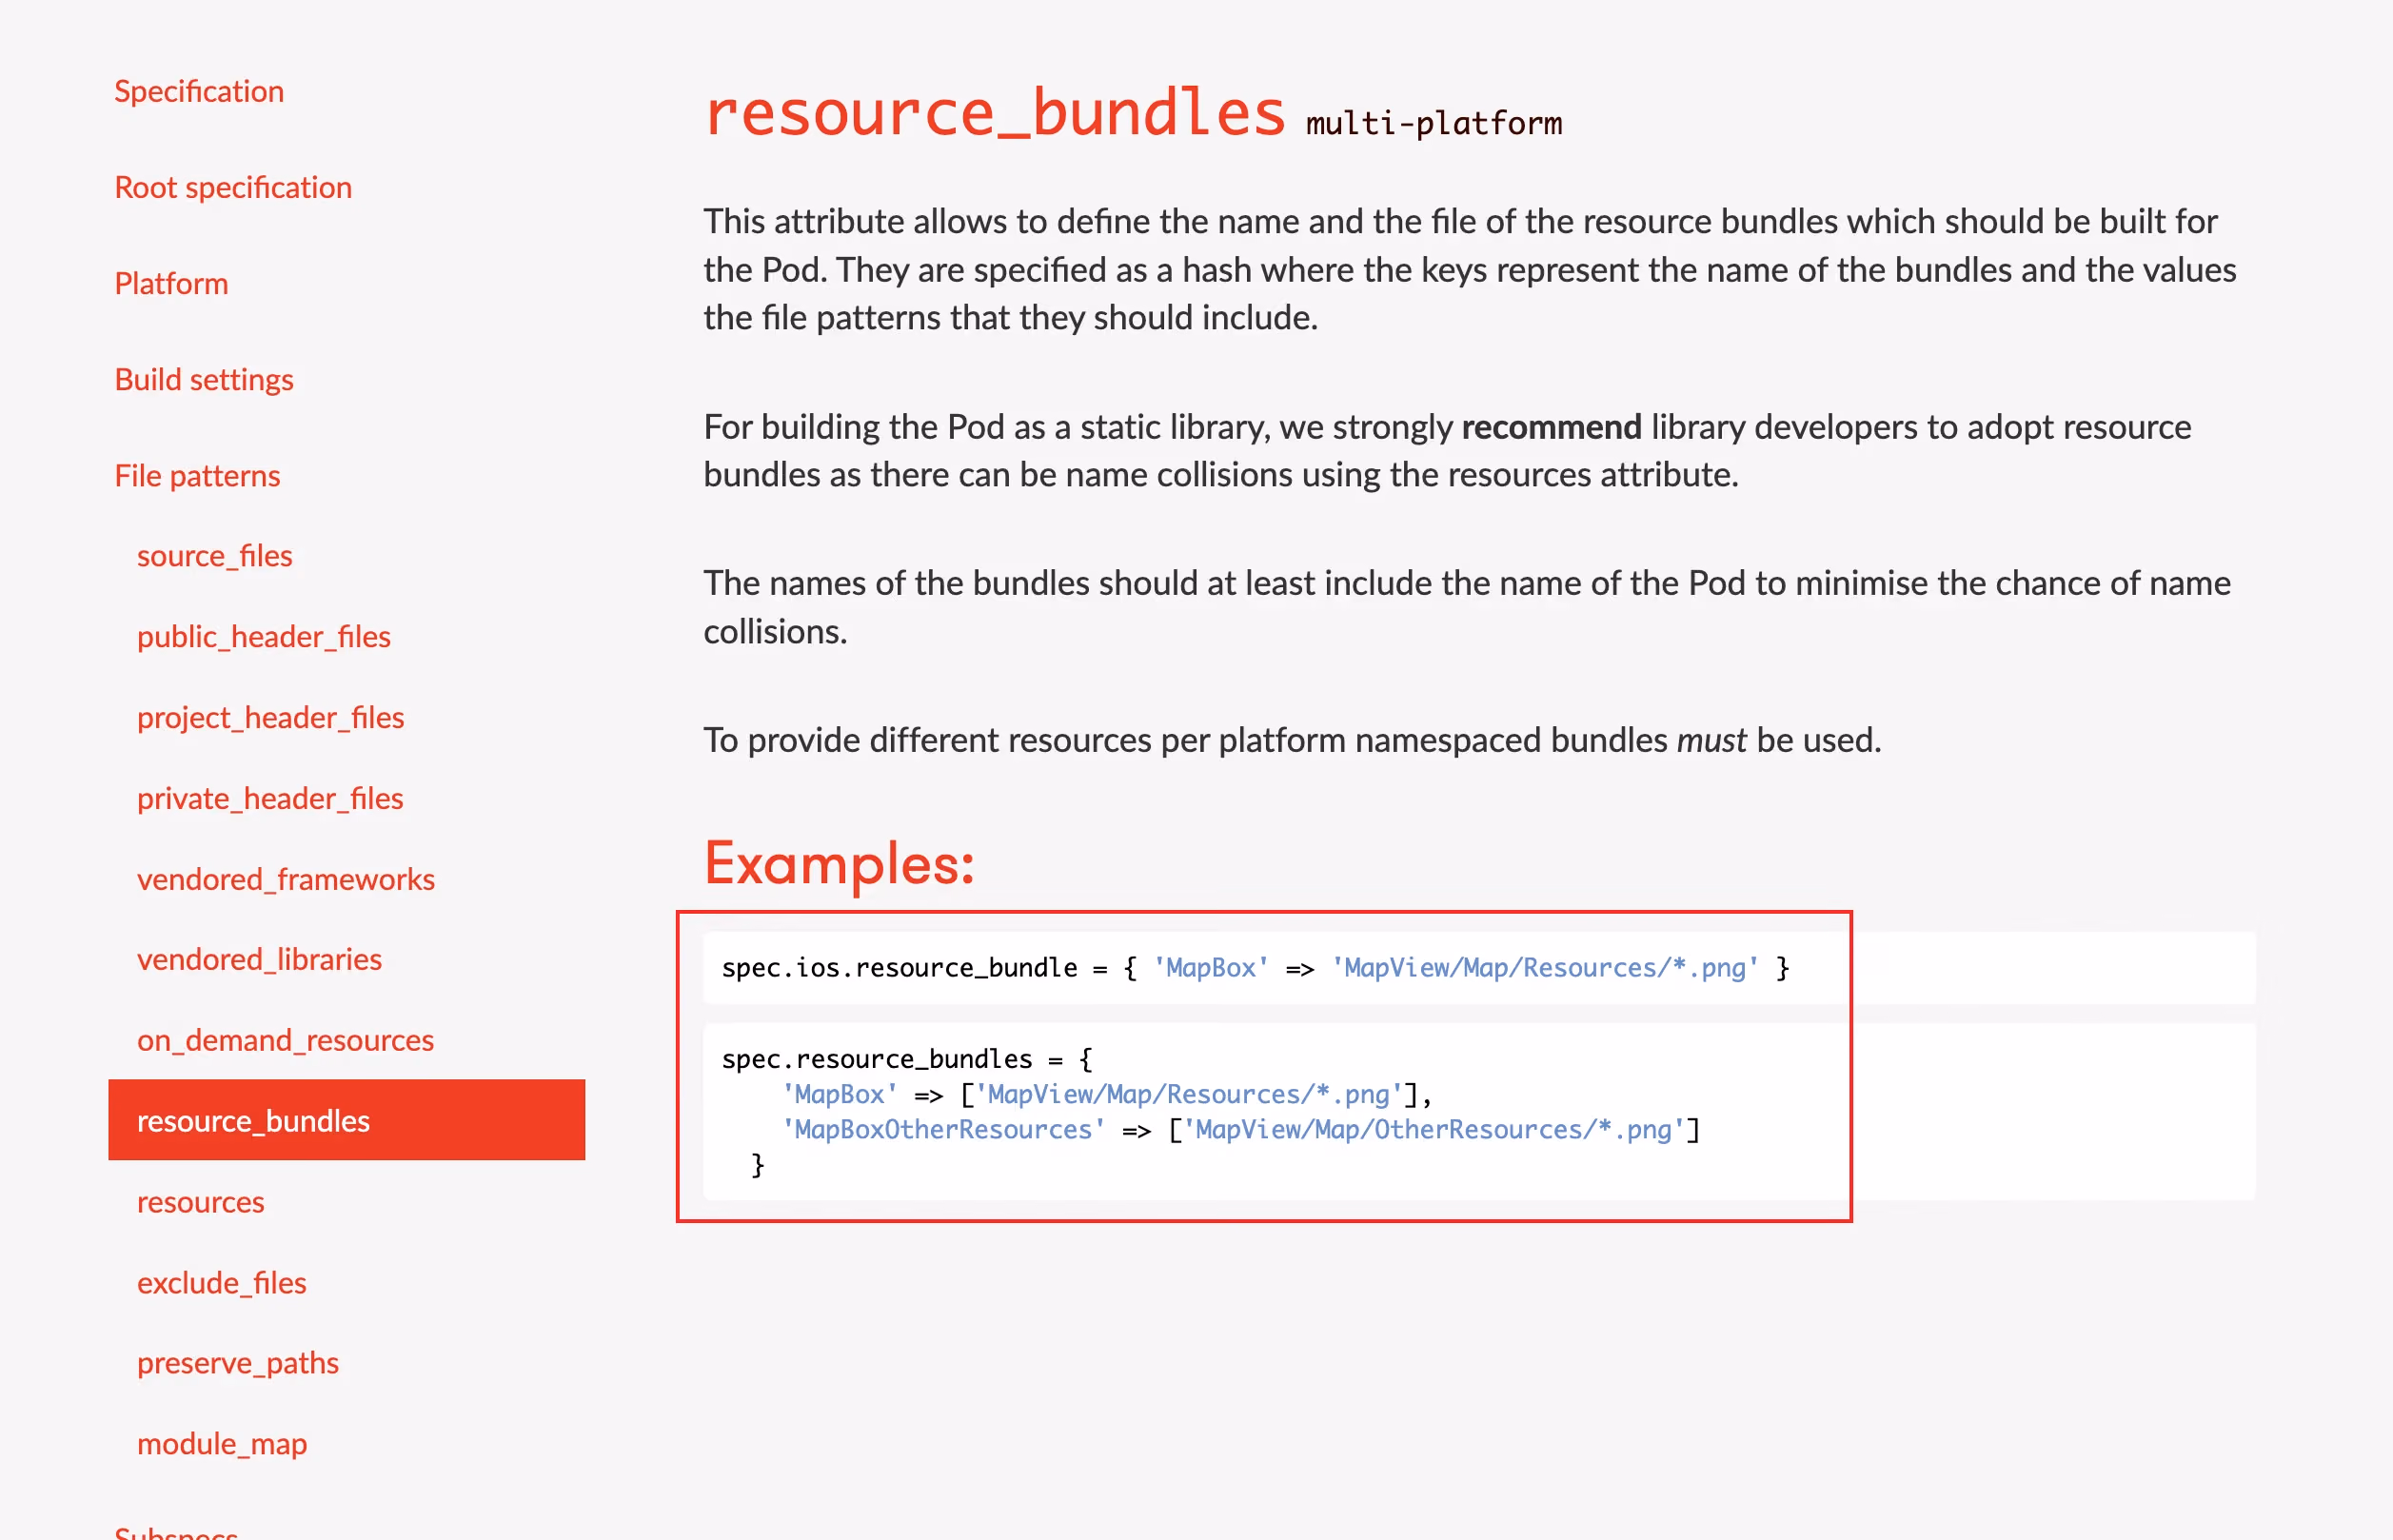
这种podspec文档中说明演示的不清晰,大家需要深入学习和挖掘,
显然这个文档根本没说XCAssets咋加的.
为图片获取添加分类
1
2
3
4
5
6
7
8
9
10
11
12
13
14
15
16
17
18
19
20
21
22
23
24
25
26
27
28
29
30
31
32
33
34
35
36
37
38
39
#import <UIKit/UIKit.h>
NS_ASSUME_NONNULL_BEGIN
@interface UIImage (YZBundleImage)

/// 从YZTools的YZToolsAssets取图片
/// - Parameter imageName: 图片名称
+ (UIImage *)yzToolsImageNamed:(NSString *)imageName;

@end

//这里的YZToolsAssets和YZTools.podspec里的spec.resource_bundles = {'YZToolsAssets' 完全对应
NSString *kYZToolsAssets = @"YZToolsAssets";

@implementation UIImage (YZBundleImage)

+ (NSBundle *)yzImageBundle
{
    static NSBundle *imageBundle = nil;
    if (!imageBundle)
    {
        NSBundle *mainBundle = [NSBundle mainBundle];
        NSString *resourcePath = [mainBundle pathForResource:kYZToolsAssets ofType:@"bundle"];
        imageBundle = [NSBundle bundleWithPath:resourcePath] ?: mainBundle;
    }
    NSAssert([imageBundle bundlePath].length > 0, @"内部imageBundle路径不能为空");
    return imageBundle;
}

+ (UIImage *)yzToolsImageNamed:(NSString *)imageName
{
    NSBundle *imageBundle = [self yzImageBundle];
    UIImage *image = [UIImage imageNamed:imageName inBundle:imageBundle compatibleWithTraitCollection:nil];
    return image;
}

@end


NS_ASSUME_NONNULL_END
在使用的时候如下代码:
1
UIImage *image = [UIImage yzToolsImageNamed:@"power"];
结果如下图:

这里需要注意下这里面拿到的是mainBundle.
当编译完后最终的XCAssets会变成一个bundle
在.app/目录下
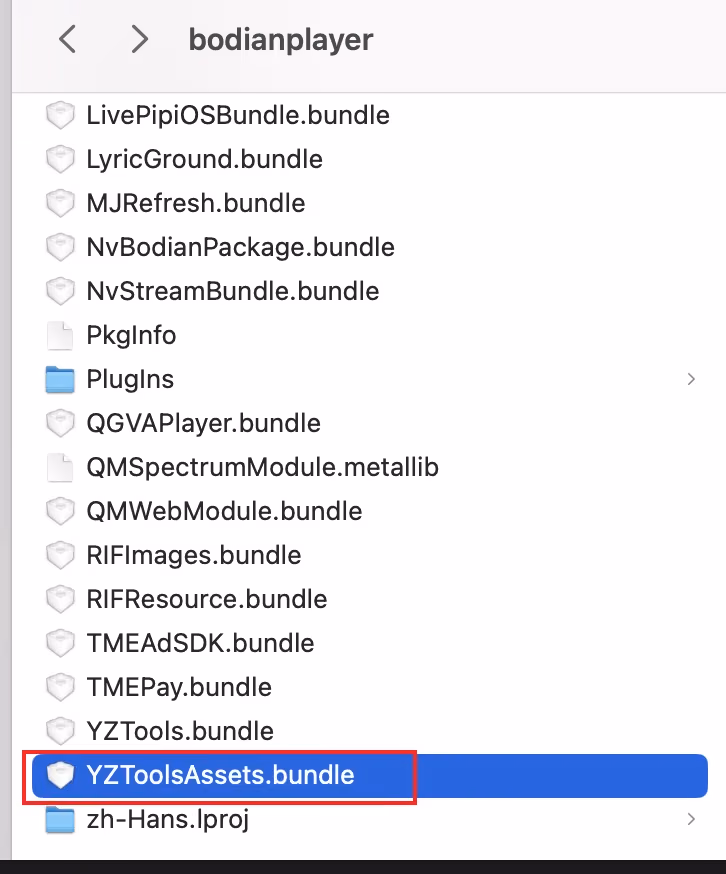
1
/var/containers/Bundle/Application/F3C2809A-A5E4-4808-A2AA-5962D4BE6AA1/bodianplayer.app/YZToolsAssets.bundle
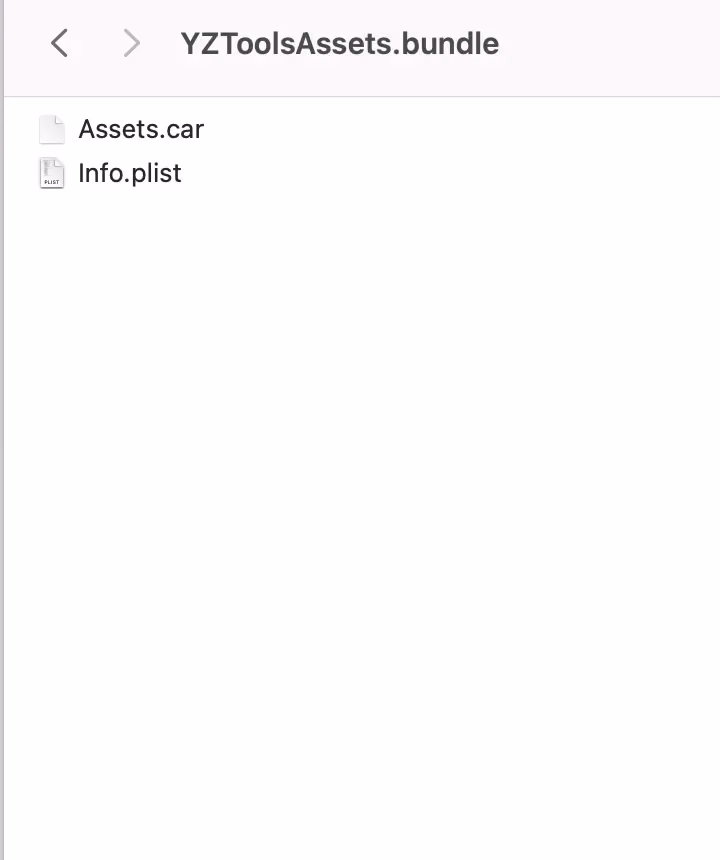
可以看到这里的图片素材已经被加密变成一个叫做Assets.car的文件,这说明我们的资源已经被加密打包,轻易不会被别的app找到.
总结
这里的XCAssets在最终被包装成bundle放在主app的目录下,最核心的方式是通过pod写好resource_bundles,并且记录好你给它的名字
这里就给大家提供demo了,都是一些技巧.