
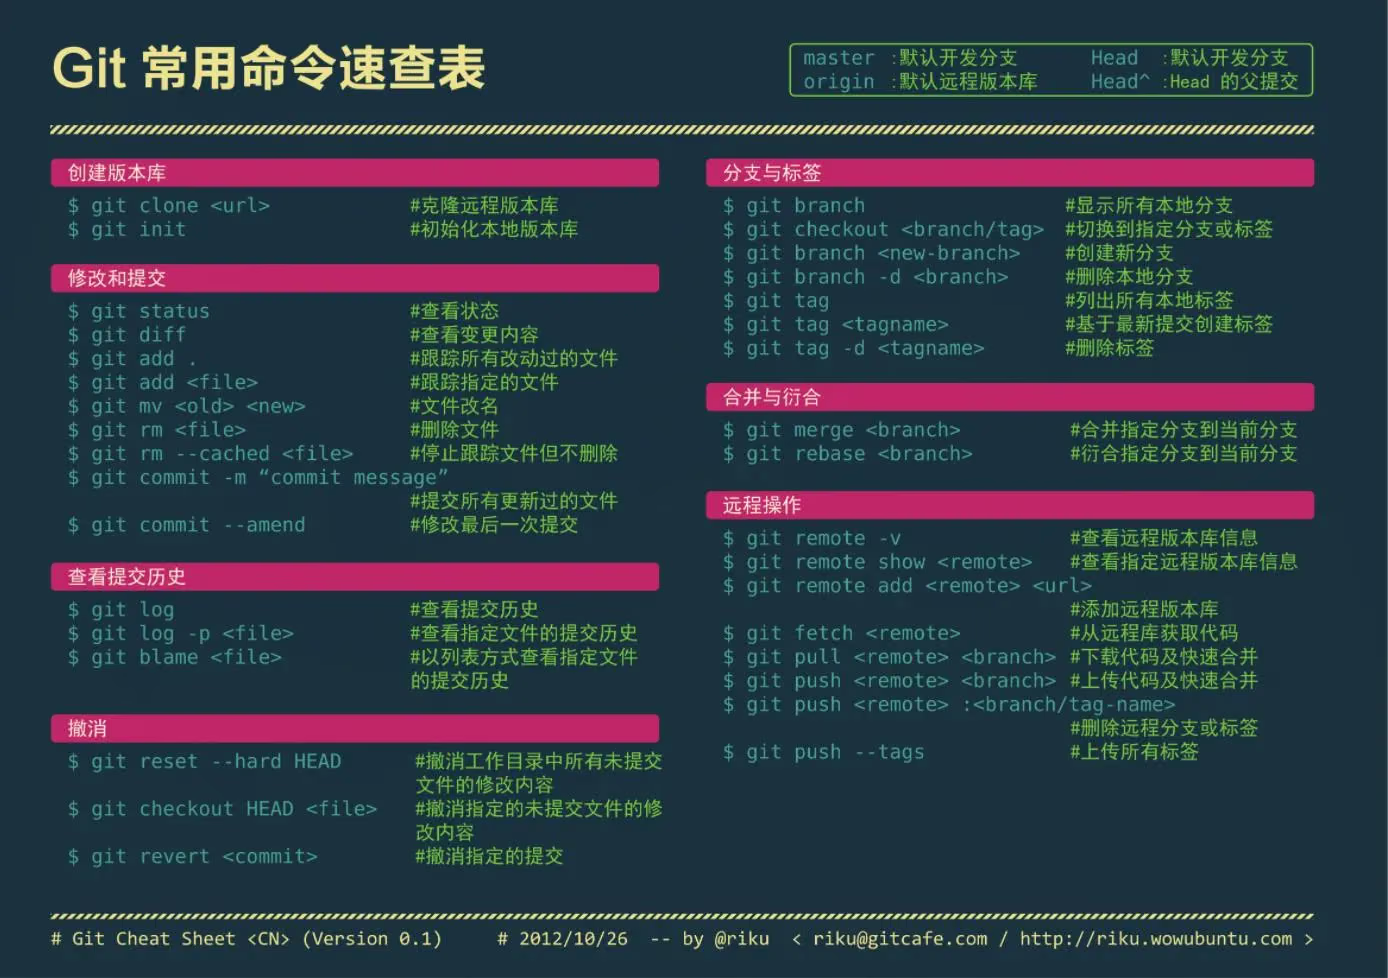
Globally Configure Git
–
1
2
$ git config --global user.name "username"
$ git config --global user.email "email@you.com"
usernameusually represents the local username used for commits
email@you.comis typically the email address
Initialize a local repository
1
$ git init
After execution, a hidden .git folder is created locally containing the git information
Clone a remote repository
1
$ git clone git@github.com:sunyazhou13/sunyazhou13.github.io.git
Check the current repository status
1
$ git status
The
git statuscommand displays the current status of the repository, including added, modified, and deleted files
Version management
HEAD points to the latest version in git, HEAD^ refers to the previous version, HEAD^^ the one before that, and HEAD~100 means 100 versions back
Stage local changes
1
2
3
//add all modifications in the current directory
$ git add .
//to add specific files, you can do it like this
$ git add A B C// separated by spaces
//if some files are marked red, it means they are not under git management yet, you can userm -rf xxxto delete them
//if some files are marked yellow, it means they have been modified
//if some files are marked green, it means they have been added togitmanagement
Commit
1
2
$ git commit -am "[产品名称][迭代名称] 1.修改点 2.修改点xxx"
Push to the git repository
1
2
$ git push origin HEAD:refs/for/master
If this is the first commit, use
git push -u origin master
Track the branch when pushing
1
$ git push --set-upstream origin + 分支名
If the commit is rejected
1
2
3
4
5
$ git fetch origin master
$ git reset --soft origin/master
$ git add .
$ git commit -m "some comments"
$ git push origin HEAD:refs/for/master
Go back to the local repository and run the commands
Branch management
Create a branch and switch to it
1
$ git branch -b 分支名
Switch branches
1
$ git checkout 分支名
To view remote branches:
git branch -r, where r stands for remote
Merge branches
$ git merge br-name merges the br-name branch into the current branch Adding --no-ff disables the fast-forward mode, meaning a new commit is created instead of just moving the HEAD pointer $ git merge --no-ff -m "merge with no-ff" dev Before merging, you can use git diff <source_branch> <target_branch> to view the differences between the two branches
Merge conflicts
When merging branches, if two branches make different modifications to the same place, a conflict occurs. For conflicting files, git generates the following content:
1
2
3
4
5
6
<<<<<<< HEAD
Creating a new branch is quick & simple.
=======
Creating a new branch is quick AND simple.
>>>>>>> feature1
After resolving the conflict and completing the merge, remember to run:
1
$ git rebase --continue
Force-update a tag to a specific commit
1
2
git tag --force v1.0.0 bc63359
git push --tags -f
git llshows the short version number. If it doesn’t work, run the script below and try again
The following are commonly used git aliases
1
2
3
4
5
6
7
8
git config --global alias.ll "log --graph --all --pretty=format:'%Cred%h %Creset -%C(yellow)%d%Creset %s %Cgreen(%cr) %C(bold blue)<%an>%Creset' --abbrev-commit --date=relative"
git config --global alias.co checkout
git config --global alias.br branch
git config --global alias.ci commit
git config --global alias.st status
git config --global alias.last 'log -1 HEAD'
git config --global alias.df diff
git config --global alias.co checkout
Reference for detailed information
Batch delete local branches
1
git branch | grep 'branchName' |xargs git branch -D
This uses shell pipe commands to delete branches in batch. grep matches the output of git branch against the pattern branchName. xargs converts the argument list into small chunks and passes them to other commands. So this command means: Match the specified branches from the branch list, pass them one by one (in small chunks) to the delete command, and finally delete them. This achieves the goal of batch-deleting branches.
For example, if I want to delete all local branches starting with 5.8., I can write:
1
2
3

git branch | grep '5.8.*' |xargs git branch -D
Just use a wildcard pattern
Updated on September 30, 2018
Continuous updates
Use git clean to remove files that are not under git version control
1
git clean -dfx
2020.1.7 update
Remove the small Xcode userdata file that keeps getting tracked despite being in .gitignore
Recently this file keeps appearing in my project; no matter how I add it to .gitignore, it never takes effect
1
2
Crown.xcworkspace/xcuserdata/sunyazhou.xcuserdatad/UserInterfaceState.xcuserstate
Here is the correct operation:
Replace ` [project] ` with your project name and ` [username] ` with your username
1
2
git rm --cached [project].xcodeproj/project.xcworkspace/xcuserdata/[username].xcuserdatad/UserInterfaceState.xcuserstate
git commit -m "Removed file that shouldn't be tracked"
Updated on 2022.12.2, from Can’t ignore UserInterfaceState.xcuserstate
If you need .gitignore templates for various languages, refer to A collection of useful .gitignore templates
Squash Multiple Commits
In Git, the rebase command moves a series of commits from one branch to another while preserving their order and content. git rebase -i is an interactive variant that allows you to edit the commits. Here are the steps to squash multiple commits into a single one using git rebase -i HEAD~N:
- Determine how many commits to squash:
HEAD~Nmeans N commits back from the current commit. You need to determine the value of N, i.e., the number of commits you want to squash.
- Start the interactive rebase:
- Open a terminal or Git Bash and switch to your Git repository directory.
- Enter
git rebase -i HEAD~N, replacing N with the number of commits you determined.
1
git rebase -i HEAD~3
Squash the latest 3 commits
- Edit the commit list:
- This opens a text editor listing all commits from
HEAD~Nto the current HEAD. - You will see a
pickcommand before each commit. You can edit these commands to decide what to do with each commit.
- This opens a text editor listing all commits from
- Squash the commits:
- To squash commits, change
picktosquashors(the shorthand forsquash) for all commits except the first one. In this way, all the other commits are squashed into the first one. For example, if you have the following commit list:
1
2
3
pick 3f3f3f3 第一个提交信息
pick 4b4b4b4 第二个提交信息
pick 5c5c5c5 第三个提交信息
You should change them to:
1
2
3
pick 3f3f3f3 第一个提交信息
squash 4b4b4b4 第二个提交信息
squash 5c5c5c5 第三个提交信息
pickserves as the base starting point
- To squash commits, change
- Edit the commit message:
- After saving and closing the editor, Git will squash the selected commits and open another editor for you to edit the new commit message.
- You can either keep the first commit’s message or edit a new one that summarizes all the squashed commits.
- Finish the rebase:
- After saving and closing the commit message editor, Git will complete the rebase and update your commit history to a new linear history.
Please note that rebasing is a destructive operation that changes the hashes of historical commits. Therefore, you should only use it when you are sure it won’t affect other people’s work, especially on public branches. If you work in a team, it’s best to communicate with your teammates before performing such an operation.
Handling Large Files
1
2
3
4
5
6
7
brew install git-lfs                                 # install via homebrew
git lfs install                                      # initialize lfs for yor repo
git lfs track ios-app/Frameworks/*.framework/**/*    # track all frameworks in your project.  *.xcframework
git add --all                                        # stage
git commit -m "Added files to git lfs"               # commit
git lfs ls-files
git push
Git Access Credentials
You can use any of the following solutions:
Option 1: Enable system credential management (recommended)
- macOS:
1
	git config --global credential.helper osxkeychain
- Windows:
1
git config --global credential.helper manager
Updated on April 4, 2026
–