
Preface
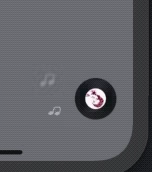
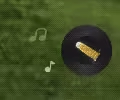
A couple of days ago I shared Douyin’s vertical swipe switching. Today I’d like to share the album animation at the bottom-right corner of Douyin.
Here’s what it looks like:
And here’s the original Douyin one:
Implementation Approach
First, you need 3 pieces of material, all of which can be found in the demo.
There’s a demo at the bottom of this post:
- ContrainerView
- Background Layer
- Album (UIImageView)
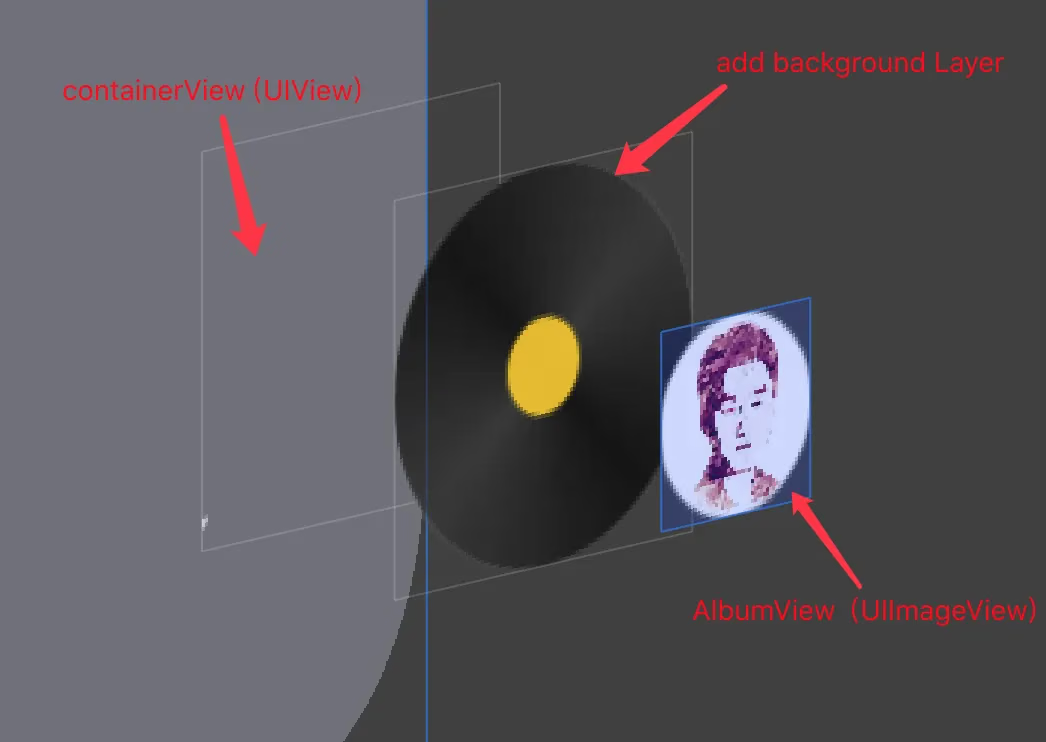
First, let’s write a MusicAlbumView that inherits from UIView
1
2
3
4
5
6
7
8
9
10
@interface MusicAlbumView : UIView

@property (nonatomic, strong) UIImageView  *album;
// start animation, rate is the animation duration coefficient
- (void)startAnimation:(CGFloat)rate;
// reset the view, remove all added animation groups
- (void)resetView;

@end
And expose two interfaces
- One to start the animation
- One to reset the animation
The album member variable is exposed in the .h so external code can load network images into it, for example:
1
2
3
4
5
6
7
8
__weak __typeof(self) wself = self;
//load the network image
[self.musicAlbum.album sd_setImageWithURL:[NSURL URLWithString:@"https://www.sunyazhou.com/assets/images/20181108AwemeAlbumAnimation/album1.avif"] completed:^(UIImage * _Nullable image, NSError * _Nullable error, SDImageCacheType cacheType, NSURL * _Nullable imageURL) {
    if(!error) {
        wself.musicAlbum.album.image = image;
    }
}];
Let’s look at how it’s wrapped internally
First, we need to create the background
1
2
3
4
5
6
7
8
9
10
- (instancetype)initWithFrame:(CGRect)frame {
    self = [super initWithFrame:frame];
    if (self) {
        self.noteLayers = [NSMutableArray array];
        //album background container view
        self.albumContainer =[[UIView alloc]initWithFrame:self.bounds];
        [self addSubview:self.albumContainer];
    }
    return self;
}
The array initialized here is used to hold the animation layers below, making it easy to remove all layers and animations when resetting.
A background container UIView + a background Layer + a UIImageView for the avatar background
Let’s put the following code below [self addSubview:self.albumContainer] in turn:
Add the record background
1
2
3
4
5
6
//add the layer for the record icon
CALayer *backgroudLayer = [CALayer layer];
backgroudLayer.frame = self.bounds;
backgroudLayer.contents = (id)[UIImage imageNamed:@"music_cover"].CGImage;
[self.albumContainer.layer addSublayer:backgroudLayer];
Avatar view
1
2
3
4
5
6
7
8
9
10
//the image placed inside the record
CGFloat w = CGRectGetWidth(frame) / 2.0f;
CGFloat h = CGRectGetHeight(frame) / 2.0f;
CGRect albumFrame = CGRectMake(w / 2.0f, h / 2.0f, w, h);
self.album = [[UIImageView alloc]initWithFrame:albumFrame];
self.album.contentMode = UIViewContentModeScaleAspectFill;
[self.albumContainer addSubview:self.album];
self.album.layer.cornerRadius = h / 2.0f;
self.album.layer.masksToBounds = YES;
Then center it.
Add rotation to self.albumContainer.layer
When we call the startAnimation: method externally, we add a rotation animation to self.albumContainer.layer
1
2
3
4
5
6
7
8
9
10

- (void)startAnimation:(CGFloat)rate {
    CABasicAnimation* rotationAnimation;
    rotationAnimation = [CABasicAnimation animationWithKeyPath:@"transform.rotation.z"];
    rotationAnimation.toValue = [NSNumber numberWithFloat: M_PI * 2.0];
    rotationAnimation.duration = 3.0f;
    rotationAnimation.cumulative = YES;
    rotationAnimation.repeatCount = MAXFLOAT;
    [self.albumContainer.layer addAnimation:rotationAnimation forKey:@"rotationAnimation"];
}
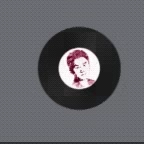
After adding it, the effect looks like this:
How to implement the arc animation
OK, we’re halfway there. Let’s talk about the arc rotation.
Take a close look at the music notes in the animation:
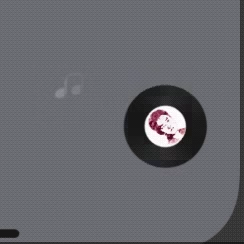
This is a note animation. Its motion trajectory is roughly like this:
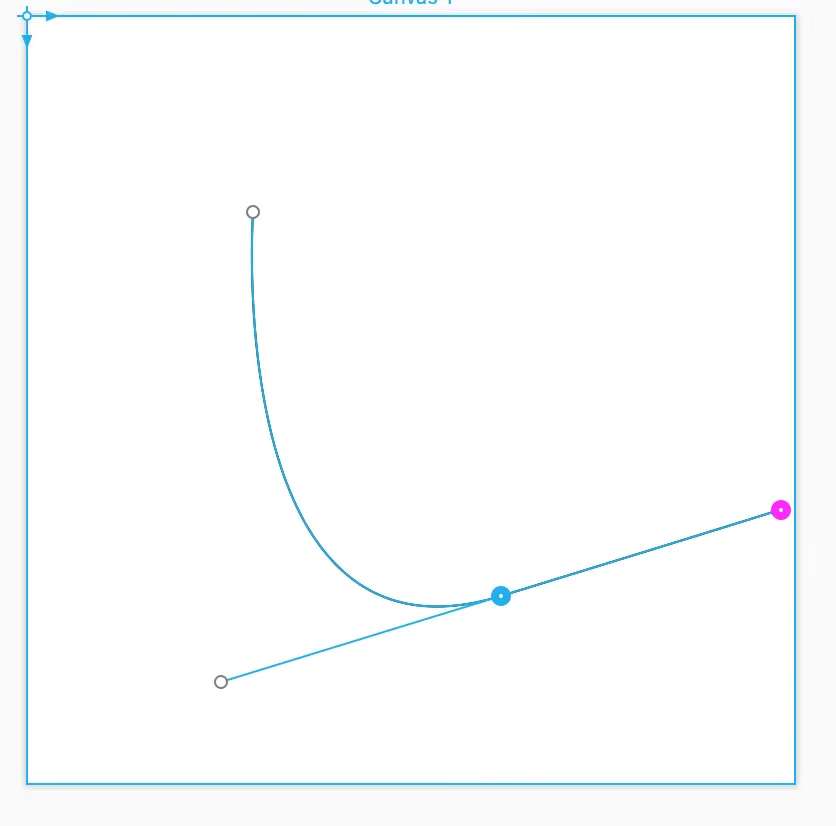
We’re actually using a Bezier curve animation. (I’m not a great artist, but you get the idea.)
Then the note layer moves and rotates along this Bezier curve… Actually, it’s a combination of the following actions:
This requires an animation group containing the following actions:
- A path animation that moves along the Bezier curve
- A rotation of about half a turn, smaller — rotating between M_PI * 0.10 and M_PI * -0.10
- An opacity animation that goes from 0 to 1 and back to 0
- A scale animation that changes from 1x to 2x
OK, let’s tackle the key part — the Bezier curve.
First, create an animation group:
1
2
3
4
5
6
7
CAAnimationGroup *animationGroup = [[CAAnimationGroup alloc]init];
animationGroup.duration = rate/4.0f;
animationGroup.beginTime = CACurrentMediaTime() + delayTime;
animationGroup.repeatCount = MAXFLOAT;
animationGroup.removedOnCompletion = NO;
animationGroup.fillMode = kCAFillModeForwards;
animationGroup.timingFunction = [CAMediaTimingFunction functionWithName:kCAMediaTimingFunctionLinear];
rateis passed in externally.delayTimeis the delay before the animation group starts. SettingdelayTimeto 0 means no delay. I’ll explain why below.
Create the Bezier curve path animation
1
2
3
//bezier path frame animation
CAKeyframeAnimation * pathAnimation = [CAKeyframeAnimation animationWithKeyPath:@"position"];
Then add the following chunk of code at the bottom of the code above:
1
2
3
4
5
6
7
8
9
10
11
12
13
14
15

CGFloat sideXLength = 40.0f;  //X轴左右侧偏移量
CGFloat sideYLength = 100.0f; //Y轴上下偏移量

CGPoint beginPoint = CGPointMake(CGRectGetMidX(self.bounds) - 5,  //贝赛尔曲线开始点CGRectGetMaxY(self.bounds));
CGPoint endPoint = CGPointMake(beginPoint.x - sideXLength, beginPoint.y - sideYLength); //贝塞尔曲线结束点
NSInteger controlLength = 60; //贝塞尔曲线控制点长度
CGPoint controlPoint = CGPointMake(beginPoint.x - sideXLength/2.0f - controlLength, beginPoint.y - sideYLength/2.0f + controlLength); //贝塞尔曲线控制点

UIBezierPath *customPath = [UIBezierPath bezierPath]; //创建贝塞尔轨迹
[customPath moveToPoint:beginPoint];
[customPath addQuadCurveToPoint:endPoint controlPoint:controlPoint]; //核心代码 二次曲线方程式 可以google查一下

pathAnimation.path = customPath.CGPath; //让动画沿着轨迹运动
Let me explain the key variables:
beginPoint— start point: the center X of the current view offset 5dp to the left (the X axis runs left-right); the Y coordinate is the view’s height, i.e., the very bottomendPoint— end point: the start point’s X minus the 40 offset to the left (i.e., farther from the left edge); Y is also reduced by the offset, moving to the top-left outside of the view.controlPoint— control point: for the start point, e.g., X is 30 - 60/2.0 - 60 = -60, which clearly runs off the far left, beyond the view bounds; the trailing + controlLength for Y means the Y coordinate is increased.
You don’t need to understand these details; just look at the image below:
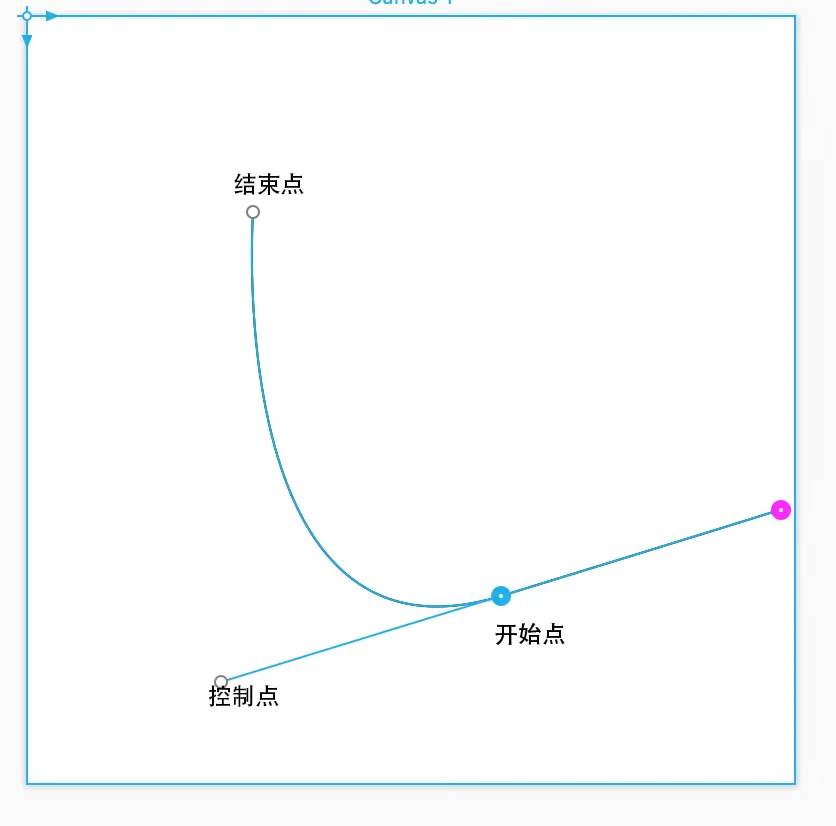
customPath: the Bezier curve object
1
2
3
4
5
6
7

[customPath moveToPoint:beginPoint];
//核心代码 二次曲线方程式 可以google查一下
[customPath addQuadCurveToPoint:endPoint controlPoint:controlPoint];
//让动画沿着轨迹运动
pathAnimation.path = customPath.CGPath;
This is the Bezier trajectory after adding the start point, end point, and control point. Then simply set the path of the path animation and you’re done.
Once that’s done, put pathAnimation into the animation group, then create a note layer and add the animation group to it:
1
2
3
4
5
6
7
8
[animationGroup setAnimations:@[pathAnimation]];

CAShapeLayer *layer = [CAShapeLayer layer];
layer.contents = (__bridge id _Nullable)([UIImage imageNamed:imageName].CGImage);
layer.frame = CGRectMake(beginPoint.x, beginPoint.y, 10, 10);
[self.layer addSublayer:layer];
[self.noteLayers addObject:layer];
[layer addAnimation:animationGroup forKey:nil];
The line
[self.noteLayers addObject:layer];uses the global variable we declared earlier to store the layers, which is used to remove the related layers and animations when resetting.
Let’s see a single note moving along the Bezier curve:

Now the remaining work is to add the rotation, opacity, and scale animations:
1
2
3
4
5
6
7
8
9
10
11
12
13
14
15
16
17
18
19
20
//rotation frame animation
CAKeyframeAnimation * rotationAnimation = [CAKeyframeAnimation animationWithKeyPath:@"transform.rotation"];
//this actually controls the start and end angles of the animation. M_PI (180°) is a semicircle; * 0.10 or * -0.10 creates the 18° gap for the key points to shift up and down
[rotationAnimation setValues:@[
                               [NSNumber numberWithFloat:0],
                               [NSNumber numberWithFloat:M_PI * 0.10],
                               [NSNumber numberWithFloat:M_PI * -0.10]]];
//opacity frame animation
CAKeyframeAnimation * opacityAnimation = [CAKeyframeAnimation animationWithKeyPath:@"opacity"];
[opacityAnimation setValues:@[
                              [NSNumber numberWithFloat:0],
                              [NSNumber numberWithFloat:0.2f],
                              [NSNumber numberWithFloat:0.7f],
                              [NSNumber numberWithFloat:0.2f],
                              [NSNumber numberWithFloat:0]]];
//scale frame animation
CABasicAnimation *scaleAnimation = [CABasicAnimation animation];
scaleAnimation.keyPath = @"transform.scale";
scaleAnimation.fromValue = @(1.0f);
scaleAnimation.toValue = @(2.0f);
Finally, add all the animations to the animation group:
1
[animationGroup setAnimations:@[pathAnimation, scaleAnimation,  rotationAnimation,opacityAnimation]];
Note: to make the note image more vivid, we need to set
layer.opacity = 0.0f;to make the note transparent, and then use the opacity frame animation to control the transparency.
Then wrap up the method and put everything we did above — the Bezier curve, opacity, gradient, scale, and the animation group — into it:
Here’s the complete code:
1
2
3
4
5
6
7
8
9
10
11
12
13
14
15
16
17
18
19
20
21
22
23
24
25
26
27
28
29
30
31
32
33
34
35
36
37
38
39
40
41
42
43
44
45
46
47
48
49
50
51
52
53
54
55
56
57
58
59
60
61
62
63
64
65
66
67
68
- (void)addNotoAnimation:(NSString *)imageName
               delayTime:(NSTimeInterval)delayTime
                    rate:(CGFloat)rate{
    CAAnimationGroup *animationGroup = [[CAAnimationGroup alloc]init];
    animationGroup.duration = rate/4.0f;
    animationGroup.beginTime = CACurrentMediaTime() + delayTime;
    animationGroup.repeatCount = MAXFLOAT;
    animationGroup.removedOnCompletion = NO;
    animationGroup.fillMode = kCAFillModeForwards;
    animationGroup.timingFunction = [CAMediaTimingFunction functionWithName:kCAMediaTimingFunctionLinear];

    //bezier path frame animation
    CAKeyframeAnimation * pathAnimation = [CAKeyframeAnimation animationWithKeyPath:@"position"];

    //X-axis left/right offset
    CGFloat sideXLength = 40.0f;
    //Y-axis up/down offset
    CGFloat sideYLength = 100.0f;

    //Bezier curve start point
    CGPoint beginPoint = CGPointMake(CGRectGetMidX(self.bounds) - 5, CGRectGetMaxY(self.bounds));
    //Bezier curve end point
    CGPoint endPoint = CGPointMake(beginPoint.x - sideXLength, beginPoint.y - sideYLength);
    //Bezier curve control point length
    NSInteger controlLength = 60;
    //Bezier curve control point
    CGPoint controlPoint = CGPointMake(beginPoint.x - sideXLength/2.0f - controlLength, beginPoint.y - sideYLength/2.0f + controlLength);
    //create the Bezier path
    UIBezierPath *customPath = [UIBezierPath bezierPath];
    [customPath moveToPoint:beginPoint];
    //core code: quadratic curve equation, you can google it
    [customPath addQuadCurveToPoint:endPoint controlPoint:controlPoint];
    //make the animation follow the path
    pathAnimation.path = customPath.CGPath;


    //rotation frame animation
    CAKeyframeAnimation * rotationAnimation = [CAKeyframeAnimation animationWithKeyPath:@"transform.rotation"];
    //this actually controls the start and end angles of the animation. M_PI (180°) is a semicircle; * 0.10 or * -0.10 creates the 18° gap for the key points to shift up and down
    [rotationAnimation setValues:@[
                                   [NSNumber numberWithFloat:0],
                                   [NSNumber numberWithFloat:M_PI * 0.10],
                                   [NSNumber numberWithFloat:M_PI * -0.10]]];
    //opacity frame animation
    CAKeyframeAnimation * opacityAnimation = [CAKeyframeAnimation animationWithKeyPath:@"opacity"];
    [opacityAnimation setValues:@[
                                  [NSNumber numberWithFloat:0],
                                  [NSNumber numberWithFloat:0.2f],
                                  [NSNumber numberWithFloat:0.7f],
                                  [NSNumber numberWithFloat:0.2f],
                                  [NSNumber numberWithFloat:0]]];
    //scale frame animation
    CABasicAnimation *scaleAnimation = [CABasicAnimation animation];
    scaleAnimation.keyPath = @"transform.scale";
    scaleAnimation.fromValue = @(1.0f);
    scaleAnimation.toValue = @(2.0f);

    [animationGroup setAnimations:@[pathAnimation, scaleAnimation,  rotationAnimation,opacityAnimation]];

    CAShapeLayer *layer = [CAShapeLayer layer];
    layer.opacity = 0.0f;
    layer.contents = (__bridge id _Nullable)([UIImage imageNamed:imageName].CGImage);
    layer.frame = CGRectMake(beginPoint.x, beginPoint.y, 10, 10);
    [self.layer addSublayer:layer];
    [self.noteLayers addObject:layer];
    [layer addAnimation:animationGroup forKey:nil];
}
Call it in the startAnimation: method we expose externally:
1
2
3
4
5
6
7
- (void)startAnimation:(CGFloat)rate {
    rate = fabs(rate);  //check 防止 rate输入为负值
    [self resetView];   //首先重置动画
   	//call it here
	[self addNotoAnimation:@"icon_home_musicnote1" delayTime:0.0f rate:rate];
	//...the cover rotation animation
}
At this point, we’ve basically completed the animation for one note. If you want multiple notes animating, just call it several times and control the delay time of each start:
1
2
3
[self addNotoAnimation:@"icon_home_musicnote1" delayTime:0.0f rate:rate];
[self addNotoAnimation:@"icon_home_musicnote2" delayTime:1.0f rate:rate];
[self addNotoAnimation:@"icon_home_musicnote1" delayTime:2.0f rate:rate];
From here you can see that we actually use delayTime (in seconds) to control the interval between each note and the previous one, and use that interval to make the notes appear alternately.
That’s why the animation group contains this line:
1
animationGroup.beginTime = CACurrentMediaTime() + delayTime;
It delays 1 or 2 seconds based on the current time.
After everything is done, it looks like this:
Summary
First, thanks to the open-source folks for their code. I studied it carefully several times and wrote some code myself. It really gives me the feeling that “great undertakings begin with small details, and hard tasks start with easy steps.”
The implementation here can simply be split into the album rotation and the note animation group.
I hope to share these technical tips with everyone. The writing is a bit messy, and I’ll keep improving in this regard. I welcome any feedback.
Reference