
Preface
Hi everyone, it’s me again. Today I’m sharing the implementation of the Douyin (TikTok) like animation. Enough talk, let me show you the pictures.
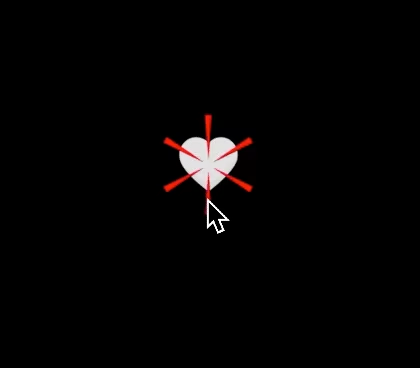
The main technical points covered in this article:
- Drawing triangles with CAShapeLayer and Bezier curves
- Timing techniques for combined animations
I usually attach the demo at the bottom of the article after writing it. If you don’t want to understand the principles, you can jump straight to the bottom to download the demo.
Implementation Principle
First, let’s break down this animation in detail
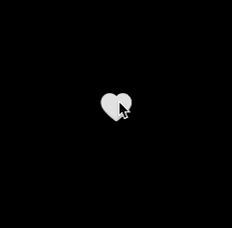
Watch carefully
Let’s look at a single animation
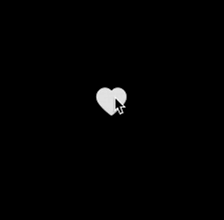
Watch carefully. I set the duration to 10 seconds so everyone can see it clearly
Implementation Principle
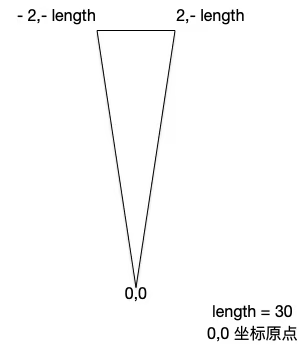
From the two images above, we can see it’s a triangular Bezier curve
Such an animation needs to go through:
- One full rotation of 2π (360°)
- A circle has a total of six triangular Bezier curve shapes.
- One animation group contains a scale animation that enlarges from 0 to 1. If the animation runs for 10 seconds, then the scale animation runs for 10*0.2 = 2 seconds. The animation group also contains another animation that transitions from the end position to the size change at the disappearing end until the animation disappears.
- Create one of the above triangle shapes every 60° around the circle.
After all that explanation, it’s actually just combining a CABasicAnimation with keypath path and a CABasicAnimation with keypath transform.scale, applied to one triangle, and creating a total of 6 triangles.
When it ends, it roughly looks like this
Actually, at the end, it’s a transition from the path where the previous animation finished to a path of three points on a line, until it finally fades away.
OK, let’s implement this animation now.
Note: the ❤️ red heart in the background is an image, not covered in this article
Code Implementation
First, we subclass a ZanLikeView that inherits from UIView, and set the bottom image and the ❤️ image that changes on click. That is, two UIImageViews with gestures. When clicked, you can tell which imageView was clicked by the tag of the different views, so you can make two different animation effects. But you can refer to the demo for these details.
I’ll mainly introduce the core code
Create a CAShapeLayer for shape-related graphic animations.
1
2
3
CAShapeLayer *layer = [[CAShapeLayer alloc]init];
layer.position = _likeBefore.center;
layer.fillColor = [UIColor redColor].CGColor;
The color can eventually be exposed as a public interface
Use a for loop to create one of the above triangles every 30°. We need to create 6, so loop 6 times
Create the initial position Bezier path
1
2
3
4
5
6
7
8
9
10
11
CGFloat length = 30;
CGFloat duration = 0.5f;
for(int i = 0 ; i < 6; i++) {
	CAShapeLayer *layer = [[CAShapeLayer alloc]init];
	layer.position = _likeBefore.center;
	layer.fillColor = [[UIColor redColor].CGColor;

	//...  1
	//...  2
	//...  3
}
Here we create a total of 6 shapeLayer instances and fill them with color. We fill them with red here; other colors can be wrapped by yourself. _likeBefore is the white ❤️ background view (UIImageView) we see
Next, add the following code at //... 1
1
2
3
4
UIBezierPath *startPath = [UIBezierPath bezierPath];
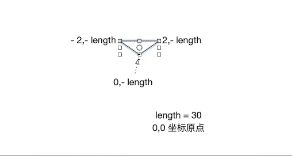
[startPath moveToPoint:CGPointMake(-2, -length)];
[startPath addLineToPoint:CGPointMake(2, -length)];
[startPath addLineToPoint:CGPointMake(0, 0)];
After adding this code, the shape looks like this
Then after creating it, we need to assign the path to layer.path. Remember to convert it to CGPath
1
2
3
layer.path = startPath.CGPath;
layer.transform = CATransform3DMakeRotation(M_PI / 3.0f * i, 0.0, 0.0, 1.0);
[self.layer addSublayer:layer]
Note: In the CATransform3DMakeRotation() function, when the x, y, z values are 0, it means no rotation on that axis; when the value is -1, it means counterclockwise rotation on that axis; when the value is 1, it means clockwise rotation on that axis
Because we need to create a layer every 60°, we use clockwise M_PI / 3.0f = 60°. Each loop creates the Nth angletimes60°.
Then add the following code at //... 2
1
2
3
4
5
6
7
8
9
10
11
12
// Animation group
CAAnimationGroup *group = [[CAAnimationGroup alloc] init];
group.removedOnCompletion = NO;
group.timingFunction = [CAMediaTimingFunction functionWithName:kCAMediaTimingFunctionEaseInEaseOut];
group.fillMode = kCAFillModeForwards;
group.duration = duration;

// Scale animation
CABasicAnimation *scaleAnim = [CABasicAnimation animationWithKeyPath:@"transform.scale"];
scaleAnim.fromValue = @(0.0);
scaleAnim.toValue = @(1.0);
scaleAnim.duration = duration * 0.2f; //注意这里是在给定时长的地方前0.2f的时间里执行缩放
Let me explain duration * 0.2f. For example, if I give a duration of 10 seconds, then duration * 0.2 = 2 seconds for the scale to execute.
Finally, add the following code at //... 3
1
2
3
4
5
6
7
8
9
10
11
12
13
14
// End point
UIBezierPath *endPath = [UIBezierPath bezierPath];
[endPath moveToPoint:CGPointMake(-2, -length)];
[endPath addLineToPoint:CGPointMake(2, -length)];
[endPath addLineToPoint:CGPointMake(0, -length)];

CABasicAnimation *pathAnim = [CABasicAnimation animationWithKeyPath:@"path"];
pathAnim.fromValue = (__bridge id)layer.path;
pathAnim.toValue = (__bridge id)endPath.CGPath;
pathAnim.beginTime = duration * 0.2f;
pathAnim.duration = duration * 0.8f;

[group setAnimations:@[scaleAnim, pathAnim]];
[layer addAnimation:group forKey:nil];
The meaning of these lines of code is to transition from the path of our previous layer to the path of our end position, and note the start time:
pathAnim.beginTime is duration * 0.2, meaning the end transition only starts at the point where the previous animation finishes, and the remaining transition duration is duration * 0.8. In this way, the two animations that are connected are executed, and finally the animations are added to the animation group, then added to the layer.
The image below shows the transition animation from start to end.
The remaining work is just to do an ordinary animation, nothing much else.
1
2
3
4
5
6
7
8
9
10
11
[UIView animateWithDuration:0.35f
                      delay:0.0f
                    options:UIViewAnimationOptionCurveEaseIn
                 animations:^{
                     self.likeAfter.transform = CGAffineTransformScale(CGAffineTransformMakeRotation(-M_PI_4), 0.1f, 0.1f);
                 }
                 completion:^(BOOL finished) {
                     [self.likeAfter setHidden:YES];
                     self.likeBefore.userInteractionEnabled = YES;
                     self.likeAfter.userInteractionEnabled = YES;
                 }];
Technique
The control of the start time and end time of the ending animation is just right.
Summary
The details of animation implementation require research, learning, and practice. Here I’d like to thank the open-source author whose code gave me the idea. Through learning and imitation, I organized the principles, wrote the code to verify them, and added relevant public interfaces.