
Preface
This article carries strong personal sentiments. If you find it uncomfortable to read, please close it. This article is for personal learning records only. You’re welcome to repost or share it within the scope of the license — please respect the copyright and keep the original link. Thank you for your understanding and cooperation. If you find this site helpful, you can subscribe via RSS. Thanks for your support!
Introduction to UIViewRepresentable
UIViewRepresentable is a protocol in the SwiftUI framework, primarily used to wrap UIKit views (UIView and its subclasses) in a SwiftUI environment. SwiftUI is a modern framework introduced by Apple for building cross-platform user interfaces, supporting iOS, macOS, watchOS, and tvOS. However, since SwiftUI was introduced relatively recently, many existing UIKit views and controls have not yet been directly integrated into SwiftUI.
The UIViewRepresentable protocol allows developers to bridge UIKit views into the SwiftUI view system, enabling SwiftUI apps to leverage the powerful features of UIKit and existing UIKit components. By using UIViewRepresentable, developers can create a SwiftUI view that internally wraps one or more UIKit views and manages them within the SwiftUI view hierarchy.
How to Use UIViewRepresentable
- Define a SwiftUI view that conforms to
UIViewRepresentable: You need to create a SwiftUI view that conforms to theUIViewRepresentableprotocol. Implement the two required protocol methods:
makeUIView(context: Context) -> UIView: This method creates and returns a UIKit view instance. This view will be wrapped inside the SwiftUI view.updateUIView(_ uiView: UIViewType, context: Context): This method is called when the SwiftUI view needs to update its internally wrapped UIKit view. You can set the UIKit view’s properties or add subviews here.
- Use your wrapped view in the SwiftUI view hierarchy: After creating and initializing your wrapped view, you can use it in your interface just like any other SwiftUI view.
Example
Here’s a simple example showing how to use UIViewRepresentable to wrap a UIKit UIButton:
1
2
3
4
5
6
7
8
9
10
11
12
13
14
15
16
17
18
19
20
21
22
23
24
25
26
import SwiftUI
import UIKit

struct MyButton: UIViewRepresentable {
    func makeUIView(context: Context) -> UIButton {
        let button = UIButton()
        button.setTitle("Click Me", for: .normal)
        button.addTarget(context.coordinator, action: #selector(Coordinator.buttonPressed), for: .touchUpInside)
        button.backgroundColor = .blue
        return button
    }

    func updateUIView(_ uiView: UIButton, context: Context) {
        // 这里可以根据需要更新按钮
    }

    class Coordinator: NSObject {
        @objc func buttonPressed() {
            print("Button was pressed!")
        }
    }

    func makeCoordinator() -> Coordinator {
        return Coordinator()
    }
}
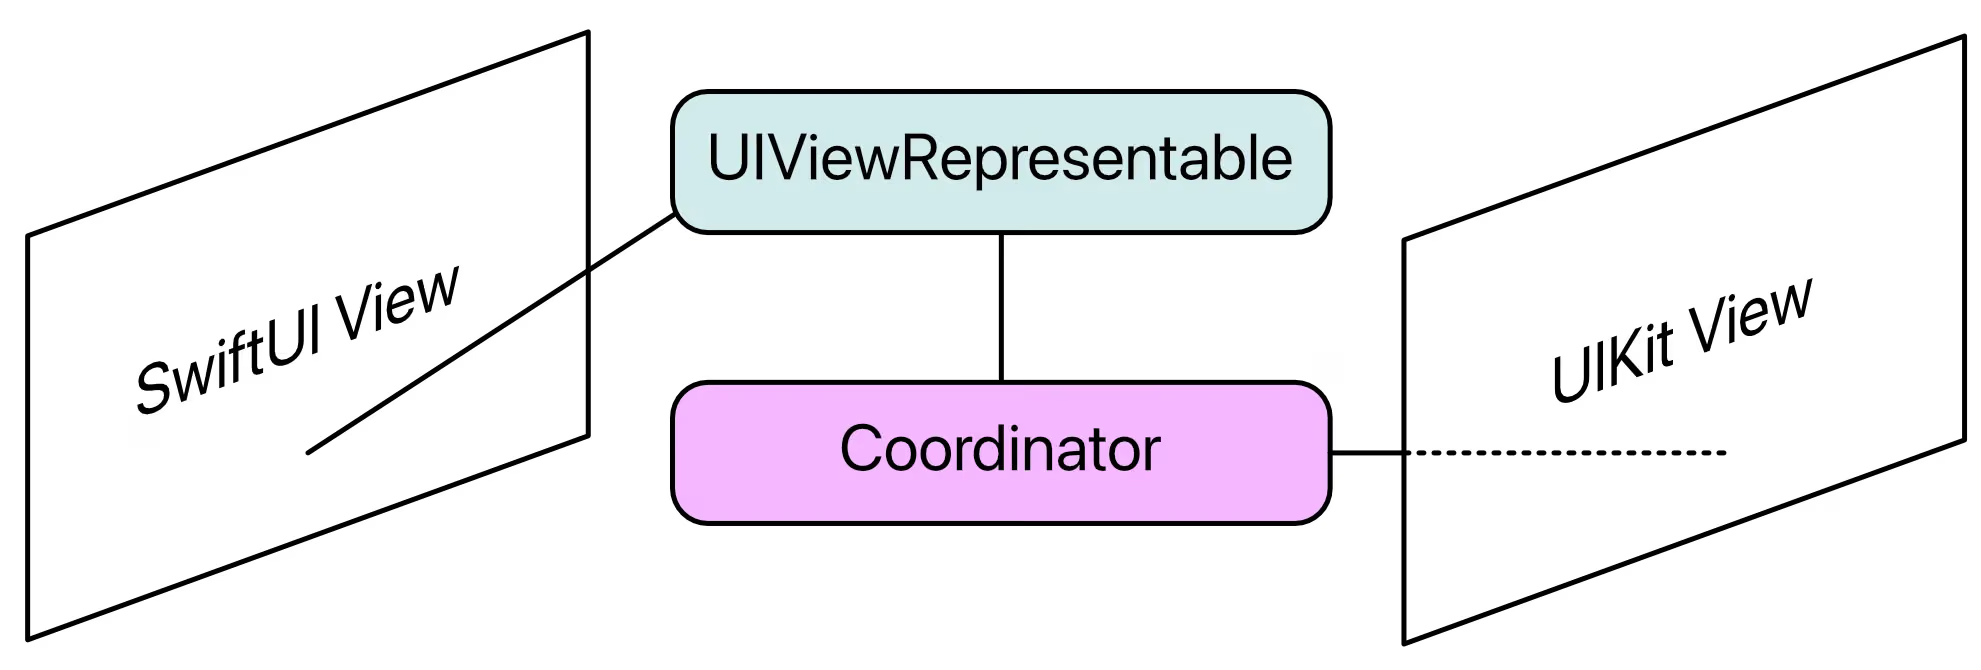
In this example, MyButton is a SwiftUI view that wraps a UIButton. We set the button’s title, color, and add a click event handler. The click event is handled through the Coordinator class, which is a common pattern in the UIViewRepresentable protocol for handling events from UIKit views.
When makeCoordinator is Called in UIViewRepresentable
In SwiftUI’s UIViewRepresentable protocol, the makeCoordinator method plays an important role, especially when handling events and callbacks from UIKit views. Below is a detailed explanation of when makeCoordinator is called.
Invocation Timing
1. View Creation and Rendering
- When SwiftUI needs to render a
UIViewRepresentableview, this typically happens when the view is first added to the view hierarchy, or when SwiftUI decides it needs to re-render the view (e.g., due to state changes or layout updates).
2. makeUIView Call
- Before the
UIViewRepresentableview prepares to add its internal UIKit view to the view hierarchy, themakeUIViewmethod is called. This method is responsible for creating and returning a UIKit view instance.
3. makeCoordinator Call
- Immediately after the
makeUIViewmethod (or in some cases, nearly simultaneously), themakeCoordinatormethod is called. The purpose of this method is to create a coordinator object, which is typically used to handle events or callbacks from the UIKit view.
4. Coordinator and UIKit View Interaction
- In
makeUIView, you may set some properties or event listeners on the UIKit view, and these listeners can point to methods in the coordinator. This way, when events occur in the UIKit view (such as button clicks), the corresponding coordinator methods are called.
5. Possible updateUIView Call
- During the lifecycle of the
UIViewRepresentableview, if its state changes and these changes need to be reflected in its internal UIKit view, theupdateUIViewmethod may be called. This method allows you to update the internal UIKit view based on theUIViewRepresentableview’s state.
Key Points
- The
makeCoordinatormethod is called only once during the lifecycle of aUIViewRepresentableview instance (unless the view is recreated, e.g., due to memory reclaim and reload). - Once the coordinator object is created, it remains associated with the
UIViewRepresentableview through theContextparameter until the view is destroyed. - You can think of the
makeCoordinatormethod as part of setting up event handling and callback logic when initializing theUIViewRepresentableview.
By understanding when makeCoordinator is called, you can more effectively bridge UIKit views in SwiftUI apps and handle events and interactions between them.