

Preface
To realize 不斷學習 與時俱進 (keep learning, keep up with the times), I spent most of my weekends learning Python. During my recent study, I’ve excerpted and organized some valuable parts and put them on the blog, so that when I forget them later, I can come back and browse the blog.
I learned from the course 《全栈数据工程师养成攻略》 on study.163.com. I recommend everyone to study it.
Main Contents of This Post
It is mainly divided into three major parts
- Setting up a
Webenvironment - How to use the MySQL database
- Using Python to operate MySQL
Setting up a Web environment
- Web environments: Apache, Nginx…
- Related configuration during Web service startup.
Web environments: Apache, Nginx…
Downloads for the two platforms
MAMP: Mac, Apache, MySQL, PHP
Mac, Apache, MySQL, PHP abbreviated as
MAMP
WAMP: Windows, Apache, MySQL, PHP
Windows, Apache, MySQL, PHP abbreviated as
WAMP
Of course there are also Linux versions; I won’t go into detail here.
In short, you need to install this software to set up the environment.
Let me use MAMP as an example

After opening it
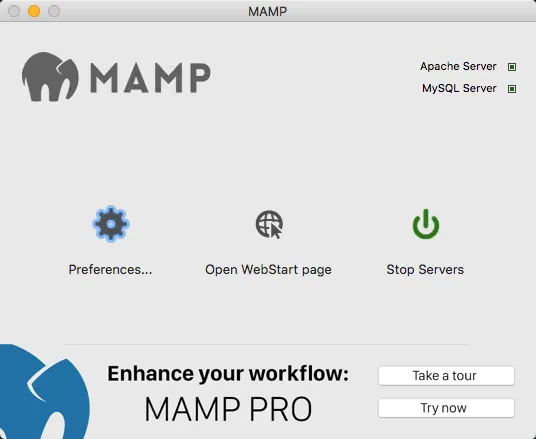
Related configuration during Web service startup
Start the Apache Server and MySQL Server services (in the upper right corner). Then click Preferences to configure the local port.
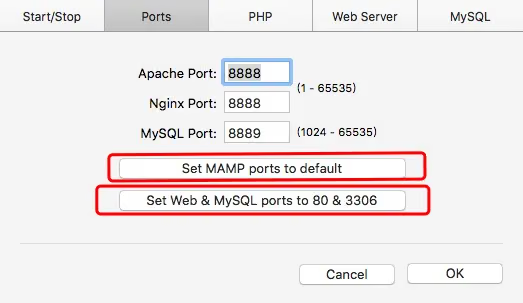
There are two default configurations here (the part highlighted in red)
If you start the services, then open the browser and enter: localhost:8888 to see the results
localhost == 127.0.0.1
8888 is the service port
The image below lets you choose the document root directory 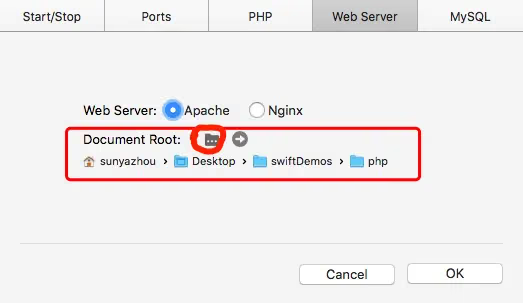
What does that mean?
It means that if you put the web page files into this folder, you can browse them directly in the browser.
In this image, in the middle is Open Start Page.
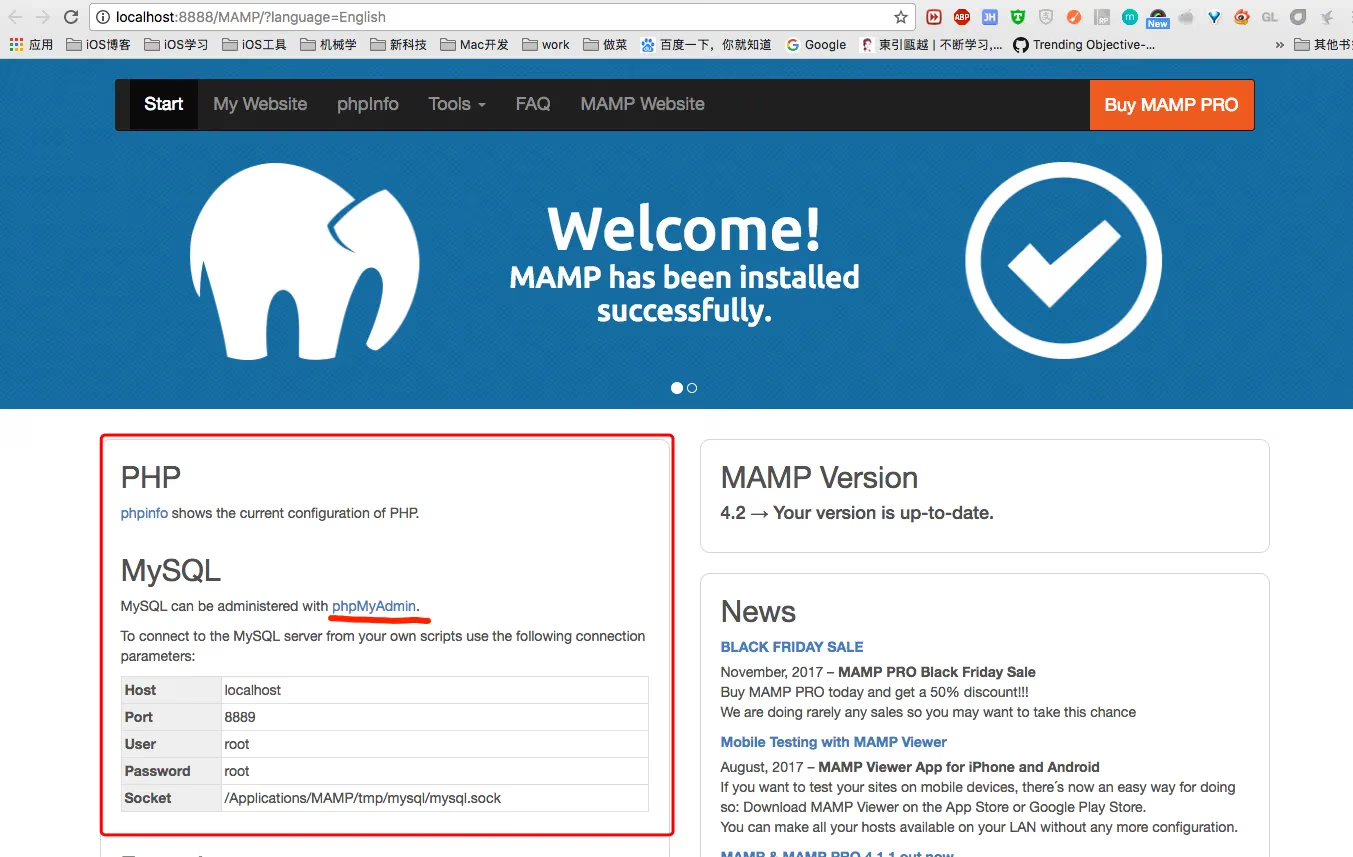
Enter the database configuration
Configure the database name 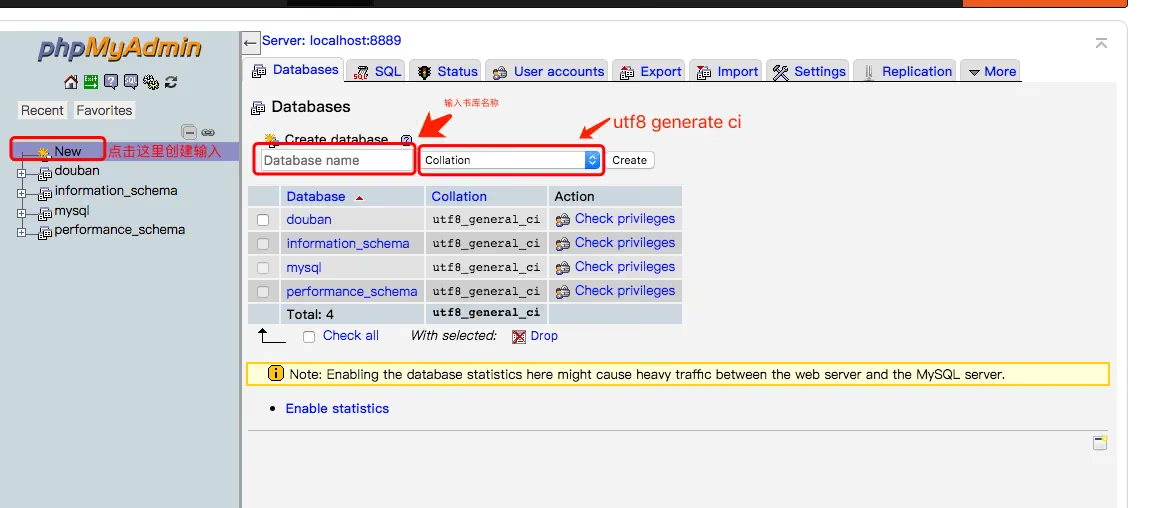
Enter the table name
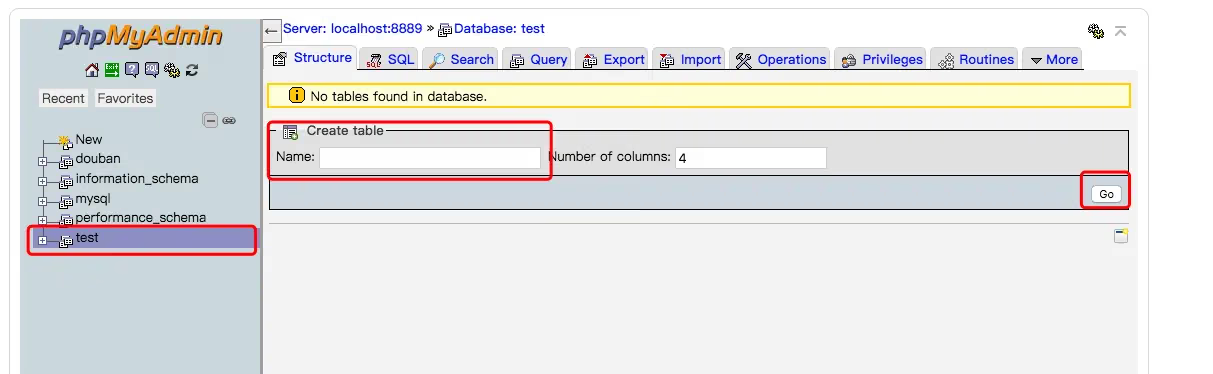
Configure the database table 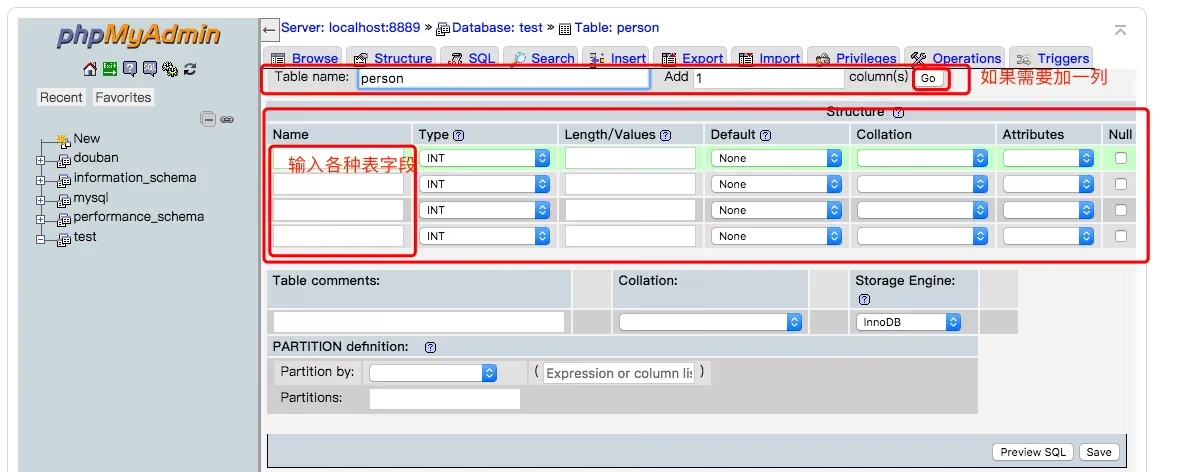
After configuring, click Done on the right
How to use the MySQL database
- Basic concepts
- Installing Python MySQL in the terminal
- Exporting and importing data with Navicat
- My personal habit and workflow
Basic concepts
CURD operations:
CCreateRReadUUpdateDDelete
These are the create, delete, update, and query operations in database knowledge
Installing Python MySQL in the terminal
Use the following command in the terminal to install the MySQL environment
1
pip install MySQL-python
I got an error when installing
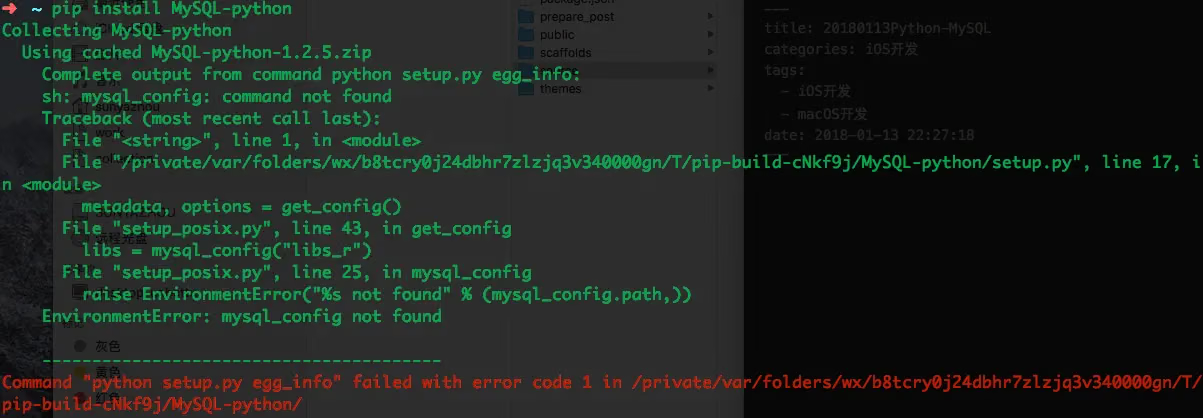
Finally, run
1
brew install mysql-python
Then run pip install MySQL-python again
How to test whether it succeeded
Enter python in the shell

Run
1
2
import MySQLdb
If there is no error, it’s OK.
Exporting and importing data with Navicat
Please download this database visualization software yourself

After opening it, click New Connection in the upper left corner and select MySQL 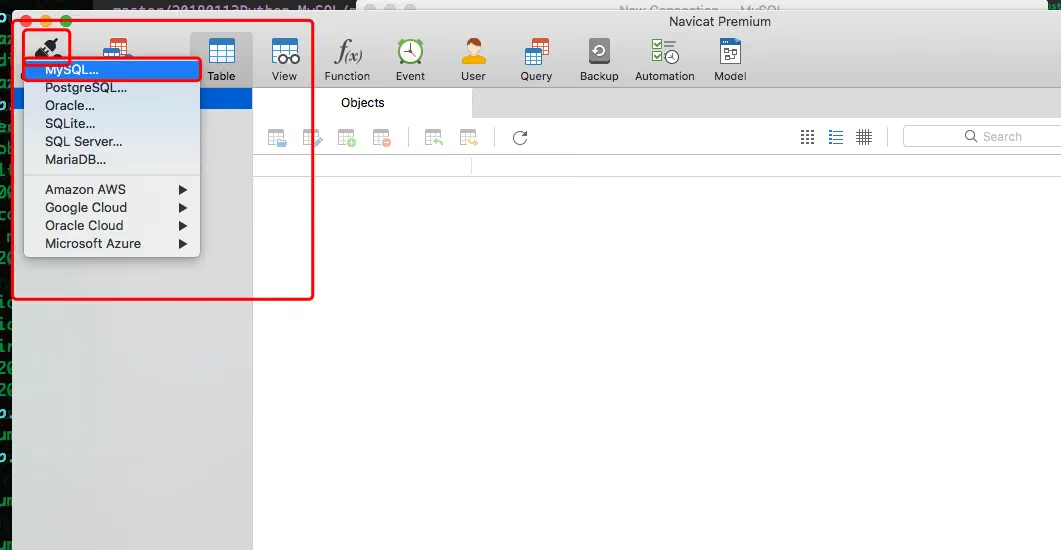
Then configure the database information 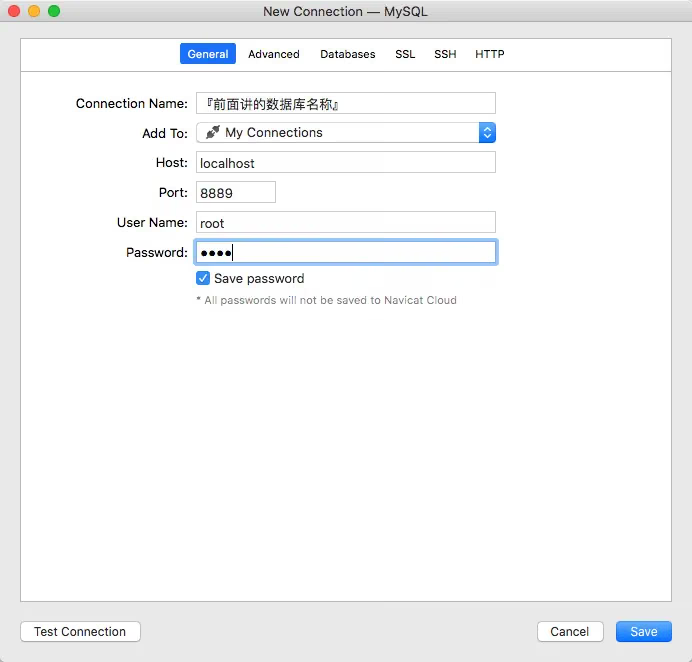
The name here is the database name For host, use local; if it’s remote, fill in the ip or url
For port, we set 8889 earlier
Enter root for both the account and password (in the earlier screenshot you can already see that the account and password are the same)
Now connect to the database
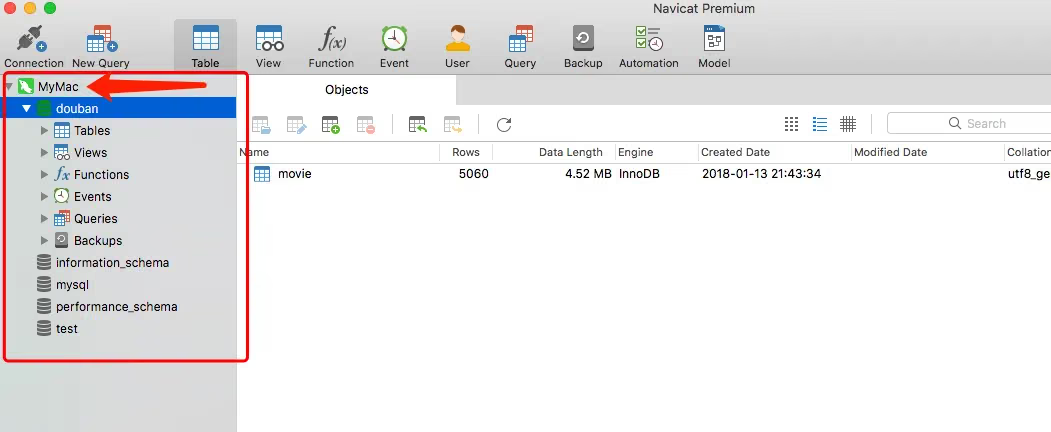
This image below shows
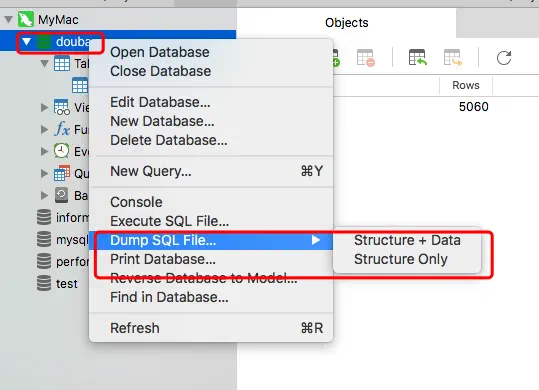
Database export and import; of course you can also export and import data tables.
My personal habit and workflow
- Use
phpmyadminto create databases and data tables - Use
pythonto insert, read, update, and modify data - Use
Navicatto export the database - Use
phpmyadminto import the database
Finally, deploy (deloy) to production, which avoids various problems caused by incorrectly operating the database
Using Python to operate MySQL
There’s nothing special here, just the coding part. Before using it, click here to download this text file
We’ll use sublime text to create a new text.py file
1
2
3
4
5
6
7
8
9
#!/usr/bin/env python
# coding:utf8

import sys
reload(sys)
sys.setdefaultencoding("utf8")

import MySQLdb
import MySQLdb.cursors
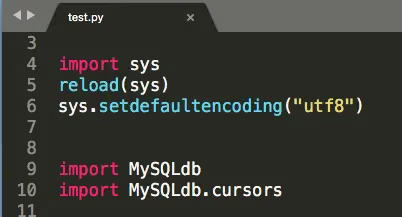
Note: test.py is best kept in the same directory as douban_movie_clean.txt so that you don’t have to write out the path
Then create the database connection
1
2
3
4
5
6
7
8
9
10
11
12

db = MySQLdb.connect(host='127.0.0.1', user='root', passwd='root', db='douban', port=8889, charset='utf8', cursorclass=MySQLdb.cursors.DictCursor) //1
db.autocommit(True) //2
cursor = db.cursor() //3

fr = open('douban_movie_clean.txt','r') //4

fr.close() //4

cursor.close() //3
db.close() //1
Note: remember to close
dbwhen done, and remember to closecursortoo.fris for file reading/writing and has nothing to do with the database, but remember to close it after use
Let me explain what this means
dbcreates the database instance, with input parametershost(here it’s 127.0.0.1, can also be replaced with localhost),passwd,db,port,charset,cursorclass.- Auto-commit to finish updating the database
- Get a connection
cursorfrom thedbinstance; each time usecursor.execute()to run the create/delete/update/query SQL statements - Read the local text file
That’s roughly what it means
Reading Data
1
2
3
4
5
6
7
8
9
10
11
12
13
14
15
16
17
18
19
20
21
22
23
24
25
# Create
# Read data
fr = open('douban_movie_clean.txt', 'r')

count = 0
for line in fr:
	count += 1
	# count indicates the current line being processed
	print count
	# Skip the header row
	if count == 1:
		continue

	# strip() removes whitespace from both ends of the string
	# split() splits the string into a list by the given separator
	line = line.strip().split('^')
	# Insert data, keeping the fields aligned
	# The first argument of execute() is the SQL command to run
	# A template is generated here using string formatting
	# %s is a placeholder
	# The second argument is the params to be formatted, passed into the template
	cursor.execute("insert into movie(title, url, rate, length, description) values(%s, %s, %s, %s, %s)", [line[1], line[2], line[4], line[-3], line[-1]])

# Close the read file
fr.close()
Use the cursor connection instance we obtained to run cursor.execute() for sql insert operations.
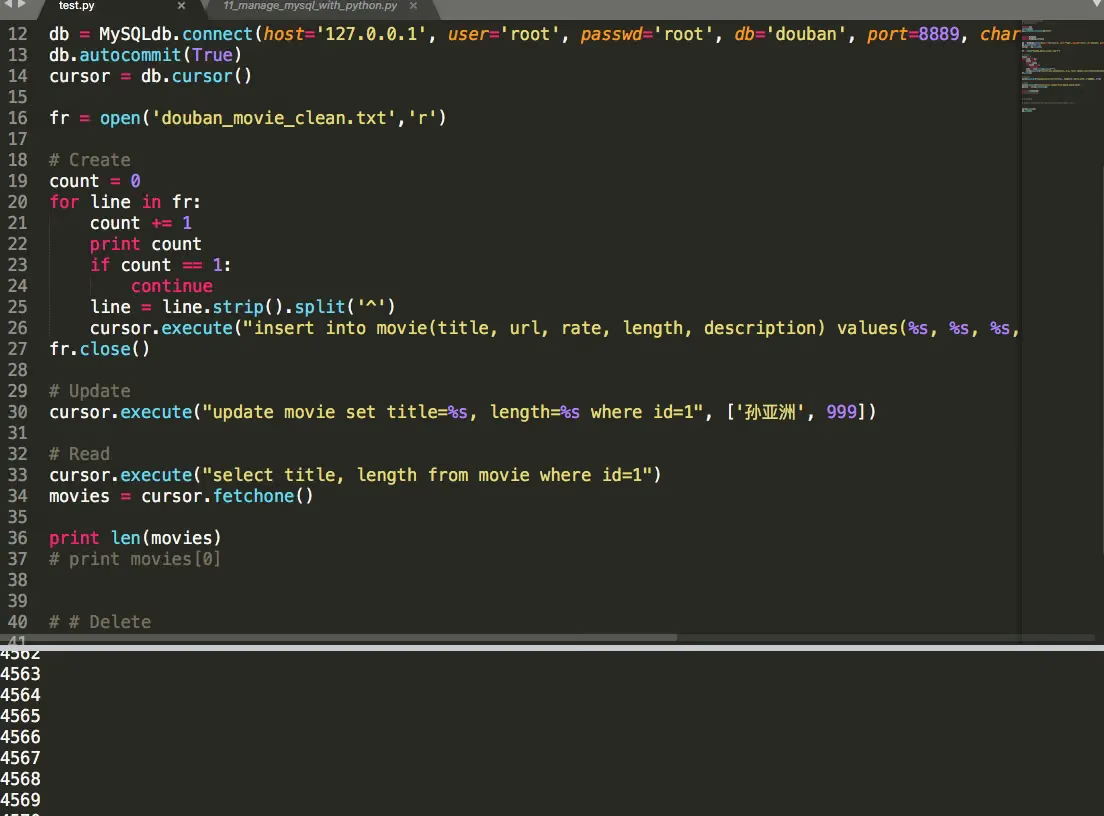
Let’s look at the result 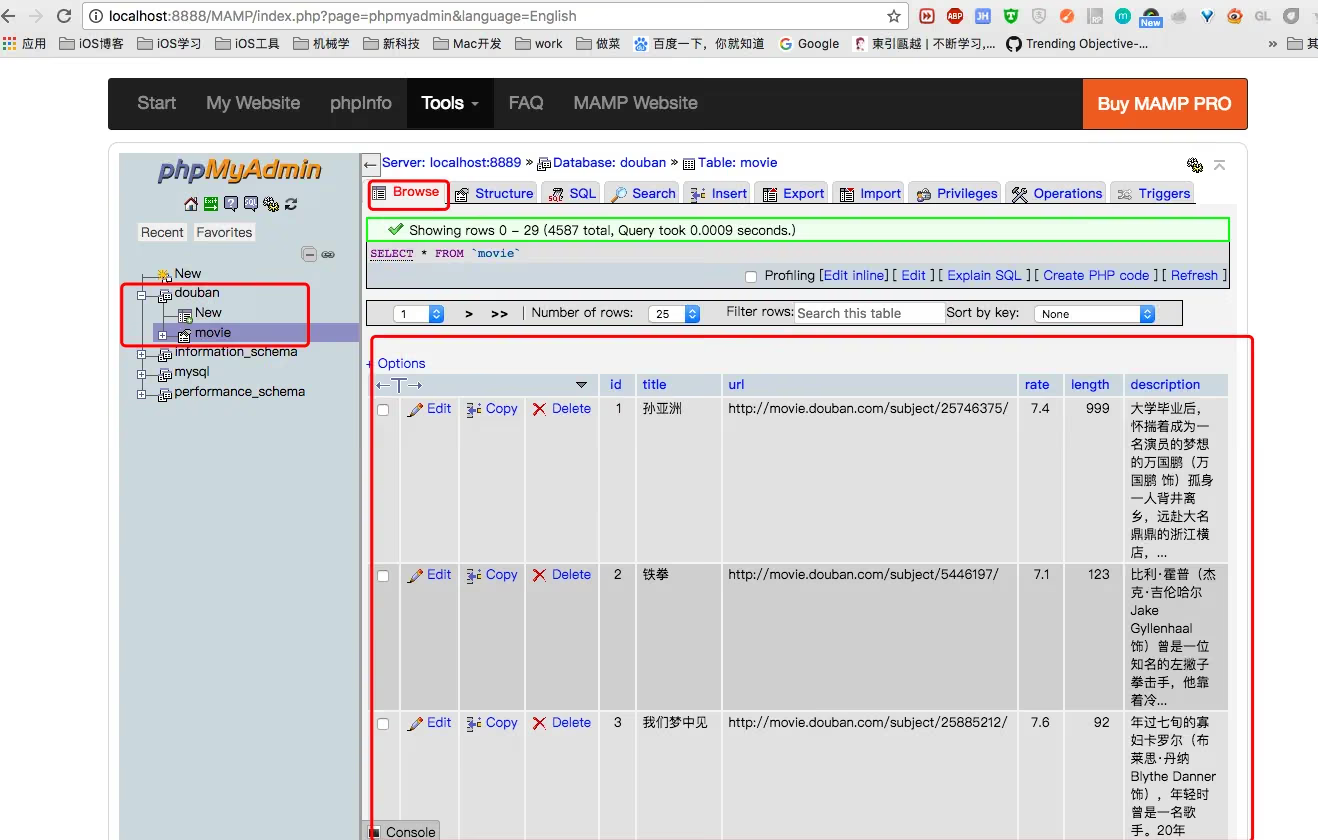
Updating Data
To update data, for example, I want to update the title field and length of the record with id=1
1
2
# Update
cursor.execute("update movie set title=%s, length=%s where id=1", ['孙亚洲', 999])
Reading Data
1
2
3
# Read
cursor.execute("select title, length from movie where id=1")
movies = cursor.fetchone()
Deleting Data
1
2
# Delete
cursor.execute("delete from movie where id=%s",[2])
Let’s look at the complete code below
1
2
3
4
5
6
7
8
9
10
11
12
13
14
15
16
17
18
19
20
21
22
23
24
25
26
27
28
29
30
31
32
33
34
35
36
37
38
39
40
41
42
43
44
45
46
#!/usr/bin/env python
# coding:utf8

import sys
reload(sys)
sys.setdefaultencoding("utf8")


import MySQLdb
import MySQLdb.cursors

db = MySQLdb.connect(host='127.0.0.1', user='root', passwd='root', db='douban', port=8889, charset='utf8', cursorclass=MySQLdb.cursors.DictCursor)
db.autocommit(True)
cursor = db.cursor()

fr = open('douban_movie_clean.txt','r')

# Create
count = 0
for line in fr:
	count += 1
	print count
	if count == 1:
		continue
	line = line.strip().split('^')
	cursor.execute("insert into movie(title, url, rate, length, description) values(%s, %s, %s, %s, %s)", [line[1], line[2], line[4], line[-3], line[-1]])
fr.close()

# Update
cursor.execute("update movie set title=%s, length=%s where id=1", ['孙亚洲', 999])

# Read
cursor.execute("select title, length from movie where id=1")
movies = cursor.fetchone()

print len(movies)
# print movies[0]


# Delete

cursor.execute("delete from movie where id=%s",[2])


cursor.close()
db.close()
Summary
Studying how to operate the database with python was very rewarding; it reminded me of how my college teacher, Li Yuehui, taught me to connect to a database with Java. At work, we may encounter problems like how to insert a huge amount of data into a database. By learning the content of this chapter, you can easily handle batch data.
For more SQL statements refer to the SQL Tutorial
End of article