
Preface
This article carries a strong personal tone. If you find it uncomfortable to read, please close it immediately. This article is intended only as a personal study record. You are welcome to repost or share it within the scope of the license—please respect the copyright and keep the original link. Thank you for your understanding and cooperation. If you find this site helpful, you can subscribe via RSS. Thanks for your support!
Background
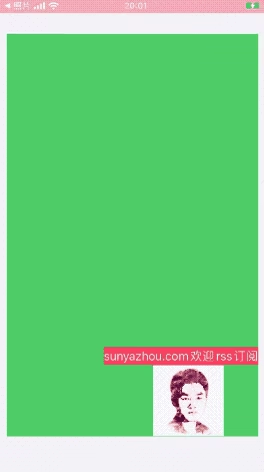
Recently, I encountered a requirement shown in the image above: create a widget that can be dragged in all directions and occasionally displays a tip bubble Label. I wanted to implement this with as little code as possible. As an iOS developer, I must carefully scrutinize this requirement. It’s clearly a bit troublesome—I, being habitually lazy, really don’t want to calculate which edge, which corner, or where it slides to in terms of frame. Calculating frame sounds laughable and feels devoid of technical substance. To minimize code while meeting the requirement, I chose to use Masonry to implement this feature.
Getting Started
Before diving in, I recommend reading 土土哥’s (ttge) Interesting Autolayout Examples 1~5 Masonry Implementation article. This article was also written with reference to 土土哥’s article. Please bear with me—personally, I think 土土哥’s articles are practically the standard tutorial for Masonry auto layout. I strongly recommend that beginners and experts alike practice it frequently.
The images below show 土土哥’s demo implementation:
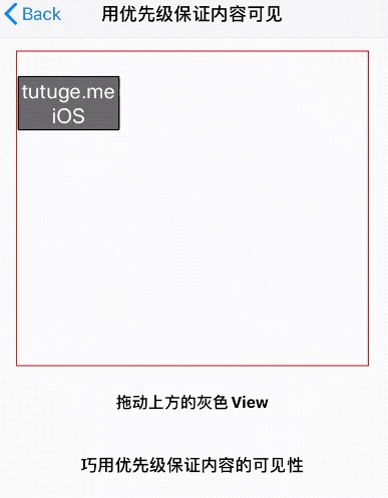
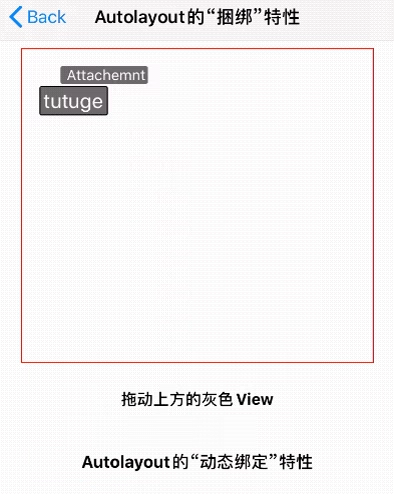
But my question is: how to ensure that the tip bubble label can move freely left and right, allowing for margin movement around the logo image?
Implementing Margin Movement
First, let’s create a demo—a simple VC demo will do. Create the green background view, the imageView, and the tipLabel bubble view. I’ve pasted the code below, so I won’t go into detail about creating the other views—just drag them in the xib.
1
2
3
4
5
6
7
8
9
10
11
12
13
14
#import "ViewController.h"
#import <Masonry/Masonry.h>

@interface ViewController ()
@property (weak, nonatomic  ) IBOutlet UIView        *greenView;
@property (weak, nonatomic  ) IBOutlet UIImageView   *widgetView;
@property (weak, nonatomic  ) IBOutlet UILabel       *bubbleTitleLabel;

@property (nonatomic, strong) MASConstraint *leftConstraint; //左侧约束变量
@property (nonatomic, strong) MASConstraint *topConstraint;  //顶部约束变量

@end
Here you can see two constraint global variables: leftConstraint and topConstraint. These are used to change the constraint offsets during dragging to implement the functionality. Here’s the specific code:
1
2
3
4
5
6
7
8
9
10
11
12
13
CGFloat screenWidth = [UIScreen mainScreen].bounds.size.width;
CGFloat screenHeight = [UIScreen mainScreen].bounds.size.height;
[self.widgetView mas_makeConstraints:^(MASConstraintMaker *make) {
    // Set boundary constraints to ensure content visibility, priority 1000
    make.left.greaterThanOrEqualTo(self.greenView.mas_left);
    make.right.lessThanOrEqualTo(self.greenView.mas_right);
    make.top.greaterThanOrEqualTo(self.greenView.mas_top);
    make.bottom.lessThanOrEqualTo(self.greenView.mas_bottom);

    self.leftConstraint = make.centerX.equalTo(self.greenView.mas_left).with.offset(screenWidth - 20).priorityHigh(); // 优先级要比边界条件低
    self.topConstraint = make.centerY.equalTo(self.greenView.mas_top).with.offset(screenHeight - 100).priorityHigh(); // 优先级要比边界条件低
    make.width.height.mas_equalTo(@100);
}];
The greaterThanOrEqualTo and lessThanOrEqualTo above limit the draggable range of the widget, while the final make.centerX/Y.equalTo sets the default position of the widget. I set it to default at the bottom-right corner, so it’s moved there via the offset.
Note: There’s a pitfall here—since this thing can be dragged in all directions, you basically need to lock
leftandtop. I found that only by moving via offset can the initial position be determined. If you directly write equalTo to xxxview’s bottom or right, it won’t slide. Think carefully about Masonry and you’ll understand why.
Then add a gesture recognizer and implement the relevant slide events to enable dragging
1
2
3
4
5
6
7
8
9
10
11
UIPanGestureRecognizer *pan = [[UIPanGestureRecognizer alloc] initWithTarget:self action:@selector(panWithGesture:)];
[self.greenView addGestureRecognizer:pan];

...

- (void)panWithGesture:(UIPanGestureRecognizer *)pan {
    CGPoint touchPoint = [pan locationInView:self.greenView];
    self.leftConstraint.offset = touchPoint.x;
    self.topConstraint.offset = touchPoint.y;
}
Constraints for the Margin Label
1
2
3
4
5
6
7
8
[self.bubbleTitleLabel mas_remakeConstraints:^(MASConstraintMaker *make) {
	make.height.equalTo(@26);
	make.bottom.equalTo(self.widgetView.mas_top);
	make.left.greaterThanOrEqualTo(self.greenView.mas_left).offset(0);
	make.right.lessThanOrEqualTo(self.greenView.mas_right).offset(0);
	make.centerX.lessThanOrEqualTo(self.widgetView.mas_right).offset(10);
	make.centerX.greaterThanOrEqualTo(self.widgetView.mas_left).offset(-10);
}];
To implement margin movement, you need to add more constraint restrictions.
Here, the following were added:
1
2
make.centerX.lessThanOrEqualTo(self.widgetView.mas_right).offset(10);
make.centerX.greaterThanOrEqualTo(self.widgetView.mas_left).offset(-10);
This way, even when sliding beyond the left/right boundaries, the tip label’s left/right movement range is still controlled.
Summary
Through real-world problems encountered at work, I learned some Masonry techniques and hope to share them with everyone. I’ve uploaded the demo below—feel free to download and study it.