
Preface
This article is highly personal in tone. If you find it uncomfortable to read, please close it as soon as possible. This article is only a personal learning record. Reposts and sharing are welcome within the scope of the license agreement. Please respect the copyright and keep the original link. Thank you for your understanding and cooperation. If you find this site helpful, you can subscribe via RSS. Thanks for your support!
This article is translated from
Author: Pavel Zak
Published: June 27, 2024
Original: https://nerdyak.tech/development/2024/06/27/particle-effects-with-SwiftUI-Canvas.html
In one of my previous articles, I shared a simple way to create particle effects in SwiftUI — using a ViewModifier, which is very neat. But I don’t recommend it for production, because every particle is a separate view, and the performance overhead becomes significant once the particle count grows.
This article presents a better alternative: using the Canvas view to render particles. Let’s go 💪
Basic Architecture
Let’s start with the following view skeleton:
1
2
3
4
5
6
7
8
9
10
11
12
13
14
15
struct ParticleCanvasView: View {

    var body: some View {
        TimelineView(.animation) { context in
            Canvas { context, size in
                let particleSymbol = context.resolveSymbol(id: 0)!
                let position = CGPoint(x: size.width/2, y: size.height/2)
                context.draw(particleSymbol, at: position, anchor: .center)
            } symbols: {
                SingleParticleView()
                    .tag(0)
            }
        }
    }
}
There’s an outer TimelineView that’s responsible for periodically triggering redraws of the inner view. The main content is the Canvas view.
For those with a UIKit background, the concept of a drawing context should be familiar: we get a canvas area with size information, then draw various elements on it — shapes, images, and more.
In our example, the particle to be drawn is represented by SingleParticleView. Note that it’s placed in the symbols parameter — this means SwiftUI will pre-render it, making each subsequent draw call extremely efficient, which is great for large numbers of particles ;)
Let’s first define SingleParticleView as a small orange dot:
1
2
3
4
5
6
struct SingleParticleView: View {
    var body: some View {
        Circle().fill(Color.orange)
            .frame(width: 35, height: 35)
    }
}
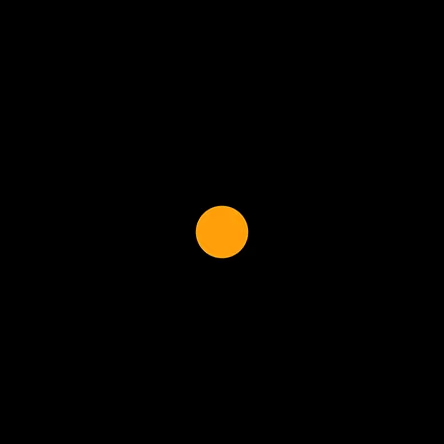
Making It Move
Now let’s make the particle move.
I want to achieve an effect similar to fire — multiple particles floating upward. Let’s start with the simplest thing: make a single particle move up from the bottom of the canvas periodically:
1
2
3
4
5
6
7
8
9
10
11
12
13
14
15
16
17
18
19
struct ParticleCanvasView: View {
    let movementDuration = 2.0

    var body: some View {
        TimelineView(.animation) { context in
            let timeInterval = context.date.timeIntervalSinceReferenceDate

            let time = timeInterval.truncatingRemainder(dividingBy: movementDuration) / movementDuration

            Canvas { context, size in
                let particleSymbol = context.resolveSymbol(id: 0)!
                let position = CGPoint(x: size.width/2, y: (1 - time) * size.height)
                context.draw(particleSymbol, at: position, anchor: .center)
            } symbols: {
                SingleParticleView().tag(0)
            }
        }
    }
}
The upward motion is controlled by the time variable. TimelineView provides the time property, but we need a normalized value that’s convenient to bind to the particle’s motion. Here I set each motion to last 2 seconds (movementDuration), and use a truncating remainder so that time always grows periodically from 0 to 1.
Remember Trigonometry?
Next, let’s upgrade the motion from a boring straight line to something more “fire-like” :)
The feel of fire is that it flickers, so let’s make the particle move along a cosine wave path, with the amplitude gradually shrinking as the particle rises:
1
2
3
4
5
6
7
8
9
10
11
12
13
14
15
16
17
18
19
20
21
22
23
24
struct ParticleCanvasView: View {
    let movementDuration = 2.0

    func particlePosition(timeInterval: Double, canvasSize: CGSize) -> CGPoint {
        let time = timeInterval.truncatingRemainder(dividingBy: movementDuration) / movementDuration
        let rotations: CGFloat = 3
        let amplitude: CGFloat = 0.1 + 0.8 * (1 - time)
        let x = canvasSize.width/2 + cos(rotations * time * CGFloat.pi * 2) * canvasSize.width/2 * amplitude
        return CGPoint(x: x, y: (1 - time) * canvasSize.height)
    }

    var body: some View {
        TimelineView(.animation) { context in
            let timeInterval = context.date.timeIntervalSinceReferenceDate
            Canvas { context, size in
                let particleSymbol = context.resolveSymbol(id: 0)!
                let position = particlePosition(timeInterval: timeInterval, canvasSize: size)
                context.draw(particleSymbol, at: position, anchor: .center)
            } symbols: {
                SingleParticleView().tag(0)
            }
        }
    }
}
The position calculation is extracted into a separate function to keep the Canvas closure clean.
Video: cosine wave motion demo
Generating Lots of Particles
The motion effect is satisfying. Now let’s wrap the drawing in a for loop to draw more particles at once:
1
2
3
4
5
6
7
8
9
let particleCount = 100
// …
for i in 0..<particleCount {
    let position = particlePosition(
        timeInterval: timeInterval + (Double(i) / Double(particleCount)),
        canvasSize: size
    )
    context.draw(particleSymbol, at: position, anchor: .center)
}
Video: multiple particles demo
Randomization
Now there are more particles, but they all follow the same path, which looks too uniform. Use random initial rotation angles and time offsets to let each particle go its own way:
1
2
3
4
5
6
7
8
9
10
11
12
13
14
15
16
17
18
19
20
21
22
23
24
25
26
27
28
struct ParticleCanvasView: View {
    let movementDuration: Double
    let particleCount: Int
    let startingParticleOffsets: [CGFloat]
    let startingParticleAlphas: [CGFloat]

    init(particleCount: Int = 200, movementDuration: Double = 3.0) {
        self.particleCount = particleCount
        self.movementDuration = movementDuration
        self.startingParticleOffsets = (0..<particleCount).map { _ in CGFloat.random(in: 0...1) }
        self.startingParticleAlphas  = (0..<particleCount).map { _ in CGFloat.random(in: 0...CGFloat.pi*2) }
    }

    func particlePosition(index: Int, timeInterval: Double, canvasSize: CGSize) -> CGPoint {
        let startingRotation  = startingParticleAlphas[index]
        let startingTimeOffset = startingParticleOffsets[index] * movementDuration

        let time = (timeInterval + startingTimeOffset)
            .truncatingRemainder(dividingBy: movementDuration) / movementDuration
        let rotations: CGFloat = 3
        let amplitude: CGFloat = 0.1 + 0.8 * (1 - time)

        let x = canvasSize.width/2 + cos(rotations * time * CGFloat.pi * 2 + startingRotation)
                 * canvasSize.width/2 * amplitude
        return CGPoint(x: x, y: (1 - time) * canvasSize.height)
    }
    // … body stays the same
}
Video: randomized particles demo
Polishing the Visuals
The motion logic is done; now we need to polish the look to make the effect juicier.
Step 1: Change the particle opacity during motion — modify the context’s opacity before the draw call:
1
context.opacity = positionAndAlpha.1
Step 2: Redesign the particle’s appearance using a blend mode:
1
2
3
4
5
6
7
8
struct SingleParticleView: View {
    var body: some View {
        Circle().fill(Color.orange.opacity(0.4))
            .frame(width: 35, height: 35)
            .blendMode(.plusLighter)
            .blur(radius: 10)
    }
}
The particles are made into large blurred dots; when they overlap, the .plusLighter blend brightens the overlapping regions, creating a volumetric fire effect.
There’s another issue that bothered me: particles are denser at the top, and I wanted the opposite. Adjust the y-coordinate formula to fix it:
1
let y = (1 - time * time) * canvasSize.height
Final Complete Code
1
2
3
4
5
6
7
8
9
10
11
12
13
14
15
16
17
18
19
20
21
22
23
24
25
26
27
28
29
30
31
32
33
34
35
36
37
38
39
40
41
42
43
44
45
46
47
struct ParticleCanvasView: View {
    let movementDuration: Double
    let particleCount: Int
    let startingParticleOffsets: [CGFloat]
    let startingParticleAlphas: [CGFloat]

    init(particleCount: Int = 200, movementDuration: Double = 3.0) {
        self.particleCount = particleCount
        self.movementDuration = movementDuration
        self.startingParticleOffsets = (0..<particleCount).map { _ in CGFloat.random(in: 0...1) }
        self.startingParticleAlphas  = (0..<particleCount).map { _ in CGFloat.random(in: 0...CGFloat.pi*2) }
    }

    func particlePositionAndAlpha(index: Int, timeInterval: Double, canvasSize: CGSize) -> (CGPoint, CGFloat) {
        let startingRotation   = startingParticleAlphas[index]
        let startingTimeOffset = startingParticleOffsets[index] * movementDuration

        let time = (timeInterval + startingTimeOffset)
            .truncatingRemainder(dividingBy: movementDuration) / movementDuration
        let rotations: CGFloat = 1.5
        let amplitude: CGFloat = 0.1 + 0.8 * (1 - time)

        let x = canvasSize.width/2 + cos(rotations * time * CGFloat.pi * 2 + startingRotation)
                 * canvasSize.width/2 * amplitude * 0.8
        let y = (1 - time * time) * canvasSize.height

        return (CGPoint(x: x, y: y), 1 - time)
    }

    var body: some View {
        TimelineView(.animation) { context in
            let timeInterval = context.date.timeIntervalSinceReferenceDate
            Canvas { context, size in
                let particleSymbol = context.resolveSymbol(id: 0)!
                for i in 0..<particleCount {
                    let positionAndAlpha = particlePositionAndAlpha(
                        index: i, timeInterval: timeInterval, canvasSize: size
                    )
                    context.opacity = positionAndAlpha.1
                    context.draw(particleSymbol, at: positionAndAlpha.0, anchor: .center)
                }
            } symbols: {
                SingleParticleView().tag(0)
            }
        }
    }
}
Now It’s Your Turn!
Directions you can explore further:
- Change the particle appearance (shape, color, size)
- Modify the particle motion path
- Combine multiple particle types
- Respond to user input
- 💫 And more…