
Preface
To avoid wasting time reinstalling Windows every time, I decided to write down the whole process in an article for later reference, since I always forget what tools I need when fixing computers.
PE Installation Tutorial
Creating a PE toolbox
Main steps:
- Step 1: Prepare the software and hardware — a USB drive of 8G or larger works, plus a computer that can access the internet normally.
- Step 2: Use the 电脑店 USB boot maker to create a bootable USB drive.
- Step 3: Download the system files you need and copy them to the USB drive.
- Step 4: Enter the BIOS and set the USB drive as the first boot device.
- Step 5: Enter WIN10 PE mode, partition, and install the system.
- Step 6: System activation issues.
- Step 7: Driver installation issues.
Creating the Toolbox
First, download a tool for creating the boot drive:
Download address: link: http://www.usbrun.com/
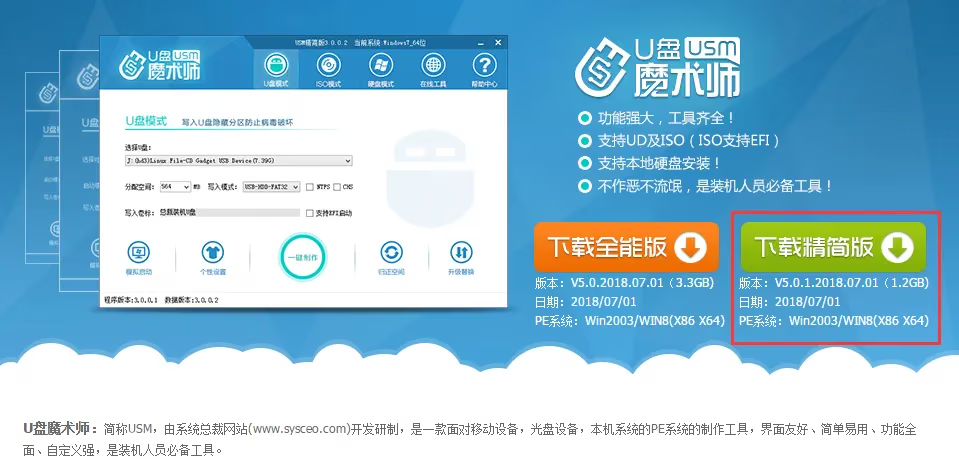
After downloading the lite version, turn off your antivirus software first!! Double-click to install it on your computer. Once installed, open it. If the software prompts for an update, you can ignore it — no update needed!
Plug in the USB drive
[Note: The USB drive will be formatted. If it has any data, copy it out first to avoid losing it.]
If you can’t see the device, unplug and replug the USB drive.
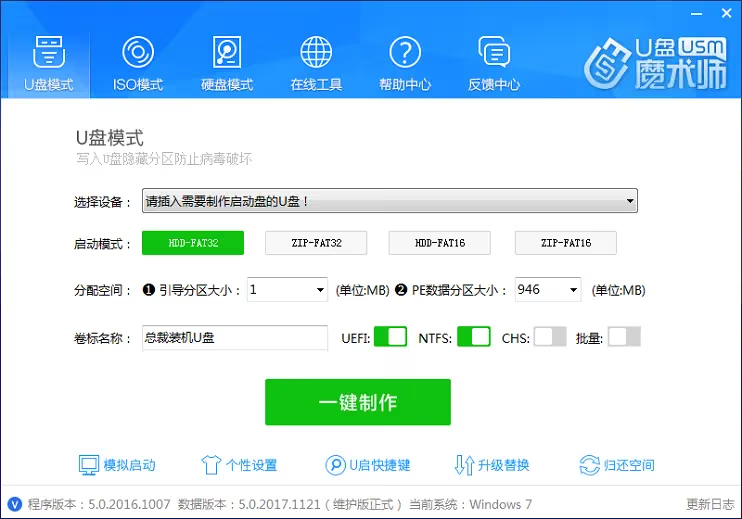
Click 一键制作 and wait for it to finish. After it’s done, click 模拟启动 to check whether the USB drive can boot. If it can, you’re good. Close it.
Downloading the System
Below, choose one system version to download. (If your USB drive is big enough, you can download both systems. This PE supports installing original systems.)
WIN7 64-bit (B360/B450 Ryzen 2nd gen CPU motherboards not supported) System download link: Link (Technician Clean Edition)
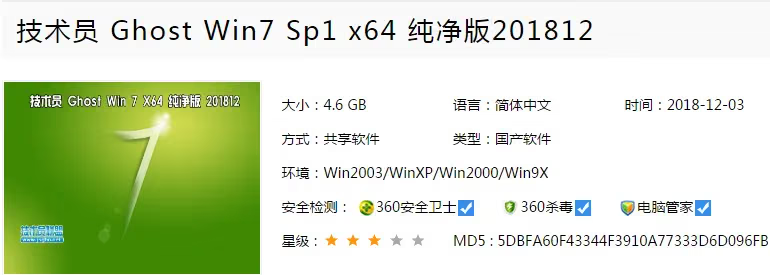

WIN7~10 64-bit
Professional Edition download address: http://msdn.itellyou.cn/
You can copy this magnet link and use Thunder to create a new download:
| ed2k:// | file | cn_windows_10_business_edition_version_1803_updated_sep_2018_x64_dvd_07b164ed.iso | 5229189120 | 5CC3C32DB198D647DCED4B0EB96B8547 | / |
Download reference:
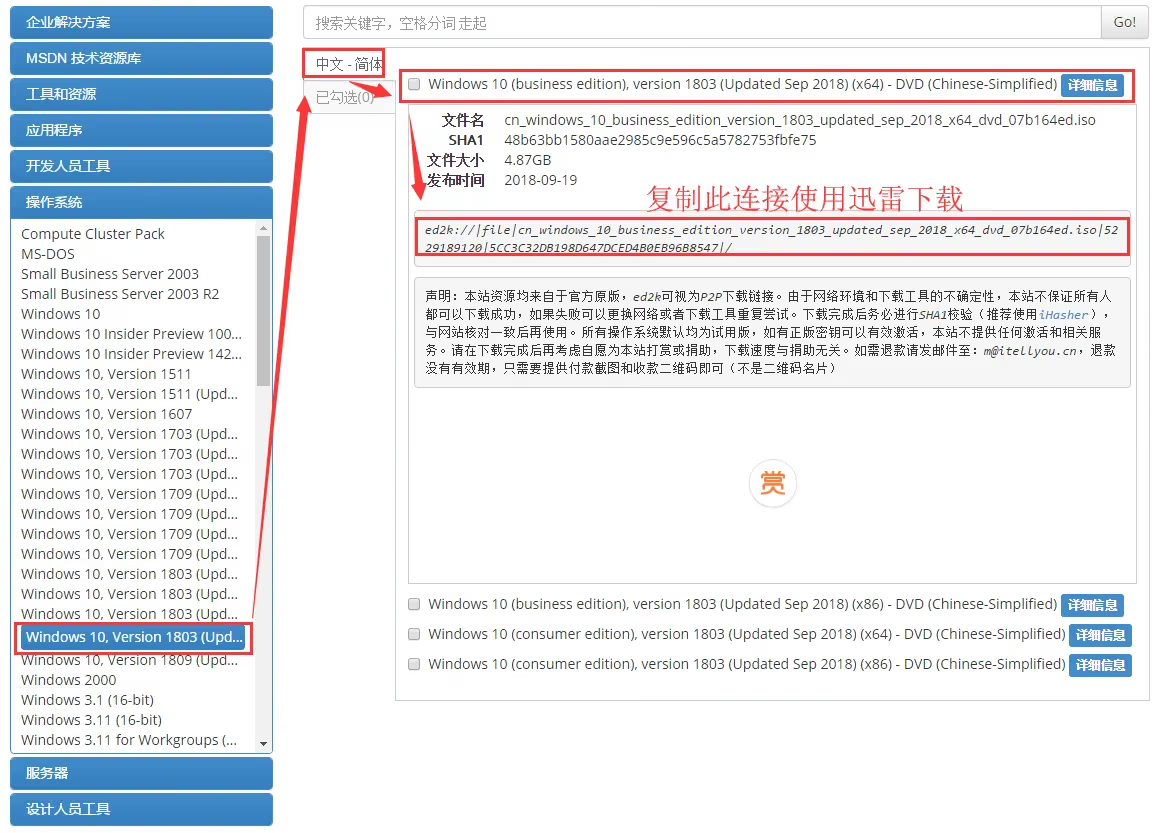
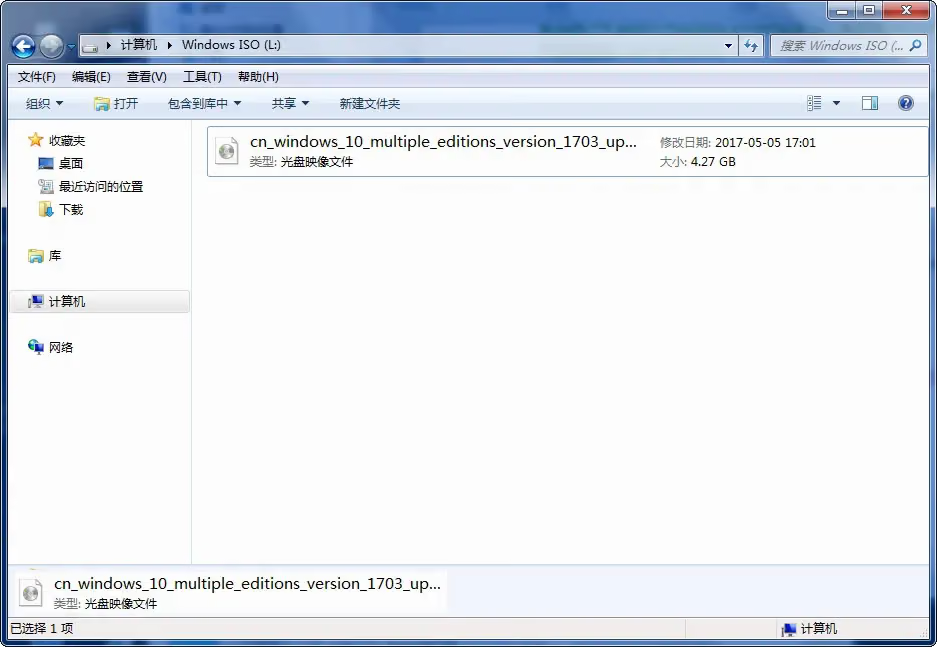
Copy the downloaded system directly to the USB drive you just made — any location is fine.
Setting Up USB Boot
Plug the prepared USB drive into the computer you want to install the system on. Below are the quick boot keys for common motherboards: ASUS boot shortcut: F8 Gigabyte, MSI, Colorful, Onda, ASRock, Biostar: press F11 Brand machines: HP, HP, Dell, Lenovo, Hasee: press F12
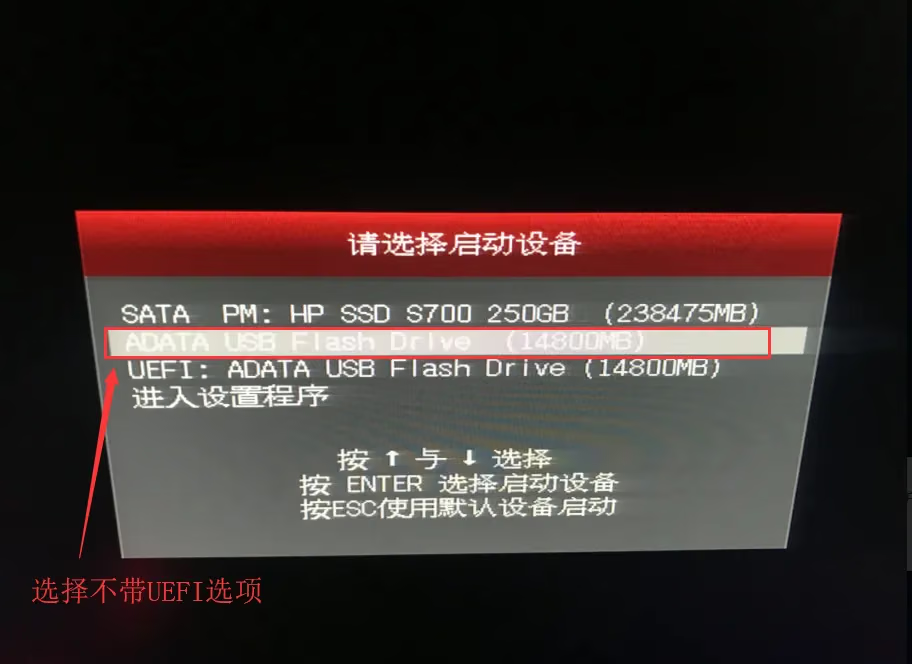
Below is a reference image of the ASUS motherboard quick boot menu for entering USB PE. This is a boot device selection menu; choose the USB drive we just created, ADATA USB Flash Drlve(14800MB), and press Enter.
(Note: choose the option without UEFI.)
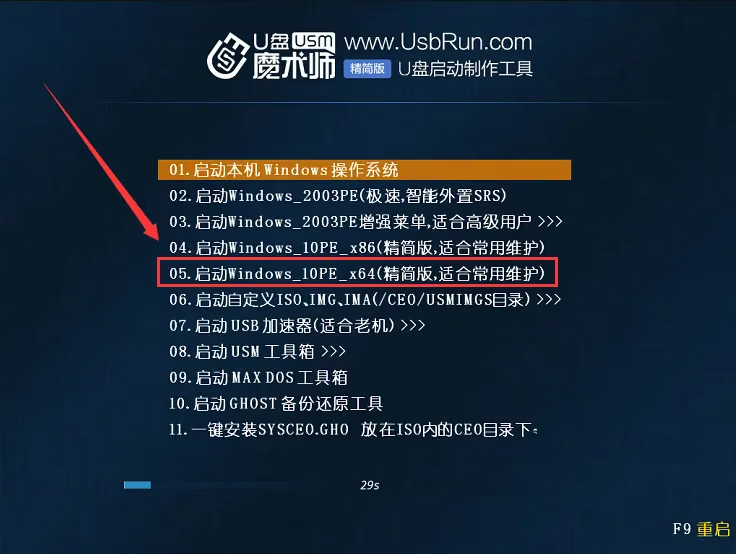
When the USB boot screen appears, choose 启动WIN10 PE X 64 as shown below. Don’t select anything else.
Partitioning and Installing the System
After entering PE, we need to partition the new hard drive.
[If it’s an old hard drive that’s already partitioned, you can skip this step and install the system directly.]
Here we use a Samsung 120G SSD. Generally, to get the maximum performance out of an SSD, you need to enable AHCI mode in the BIOS in advance and choose 4K alignment when partitioning. Also, the 3.0 data cable and the motherboard must support 3.0 ports.
AHCI mode is built into the motherboard; all new motherboards support it. If some older motherboards are set to IDE, configure it in advance. Motherboards like ASUS and Gigabyte B250 and above default to AHCI mode, so no change is needed.
First, open the DG partition toolbox to partition, as shown below:
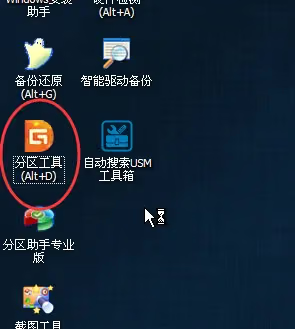
After clicking the partition tool, you’ll see your hard drive. Select the new hard drive and click 快速分区 at the top, as shown below:
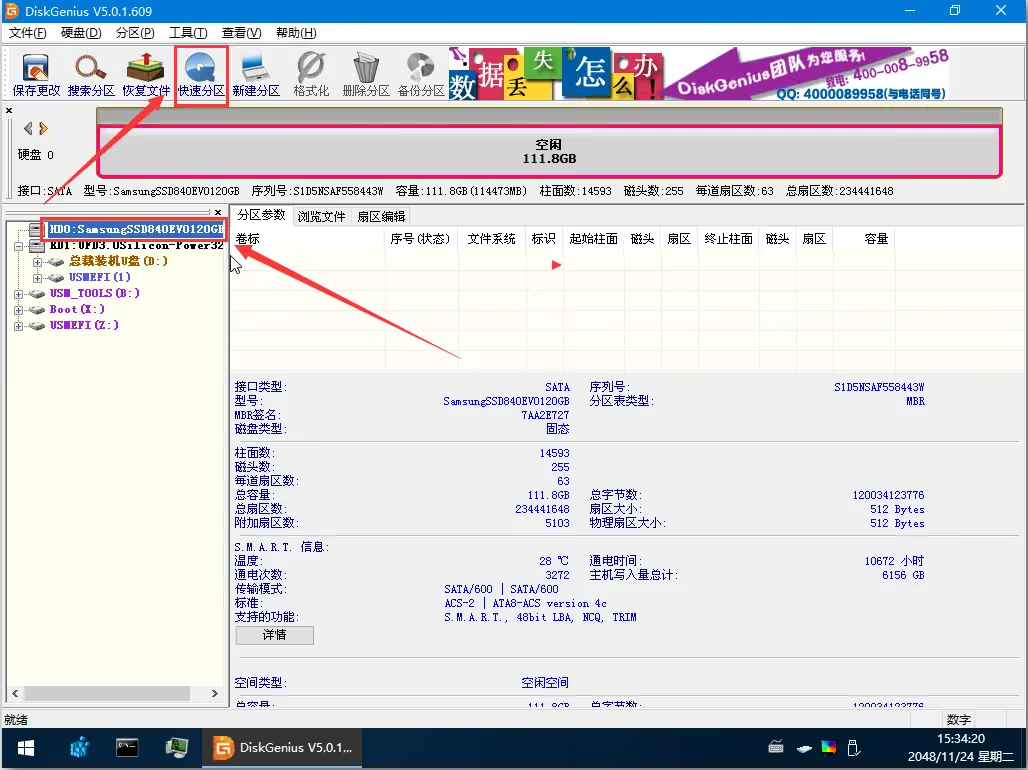
On the new page, you can choose how many partitions to create and how much capacity each one gets — fill in whatever you like. Don’t change anything else. In the bottom-right corner is the 4K alignment; just check it, as shown below:
Note: SSDs need 4K alignment; mechanical hard drives don’t need it for now. Choosing it for an HDD will prevent the system from booting.
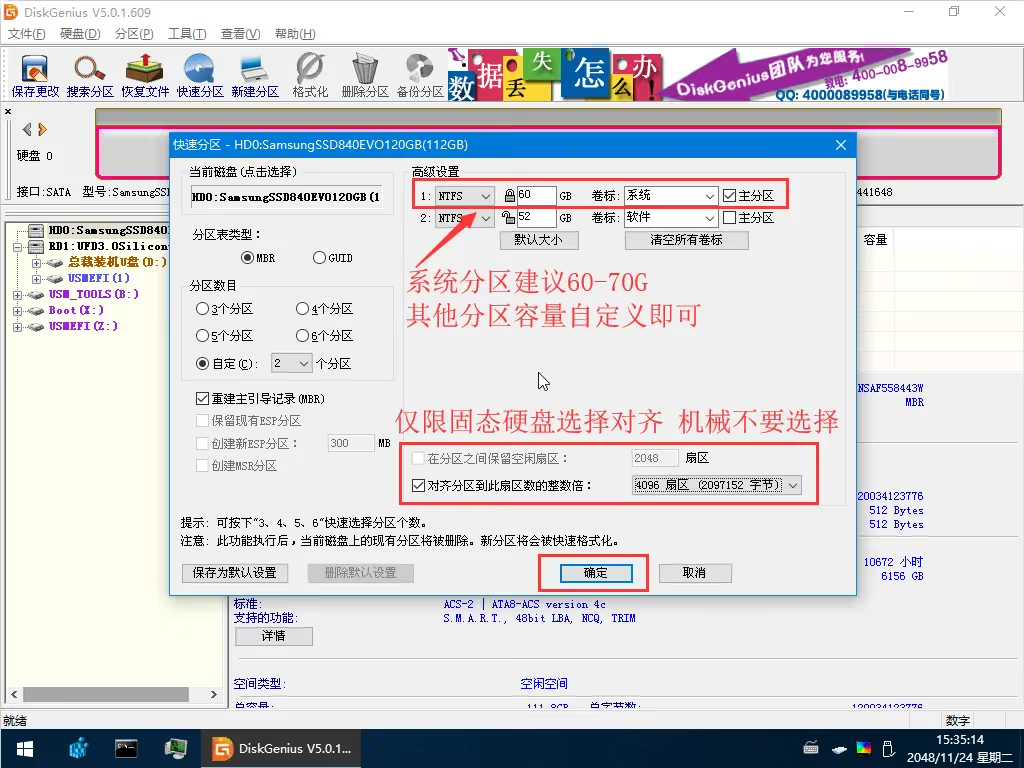
After partitioning, close the partition window and proceed to the next step.
Installing the System Image
Open 电脑店一键还原 on the desktop, as shown below:
- ① Select the system image file, wait for it to be auto-recognized and mounted, then select the system version again.
- ② Select the partition where the system will be installed. [You can identify the partition by its capacity and format info.]
- ③ Click the execute button, wait for the installation to complete, then restart and unplug the USB drive.
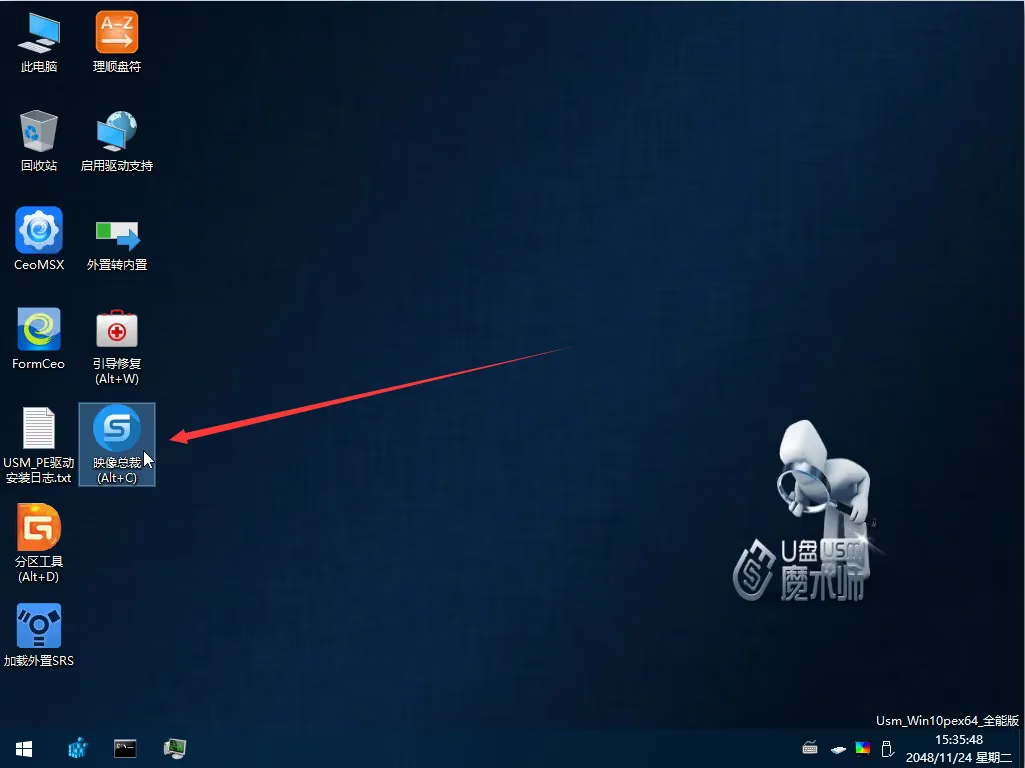
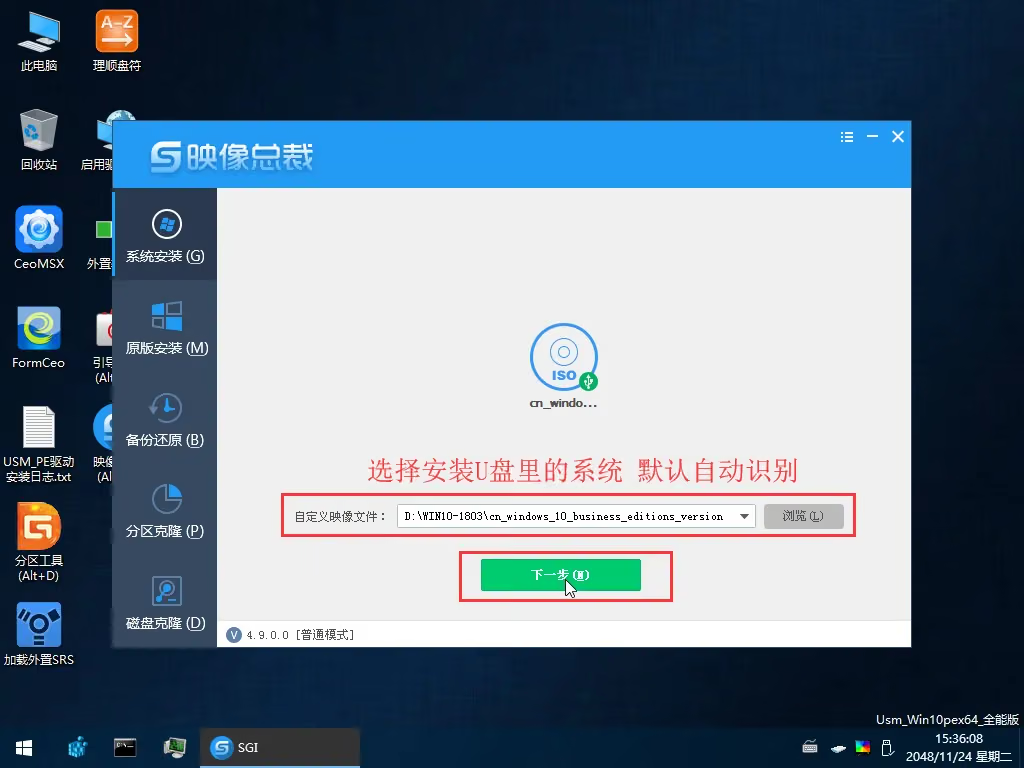
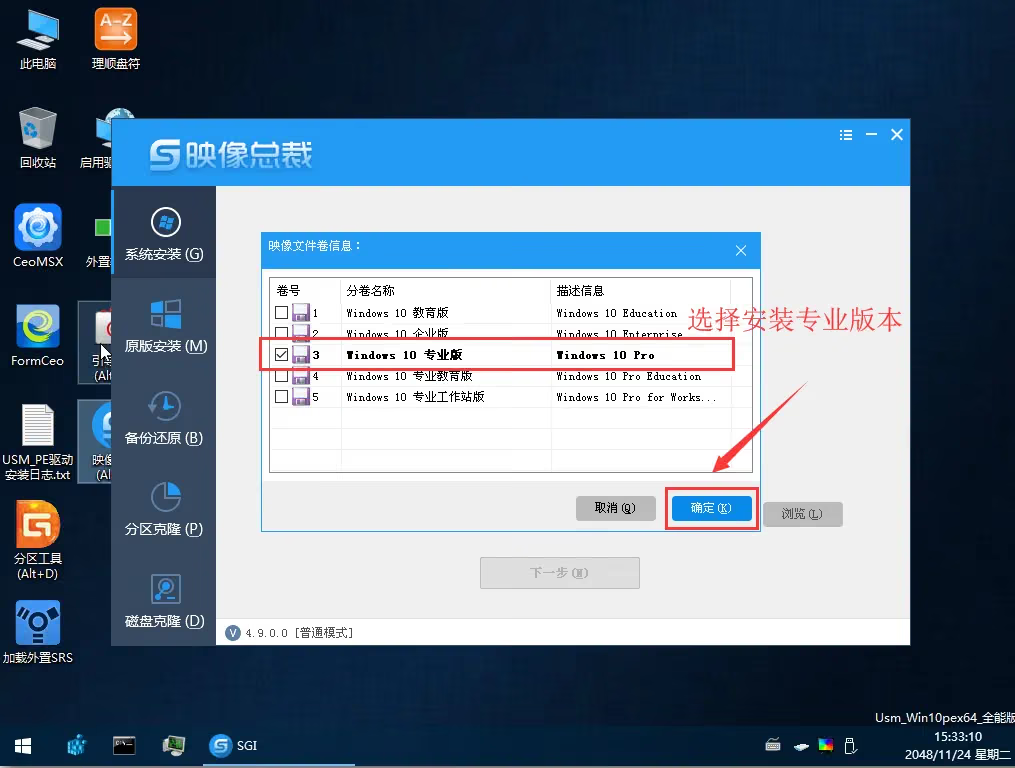
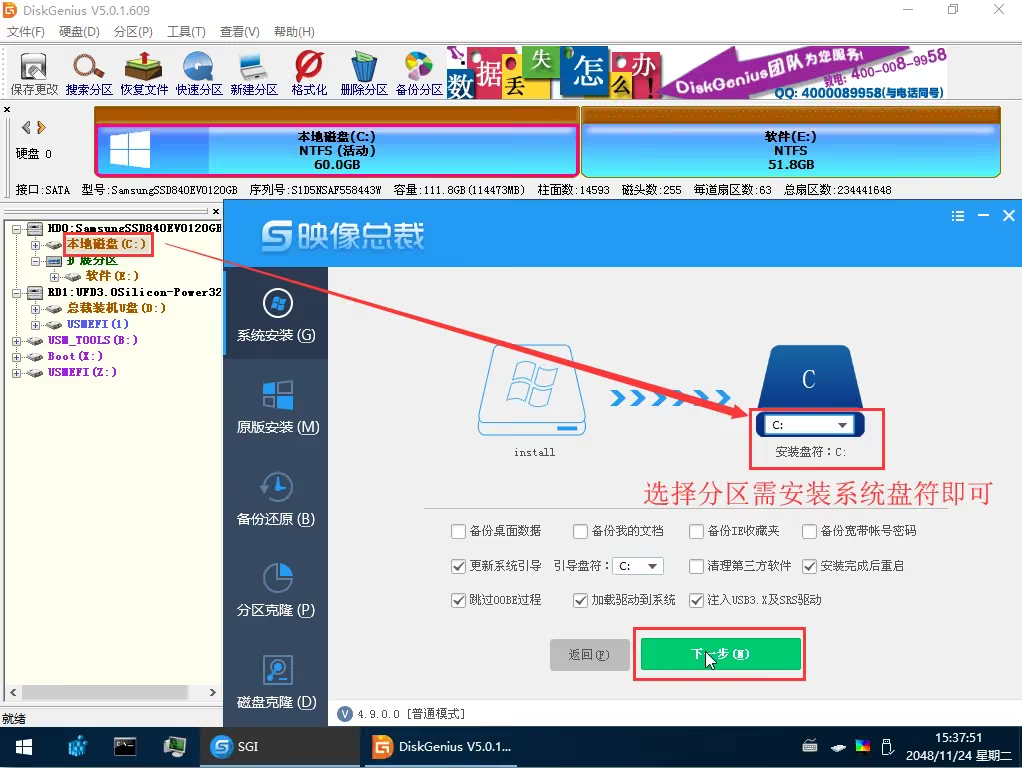
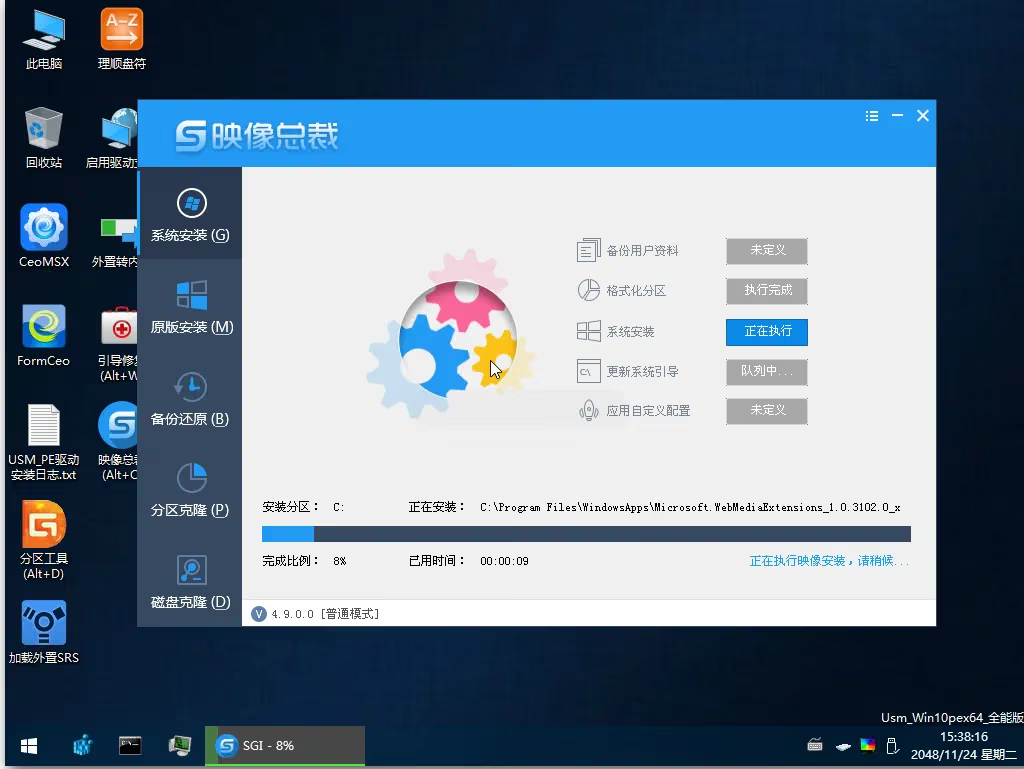
PS: When the progress bar finishes and it prompts you to restart, be sure to unplug the USB drive before restarting! Then you can proceed into the system installation process normally. Wait about 5-10 minutes for it to finish, restart, and it will work normally.
Disclaimer
(This work is only for users to exchange system installation experience, or to temporarily test PC hardware. Please delete it within 24 hours after installation. If you need long-term use, please purchase genuine systems and software.)
Activating the System
Activation toolbox download links:
win7 click here link: https://pan.baidu.com/s/1iWVZW534JKqAd9mu1B0VzQ extract code: u71b
win8 link: https://pan.baidu.com/s/1M6t2nGwlBM4qXWT_imcI-A extract code: tkhb
win10 link: https://pan.baidu.com/s/1Tr-0PYBVmQFR0HNvzZ5yjA extract code: a3mt
Installing the ASUS Motherboard Network Card Driver
Tutorial link: http://note.youdao.com/noteshare?id=40345f63671ea936740aa771cca2d438
For other driver issues, it’s recommended to go online and download: 驱动精灵 Standard Edition
Summary
I always forget some of the steps when installing a system, so I’m recording them here.
Reference: PE Installation Tutorial U-Disk Burning Tutorial for Installing Original Systems I tell you — a magical image download site, absolutely clean