
Preface
This post carries strong personal sentiment; if you feel uncomfortable reading it, please close it as soon as possible. This post is only a personal learning record. Reposting or sharing within the license terms is welcome; please respect copyright and keep the original link. Thank you for your understanding and cooperation. If you find this site helpful, you can subscribe via RSS. Thanks for your support!
SwiftUI Course
Recently I’ve been listening to a SwiftUI course taught by a female blogger from Taiwan Province of our motherland on Bilibili (her voice is very sweet/dia). She explains it quite well, so I’m recording what I’ve learned:
Main contents

1-5 Chapter 1 supplement: some View, layout rules, design details - SwiftUI for beginners
- SwiftUI basic architecture
- Views and modifiers (which are just functions/methods on views)
- The @State property wrapper
- Transform and transition animations — SwiftUI has default transition and transform display animations
- View identity
- How SwiftUI does layout and View’s underlying types, especially what
some Viewis all about
Quite good indeed
Code record
1
2
3
4
5
6
7
8
9
10
11
12
13
14
15
16
17
18
19
20
21
22
23
24
25
26
27
28
29
30
31
32
33
34
35
36
37
38
39
40
41
42
43
44
45
46
47
48
49
50
51
52
53
54
55
56
57
58
59
60
61
62
63
64
65
66
67
68
//
//  ContentView.swift
//  FoodPicker
//
//  Created by sunyazhou on 2023/4/16.
//

import SwiftUI

struct ContentView: View {
    let food = ["汉堡", "沙拉", "披萨", "意大利面", "鸡腿便当", "刀削面", "火锅", "牛肉面", "关东煮"]
    @State private var selectedFood: String?
    var body: some View {
        VStack(spacing: 30) {
            Image("dinner")
                .resizable()
                .aspectRatio(contentMode: .fit)
            Text("今天吃什么?")
                .bold()
            if selectedFood != .none {
                Text(selectedFood ?? "")
                    .font(.largeTitle)
                    .bold()
                    .foregroundColor(.green)
                    .id(selectedFood)
                    .transition(.asymmetric(
                        insertion:.opacity
                                  .animation(.easeInOut(duration: 0.5).delay(0.2)),
                        removal:.opacity
                                .animation(.easeInOut(duration: 0.4))))
            }

            Button {
//                withAnimation {
//                }
                selectedFood = food.shuffled().filter {$0 != selectedFood }.first
            } label: {
                Text(selectedFood == .none ? "告诉我!": "换一个").frame(width: 200, alignment: .center)
                    .animation(.none, value: selectedFood)
                    .transformEffect(.identity)
            }.padding(.bottom, -15)

            Button {
//                withAnimation {
//                    selectedFood = .none
//                }
                selectedFood = .none
            } label: {
                Text("重置").frame(width: 200)
            }.buttonStyle(.bordered)
        }
        .padding()
        .frame(maxHeight: .infinity)
        .background(Color(.secondarySystemBackground))
        .font(.title)
        .buttonStyle(.borderedProminent)
        .buttonBorderShape(.capsule)
        .controlSize(.large)
        .animation(.easeInOut(duration: 0.6), value: selectedFood)
    }
}

struct ContentView_Previews: PreviewProvider {
    static var previews: some View {
        ContentView()
    }
}
There are a few important things here
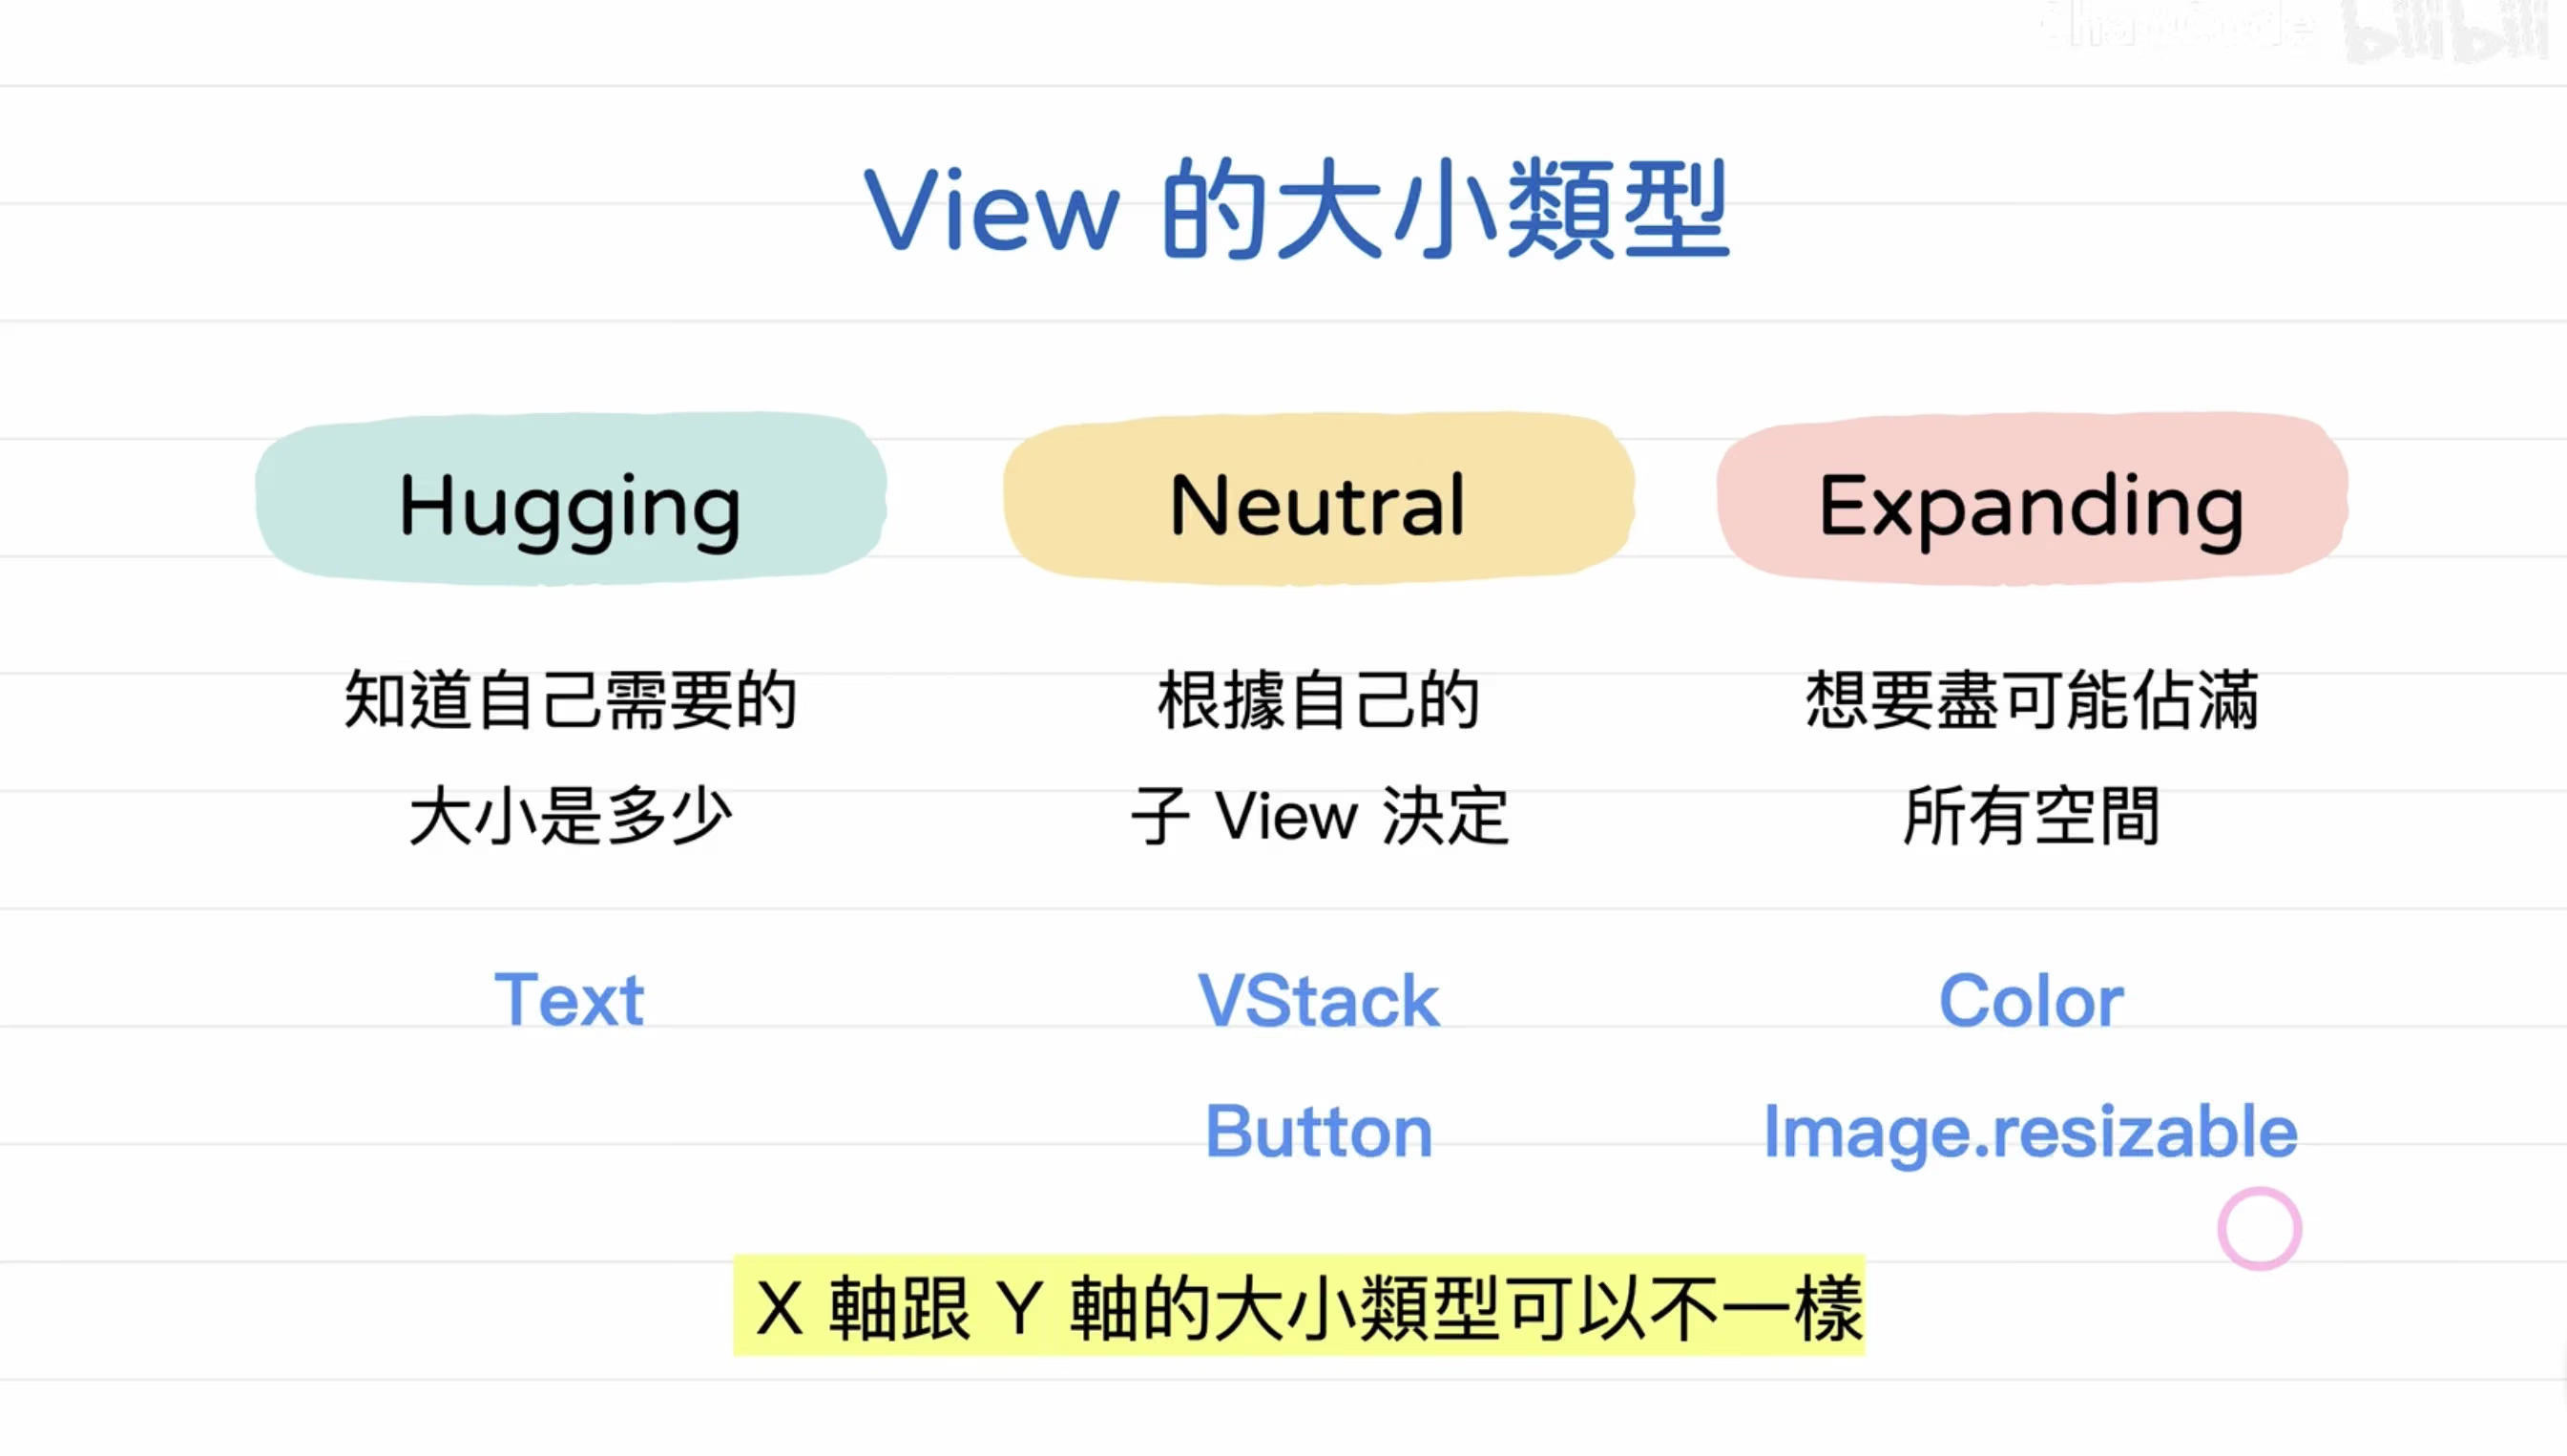
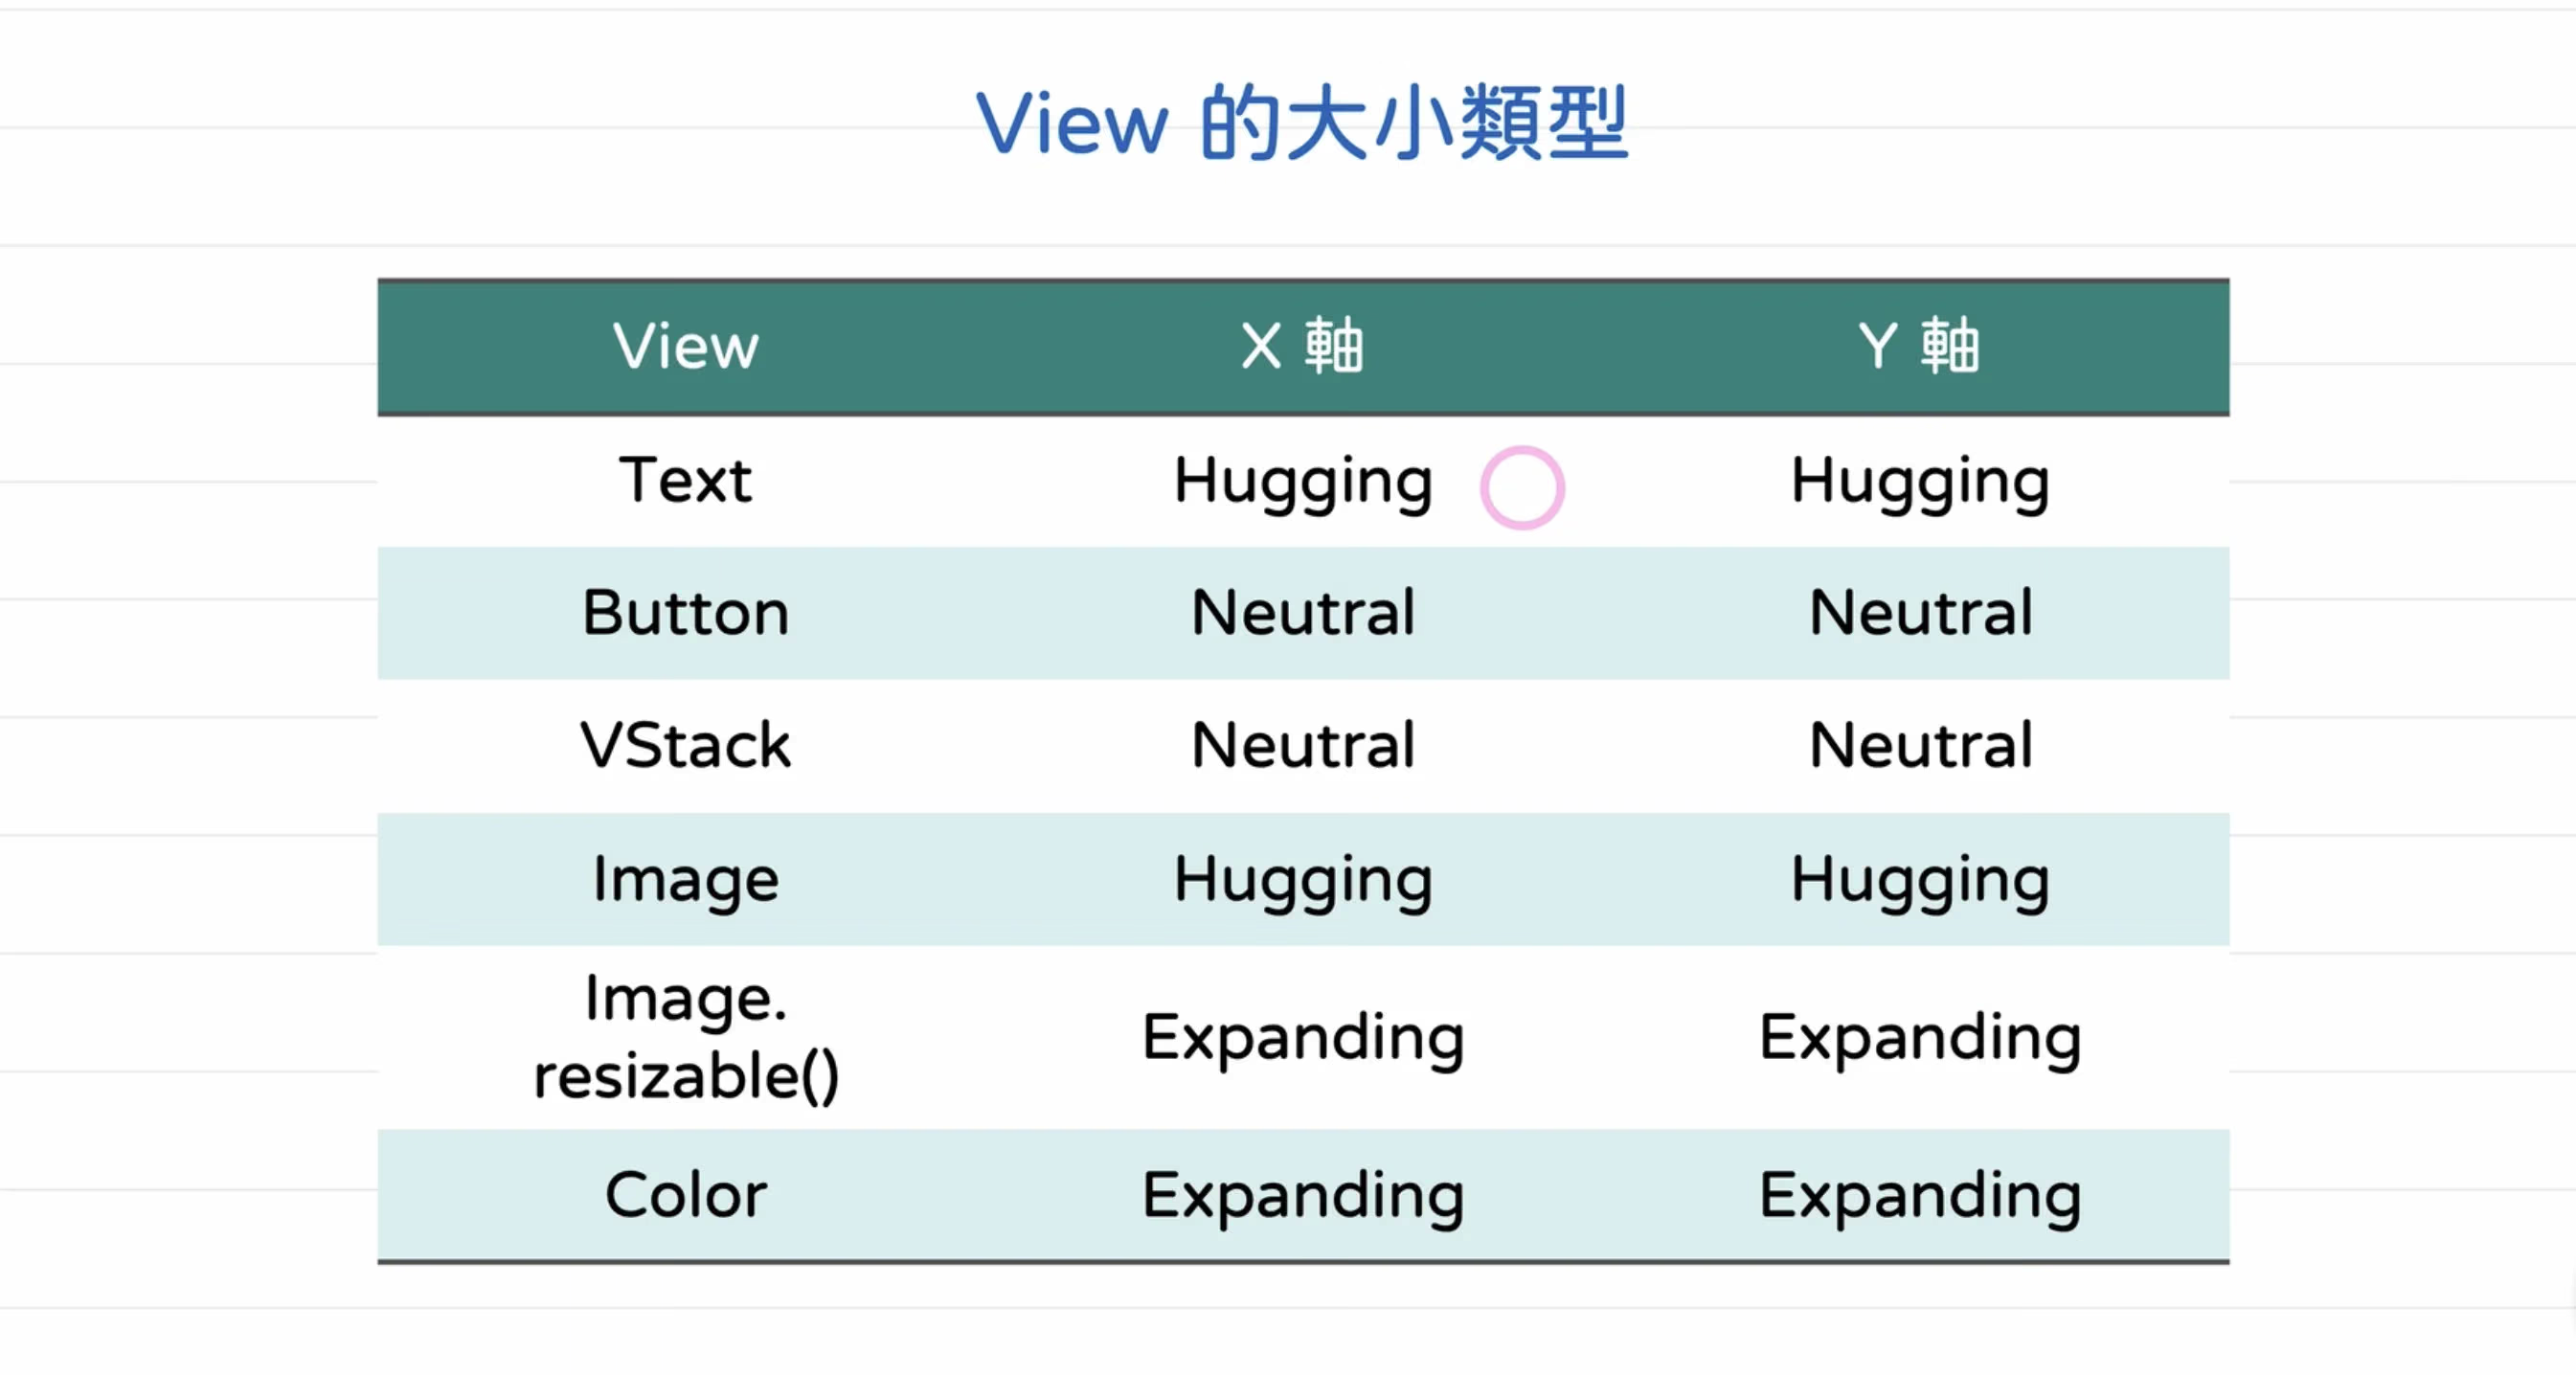
- Dynamic type Human Interface Guidelines
- Screen scale factor Screen size and Scale factor
Some of the animations here are very nice; I won’t go into detail here. I’ve recorded some code demos in the links below.
Summary
Work keeps me very busy, so I only have time on weekends to record some important and easily forgotten content. It’s pretty rough, hope you don’t mind.
This post’s demo
1-5 Chapter 1 supplement: some View, layout rules, design details - SwiftUI for beginners