
Preface
This article carries strong personal sentiments. If you find it uncomfortable to read, please close it. This article is for personal learning records only. You’re welcome to repost or share it within the scope of the license — please respect the copyright and keep the original link. Thank you for your understanding and cooperation. If you find this site helpful, you can subscribe via RSS. Thanks for your support!
SwiftUI Course
I’ve been consistently learning SwiftUI lately. Over the weekend, I finished going through Chapter 4 — and by “going through” I mean hands-on practice plus tutorial study. Here I’m recording some easily forgotten content.
Main Topics Include
- SwiftUI components corresponding to similar UIKit components
- @AppStorage — UserDefault property wrapper
- .environment(.colorScheme, shouldUseDarkMode ? .dark : .light)
- Encoding and decoding (serializing to JSON)
- Implementing the Codable protocol to auto-generate
DecoderandEncoder
SwiftUI Components Corresponding to UIKit Components
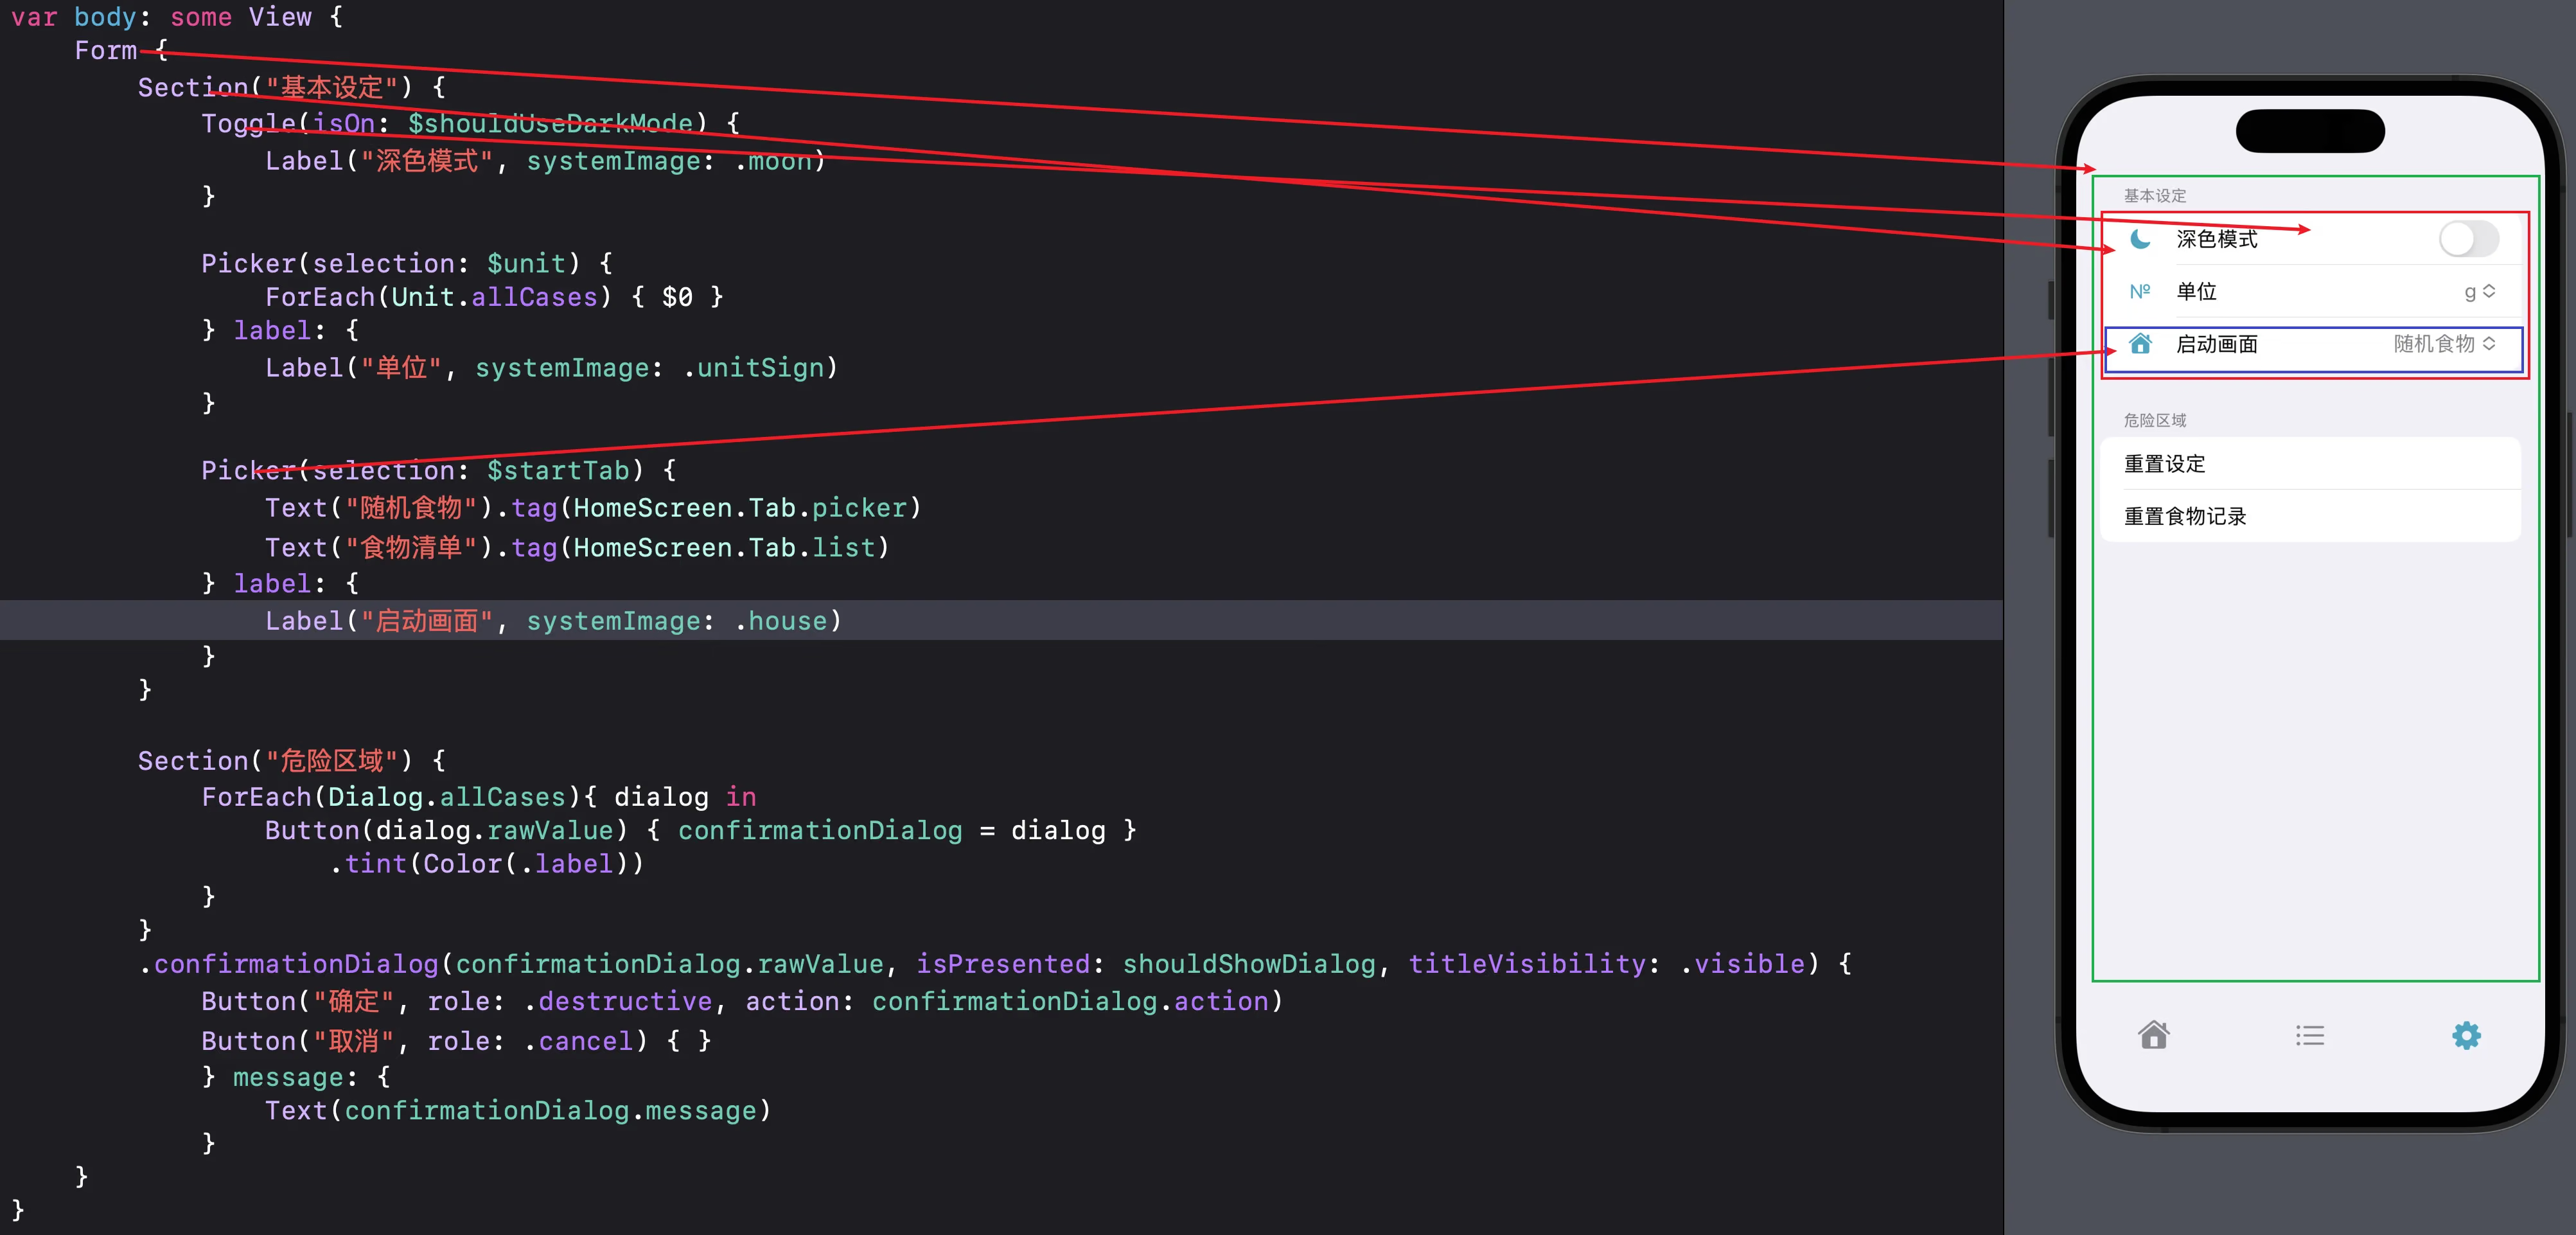
Below is the UI diagram for this SwiftUI framework:
1
2
3
4
5
6
7
8
9
10
11
12
13
14
15
16
17
18
19
20
21
22
23
24
25
26
27
28
29
30
31
32
33
34
35
var body: some View {
        Form {
            Section("基本设定") {
                Toggle(isOn: $shouldUseDarkMode) {
                    Label("深色模式", systemImage: .moon)
                }

                Picker(selection: $unit) {
                    ForEach(Unit.allCases) { $0 }
                } label: {
                    Label("单位", systemImage: .unitSign)
                }

                Picker(selection: $startTab) {
                    Text("随机食物").tag(HomeScreen.Tab.picker)
                    Text("食物清单").tag(HomeScreen.Tab.list)
                } label: {
                    Label("启动画面", systemImage: .house)
                }
            }

            Section("危险区域") {
                ForEach(Dialog.allCases){ dialog in
                    Button(dialog.rawValue) { confirmationDialog = dialog }
                        .tint(Color(.label))
                }
            }
            .confirmationDialog(confirmationDialog.rawValue, isPresented: shouldShowDialog, titleVisibility: .visible) {
                Button("确定", role: .destructive, action: confirmationDialog.action)
                Button("取消", role: .cancel) { }
                } message: {
                    Text(confirmationDialog.message)
                }
        }
    }
- Form –> Similar to UITableView in UIKit
- Section –> Similar to UITableView sections in UIKit, but in SwiftUI it’s an independent container
- Toggle/Picker/Button –> Similar to UITableViewCell in UIKit, with switches, pickers, and buttons already laid out
@AppStorage — UserDefault Property Wrapper
This @AppStorage is SwiftUI’s wrapper for UserDefault, used for local storage similar to NSUserDefault — storing key and value or object, ultimately archived to a plist file.
For example:
1
@AppStorage("shouldUseDarkMode") private var shouldUseDarkMode: Bool = false
When you declare a variable called shouldUseDarkMode in SwiftUI with a default value of false, when UserDefault retrieves a value, this shouldUseDarkMode member variable will be the retrieved real value. If nothing is retrieved, false serves as the fallback default.
@AppStorage(“shouldUseDarkMode”) — the string here is the key used when retrieving the value from UserDefault.
.environment Environment Variable
1
2
3
4
@AppStorage(.shouldUseDarkMode) private var shouldUseDarkMode: Bool = false //深色模式
@AppStorage(.unit) private var unit: Unit = .gram
@AppStorage(.startTab) private var startTab: HomeScreen.Tab = .picker
@State private var confirmationDialog: Dialog = .inactive
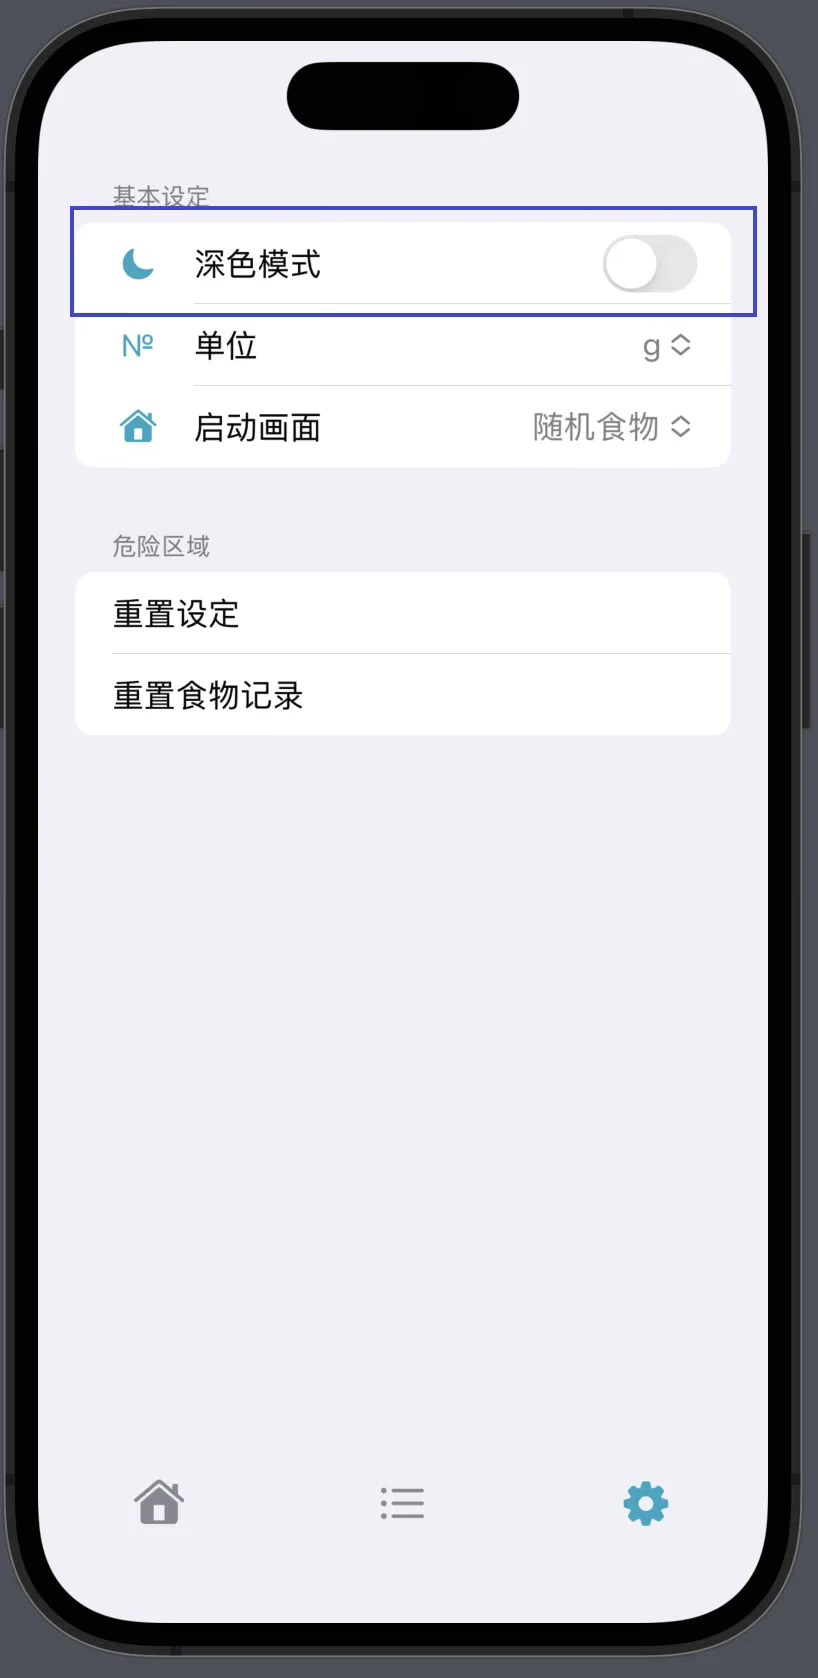
The Toggle here is the switch we learned about in UIKit. The value it triggers is directly linked to @AppStorage("shouldUseDarkMode"), and it also updates the member variable. All these operations are handled by SwiftUI for us.
When this operation is done, it should take effect immediately.
Now we need to modify this code in the project:
1
2
3
4
5
6
7
8

var body: some View {
    TabView(selection: $tab) {
        ForEach(Tab.allCases, id: \.self) { $0 }
    }
    .environment(\.colorScheme, shouldUseDarkMode ? .dark : .light)
}
Although this change takes effect immediately, it doesn’t apply to global ViewControllers or similar views. This change only affects the top-level VC in the responder chain. If some DetailVC is presented, it won’t be controlled by this environment.
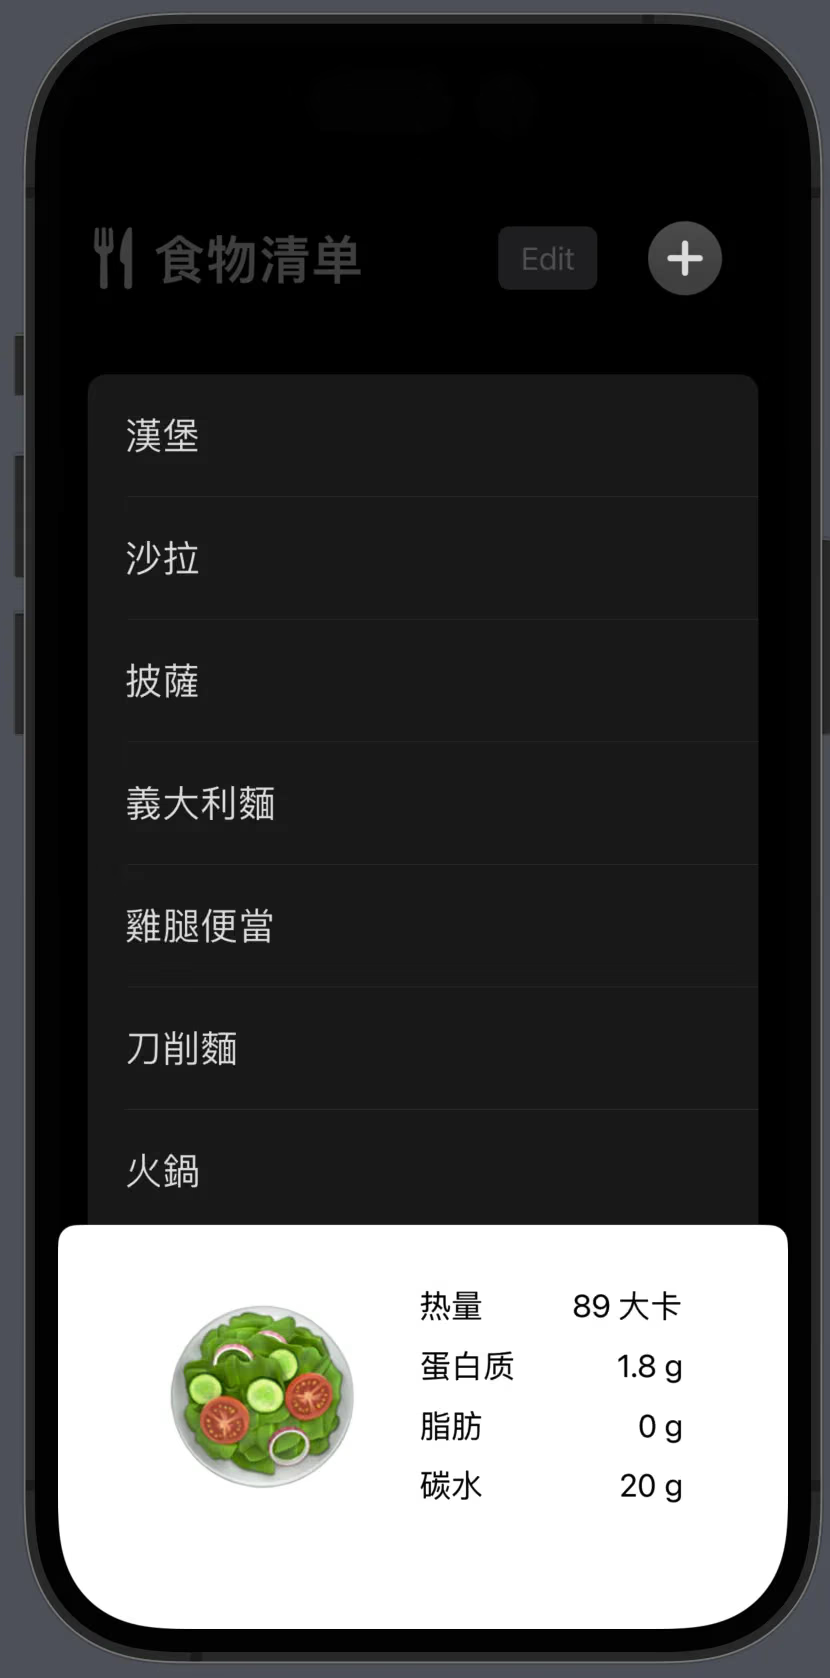
To solve this problem, you need to wrap it at the top level using the following code, and use the preferredColorScheme() function for the change to take effect globally:
1
2
3
4
5
6
NavigationStack {
    TabView(selection: $tab) {
        ForEach(Tab.allCases, id: \.self) { $0 }
    }
    .preferredColorScheme(shouldUseDarkMode ? .dark : .light)
}
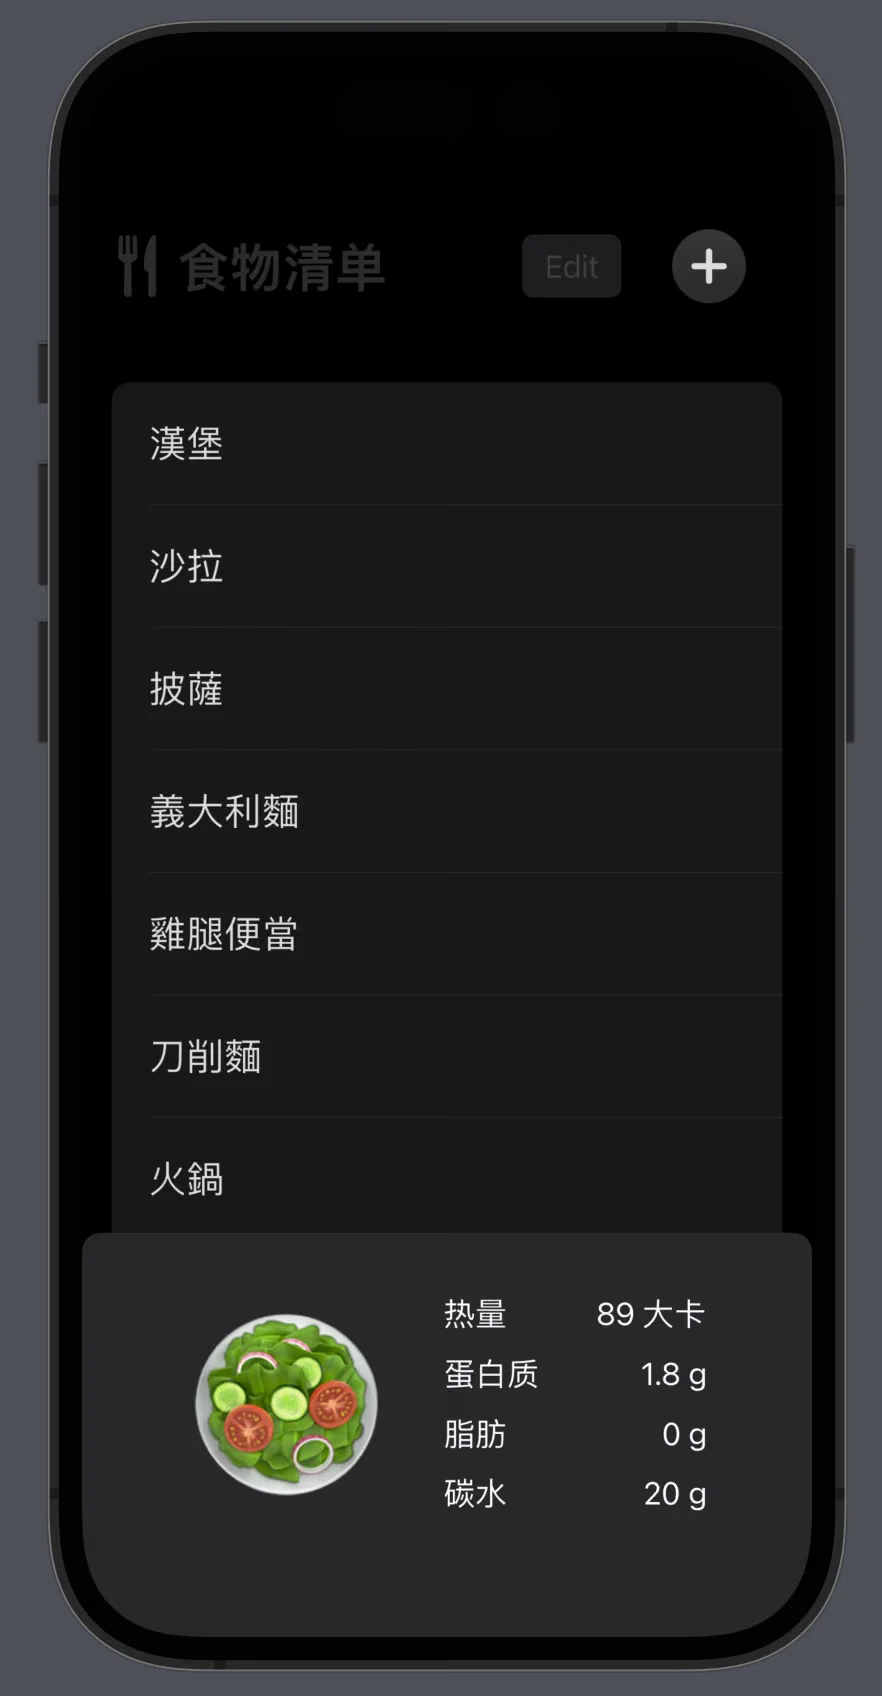
That’s the technique covered in this section.
Complete code:
1
2
3
4
5
6
7
8
9
10
11
12
13
struct HomeScreen: View {
    @AppStorage("shouldUseDarkMode") var shouldUseDarkMode = false
    @State var tab: Tab = .settings
    var body: some View {
        NavigationStack {
            TabView(selection: $tab) {
                ForEach(Tab.allCases, id: \.self) { $0 }
            }
//            .environment(\.colorScheme, shouldUseDarkMode ? .dark : .light)
            .preferredColorScheme(shouldUseDarkMode ? .dark : .light)
        }
    }
}
Encoding and Decoding (Serializing to JSON)
All the code above uses @AppStorage to store basic data types. But what if it’s a Person object?
To be used with @AppStorage (i.e., UserDefault), it must implement encoding and decoding. Similar to how NSObject needs to conform to the Copy protocol, in Swift this is a synthesized protocol called Codable, which includes Decodable & Encodable.
Code below:
1
2
3
4
5
6
7
8
9
10
11
12
13
14
15
16
17
18
19
struct Person : Codable {
    var name: String
    var age: Int
}

//编码 调用时
let person = Person(name: "sunyazhou.com", age: 33)
let data: Data = try! JSONEncoder().encode(person)
let string: String = try! String(data: data, encoding: .utf8) ?? ""
print(string)  //输出; {"name":"sunyazhou.com","age":33}

//解码调用时
let string = """
{"name":"sunyazhou.com","age":33}
"""
let data: Data = string.data(using: .utf8)!
let person: Person = try! JSONDecoder().decode(Person.self, from: data)
print(person)  //输出:Person(name: "sunyazhou.com", age: 33)
Implementing Codable Protocol to Auto-generate Decoder and Encoder
Xcode 14 and later can automatically generate encoding and decoding for structs.
When we hold command+click on the Person struct, a list appears:
As shown below:
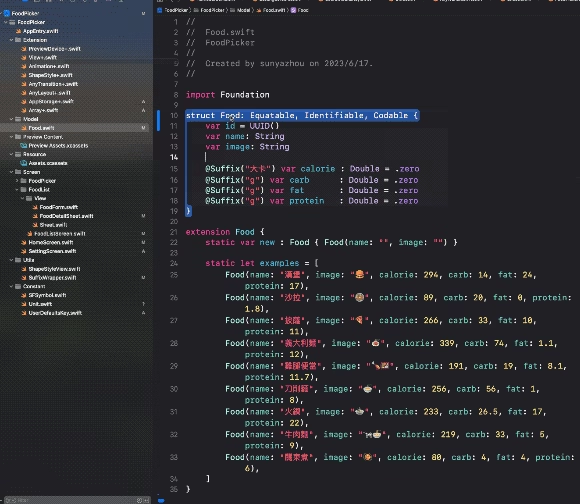
Clicking “Add Explicit Codable Implementation” will automatically generate the following for Person:
1
2
3
4
5
6
7
8
9
10
11
12
13
14
15
16
17
18
19
20
21
22
23
24
25
26
27
28
29
30
31
32
33
34
35
36
37
38
39
40
41
42
43
44
45
struct Food: Equatable, Identifiable, Codable {
    var id = UUID()
    var name: String
    var image: String

    @Suffix("大卡") var calorie : Double = .zero
    @Suffix("g") var carb      : Double = .zero
    @Suffix("g") var fat       : Double = .zero
    @Suffix("g") var protein   : Double = .zero

    enum CodingKeys: CodingKey {
        case id
        case name
        case image
        case calorie
        case carb
        case fat
        case protein
    }

    init(from decoder: Decoder) throws {
        let container: KeyedDecodingContainer<Food.CodingKeys> = try decoder.container(keyedBy: Food.CodingKeys.self)

        self.id = try container.decode(UUID.self, forKey: Food.CodingKeys.id)
        self.name = try container.decode(String.self, forKey: Food.CodingKeys.name)
        self.image = try container.decode(String.self, forKey: Food.CodingKeys.image)
        self._calorie = try container.decode(Suffix.self, forKey: Food.CodingKeys.calorie)
        self._carb = try container.decode(Suffix.self, forKey: Food.CodingKeys.carb)
        self._fat = try container.decode(Suffix.self, forKey: Food.CodingKeys.fat)
        self._protein = try container.decode(Suffix.self, forKey: Food.CodingKeys.protein)

    }

    func encode(to encoder: Encoder) throws {
        var container: KeyedEncodingContainer<Food.CodingKeys> = encoder.container(keyedBy: Food.CodingKeys.self)

        try container.encode(self.id, forKey: Food.CodingKeys.id)
        try container.encode(self.name, forKey: Food.CodingKeys.name)
        try container.encode(self.image, forKey: Food.CodingKeys.image)
        try container.encode(self._calorie, forKey: Food.CodingKeys.calorie)
        try container.encode(self._carb, forKey: Food.CodingKeys.carb)
        try container.encode(self._fat, forKey: Food.CodingKeys.fat)
        try container.encode(self._protein, forKey: Food.CodingKeys.protein)
    }
}
@Suffix()is a custom property wrapper I created for adding a default suffix to a variable’s string representation. You don’t need to worry about it here.
Note that some Xcode versions won’t generate this comprehensively because there are many extensions, such as:
1
2
3
extension Food: Codable{

}
This code is written in an extension, not where Person is declared, so Xcode won’t find it. The best approach is to write them together.
Summary
That’s my takeaway after finishing Chapter 4. It’s a bit rough, but I hope recording it will deepen my impression for future use and make it easier to share with others who need it.