

Preface
This post carries strong personal opinions. If reading it makes you uncomfortable, please close it as soon as possible. This article is only for my personal study records; you are also welcome to repost or share it within the scope of the license. Please respect the copyright and keep the original link. Thank you for your understanding and cooperation. If you find this site helpful, you can subscribe via RSS. Thanks for your support!
SwiftUI Course
I’ve kept up learning SwiftUI and have now reached Chapter 3, so I’m writing down the important parts.
Main Contents
- Presenting a child VC
- Managing icons with an enum
- Markdown can be used in comments
- How to write extensions
Presenting a child VC
In SwiftUI, you can’t really call it presenting a VC; instead, you present a view of type some View.
1
2
3
4
5
6
7
8
9
10
11
12
13
14
15
16
17
18
19
20
21
22
23
24
25
26
27
28
29
30
var foodDetailView: some View {
        VStack {
            if (shouldShowInfo) {
                Grid(horizontalSpacing: 12, verticalSpacing: 12) {
                    GridRow {
                        Text("蛋白质")
                        Text("脂肪")
                        Text("碳水")
                    }.frame(minWidth: 40)

                    Divider()
                        .gridCellUnsizedAxes(.horizontal)
                        .padding(.horizontal, -10)

                    GridRow {
                        Text(selectedFood!.$protein)
                        Text(selectedFood!.$carb)
                        Text(selectedFood!.$fat)
                    }
                }
                .font(.title3)
                .padding(.horizontal)
                .padding()
                .roudedRectBackground()
                .transition(.moveUpWithOpacity)
            }
        }
        .maxWidth()
        .clipped()
    }
Really, you just create a View and you’re done — no complicated operations needed. There is no push and pop like in UIKit, nor present and dismiss. Here it’s basically views driven by state listening: whether to show or not has changed the way we used to work.
Managing icons with an enum
When you end up using a lot of icons, you need variables that fetch images from a single unified data source. Since Swift enums can be declared with various raw types — usually strings — string-based enum cases naturally come into play.
1
2
3
4
5
6
7
8
9
10
11
12
13
14
15
16
17
18
19
20
21
22
23
24
25
26
27
import SwiftUI

enum SFSymbol: String {
    case pencil
    case plus = "plus.circle.fill"
    case chevronUp = "chevron.up"
    case chevronDown = "chevron.down"
    case xmark = "xmark.circle.fill"
    case forkAndKnife = "fork.knife"
    case info = "info.circle.fill"
}

extension SFSymbol : View {
    var body: Image {
        Image(systemName: rawValue)
    }

    func resizable() -> Image {
        self.body.resizable()
    }
}

extension Label where Title == Text, Icon == Image {
    init(_ text: String, systemImage: SFSymbol) {
        self.init(text, systemImage: systemImage.rawValue)
    }
}
Usage:
1
2
3
4
5
6
7
8
9
10
11
var addButton : some View {
        Button {
            sheet = .newFood { food.append($0) }
        } label: {
            SFSymbol.plus  //直接使用
                .font(.system(size: 50))
                .padding()
                .symbolRenderingMode(.palette)
                .foregroundStyle(.white, Color.accentColor.gradient)
        }
    }
Markdown Works in Comments
First, look at two functions:
1
2
3
4
5
6
7
8
9
10
11
12
13
14
15
16
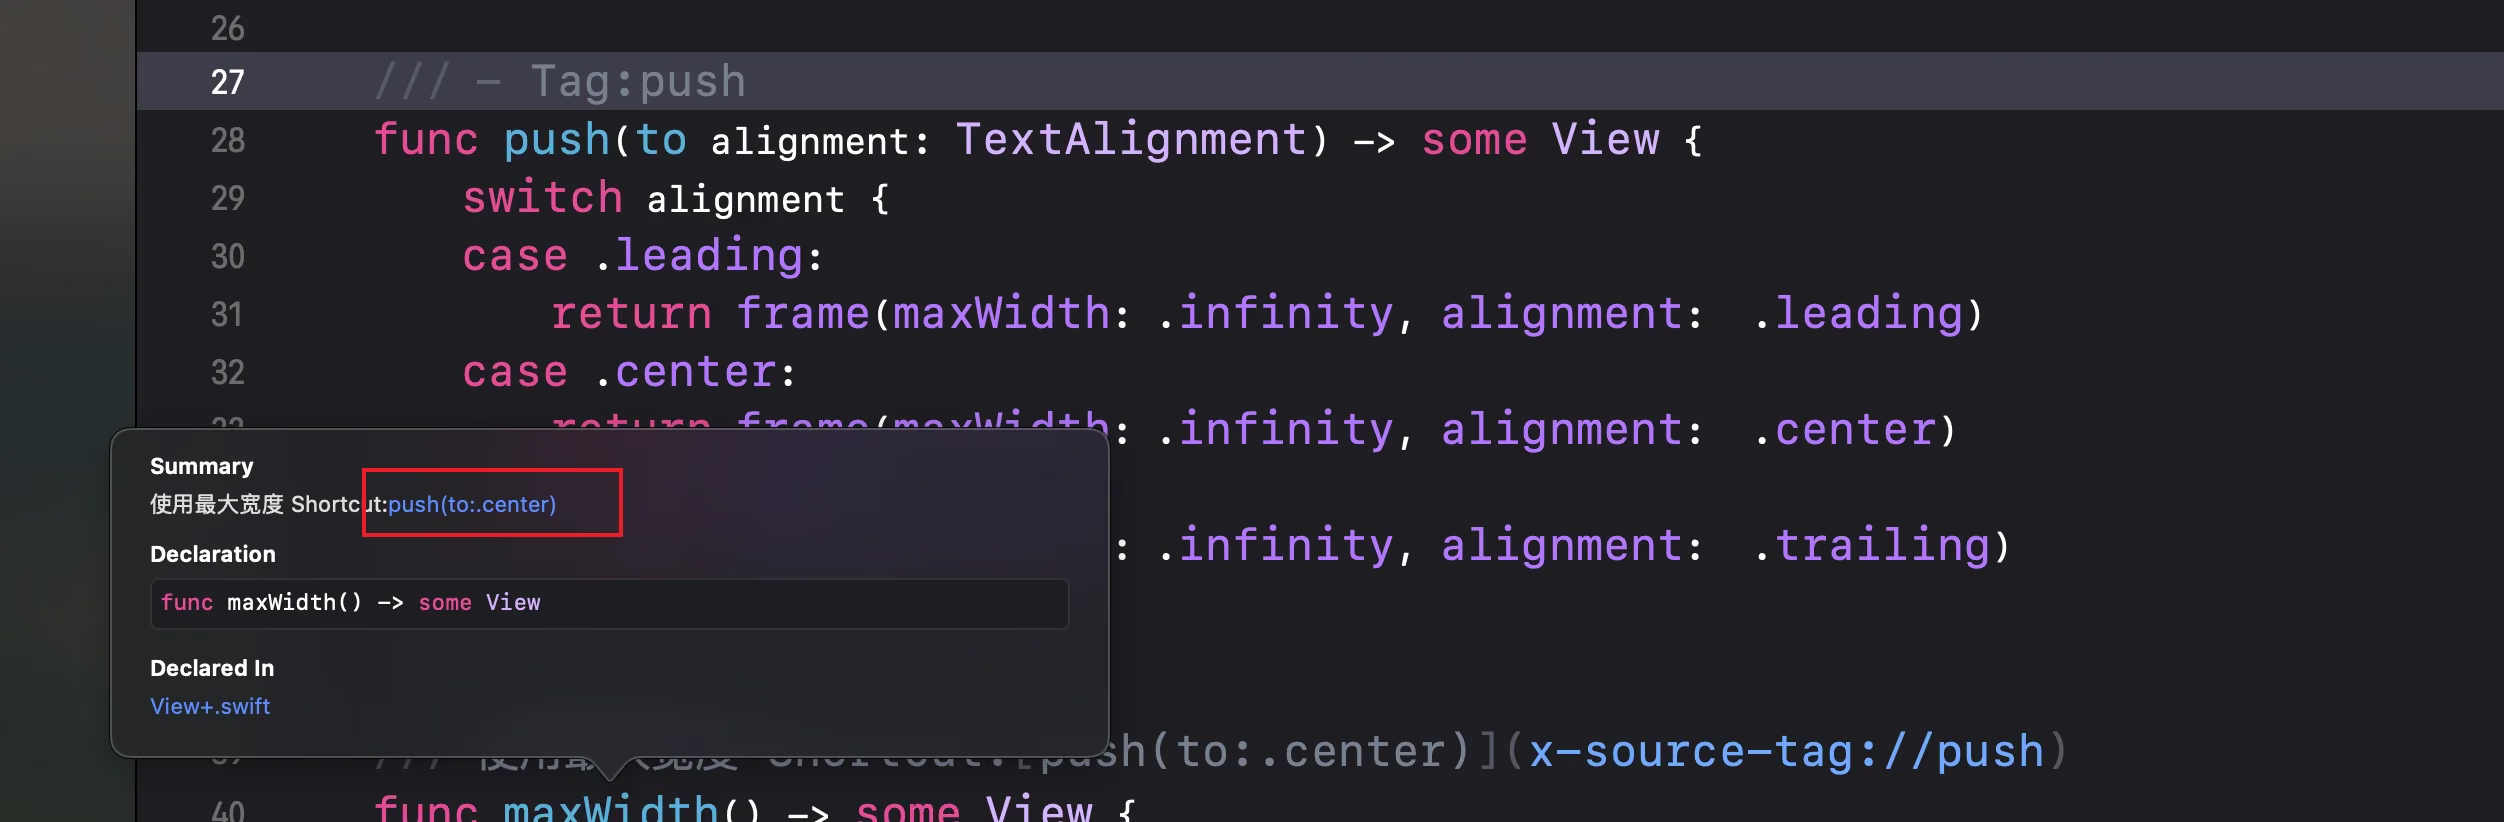
/// - Tag:push
func push(to alignment: TextAlignment) -> some View {
    switch alignment {
    case .leading:
        return frame(maxWidth: .infinity, alignment:  .leading)
    case .center:
        return frame(maxWidth: .infinity, alignment:  .center)
    case .trailing:
        return frame(maxWidth: .infinity, alignment:  .trailing)
    }
}

/// Use maximum width Shortcut:[push(to:.center)](x-source-tag://push)
func maxWidth() -> some View {
    push(to: .center)
}
Note: /// Use maximum width Shortcut:[push(to:.center)](x-source-tag://push)
Have you noticed? Comments support Markdown out of the box.
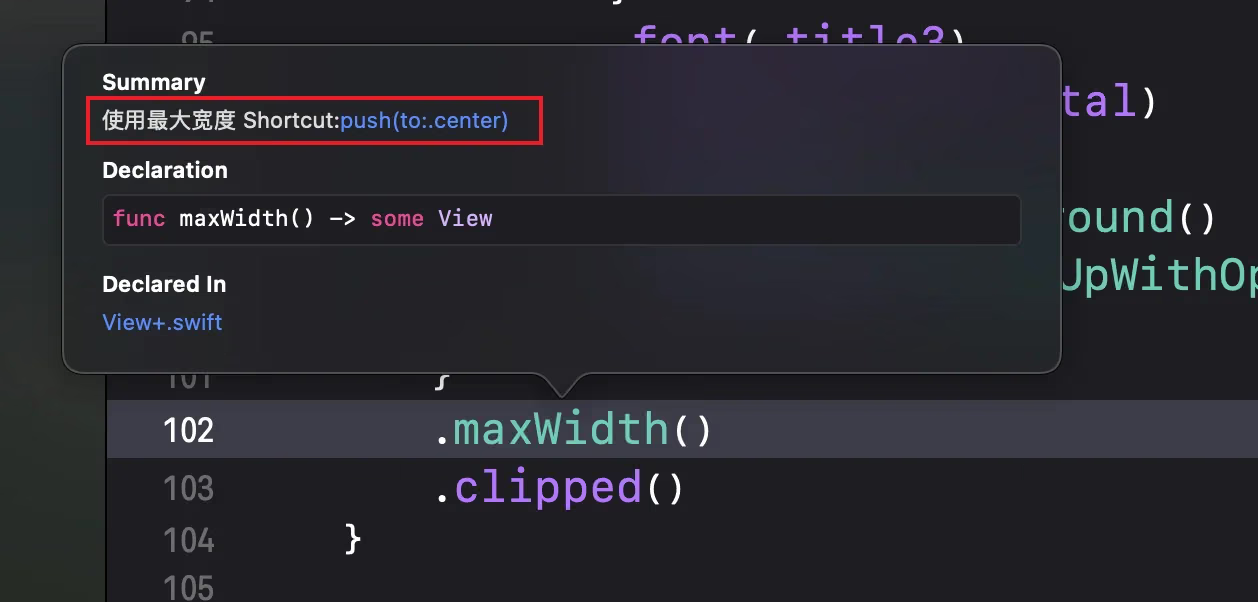
The blue jump-intercepted function declaration is /// - Tag:push. The Tag must be written with exact casing and no spaces; it uses the x-source-tag scheme to jump to push.
How to Write extensions
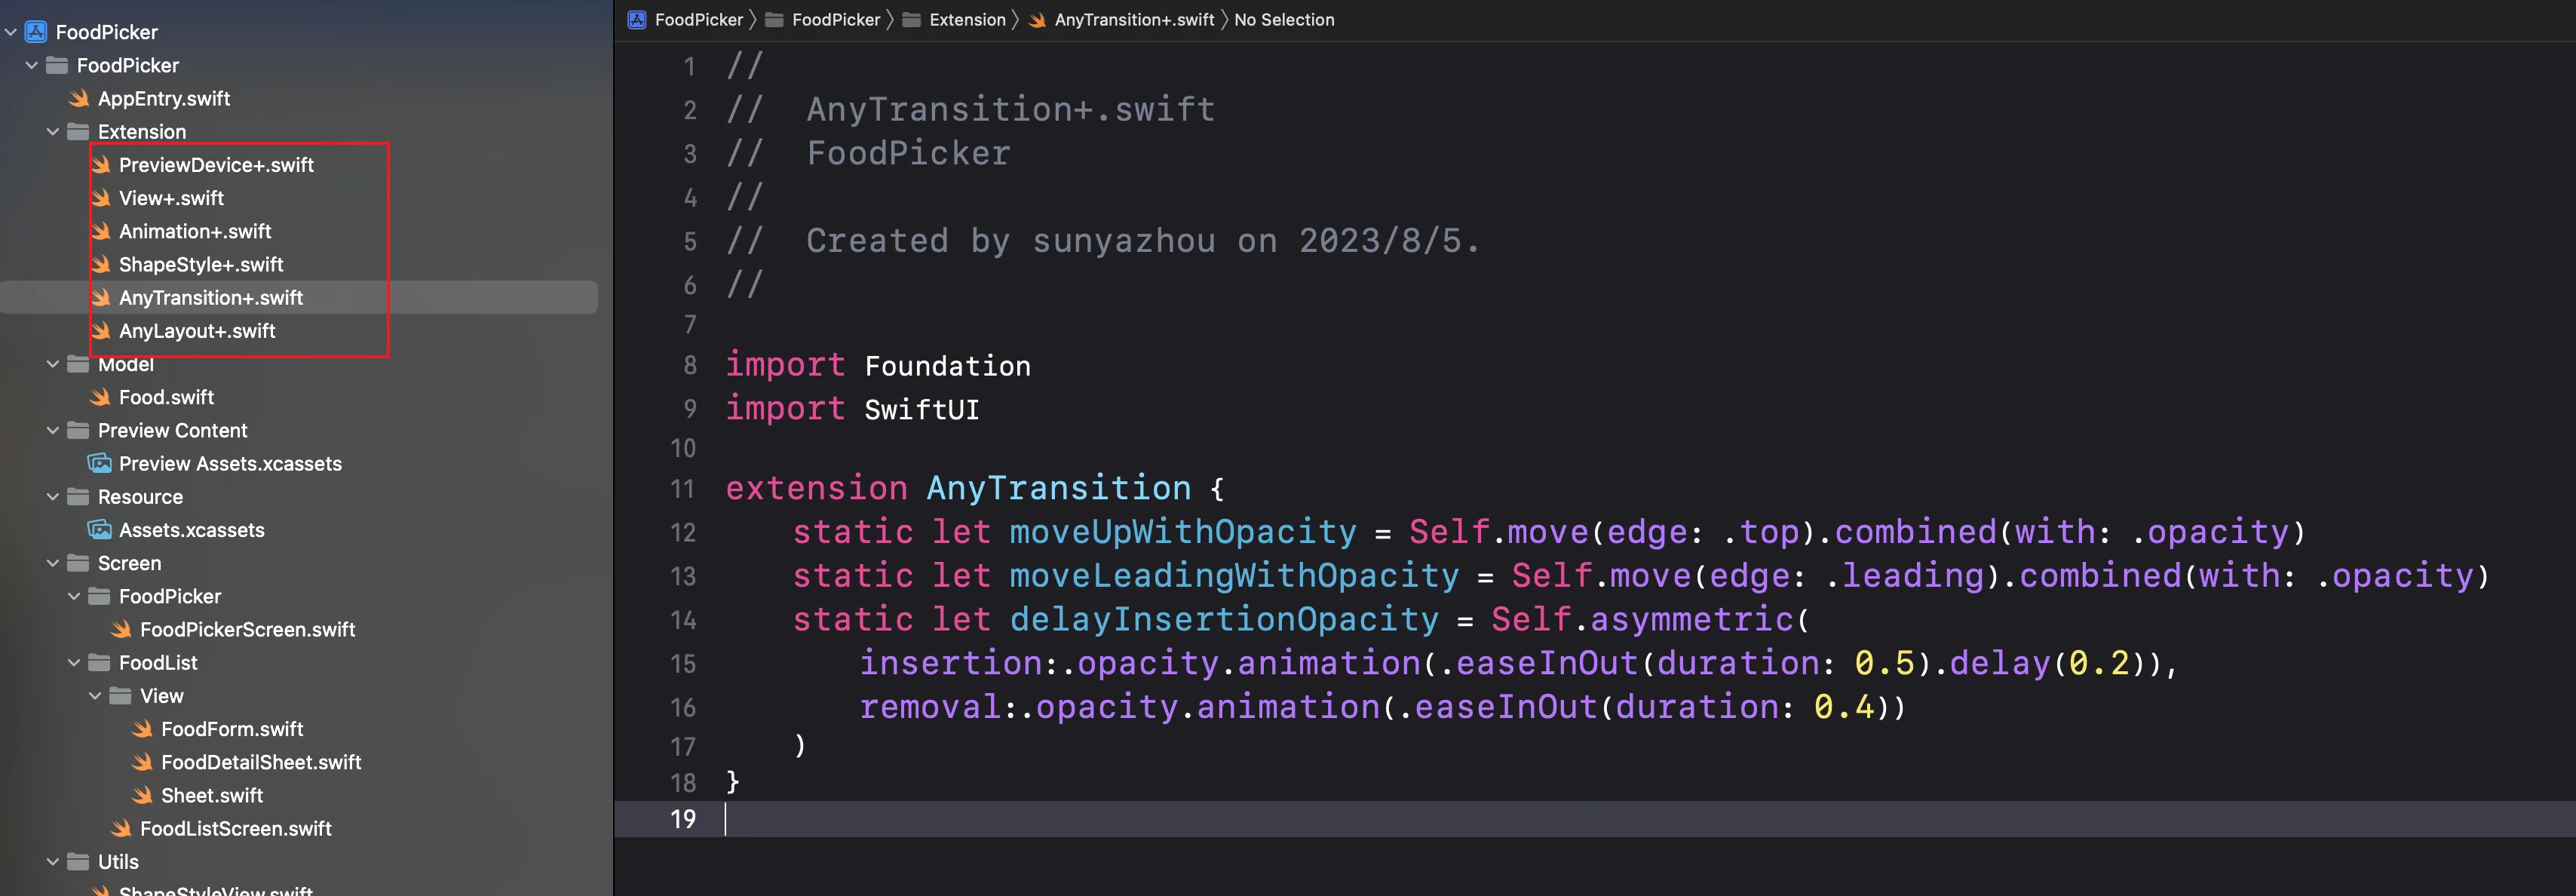
After you write a lot of extensions in a Swift project, the number of classes keeps growing and gets harder and harder to manage. To solve the manageability and readability problems:
By convention, when creating a Swift extension, name the file by appending a + suffix.
As shown below:
Summary
Chapter 3 is a particularly long haul and takes patience. It also covered a form in the middle, which I didn’t write about here, because there’s a lot of material and it’s complicated — you’re better off watching the videos carefully; that’s more convincing than my summary here.
Chapter 3 course link
Project code
Finished code example for this post