
Preface
This article carries strong personal sentiments. If you find it uncomfortable to read, please close it. This article is for personal learning records only. You’re welcome to repost or share it within the scope of the license — please respect the copyright and keep the original link. Thank you for your understanding and cooperation. If you find this site helpful, you can subscribe via RSS. Thanks for your support!
Animation Background
In HarmonyOS development, the animation categories are richer than in iOS development, including the following animation types:
- Property animation (animation)
- Explicit animation (animateTo)
- Keyframe animation (keyframeAnimationTo)
- Transition animation (Transition)
- Page transition (pageTransition)
- Component transition (transition)
- Shared element transition (sharedTransition)
- Implicit shared element transition within component (geometryTransition)
- Path transition (motionPath)
- Particle animation (Particle)
Detailed source: HarmonyOS Development Documentation - Animation
Property Animation (animation)

1
2
3
4
5
6
7
8
9
10
11
12
13
14
15
16
17
18
19
20
21
22
23
24
25
26
27
28
29
30
31
32
33
34
35
36
37
38
39
40
41
42
43
import { SizeT } from '@ohos.arkui.node';

@Entry
@Component
struct MTAnimation3 {
  @State message: string = '迈腾大队长';
  @State buttonSize: Size = {width: 266, height: 108};
  @State didChanged: boolean = true;

  build() {
    Row() {
      Column() {
        Text(this.message)
          .fontSize(50)
          .fontWeight(FontWeight.Bold)
        Button("sunyazhou.com")
          //.animation({}) // 公式:animation 增加到那个地方的后面,前面就会被animation管理,否则不生效
          .onClick( ()=> {
            console.log("点击sunyazhou.com按钮")
            if (this.didChanged) {
              this.buttonSize = {width: 166, height:80}
            } else {
              this.buttonSize = {width: 266, height:108}
            }
            this.didChanged = !this.didChanged //反置 交换
          })
          .width(this.buttonSize.width)
          .animation({
              duration: 1000,
              curve: Curve.EaseInOut,
              // iterations: 1, //执行次数,(动画来回算2次)
              playMode: PlayMode.Alternate, //动画结束停在动画结束的位置
              onFinish: ()=> {
                console.log("动画执行完成")
              }
          }) //我只负责前面的代码 有动画,后面的代码,我不管(在这里之前的代码都受animation控制)
          .height(this.buttonSize.height) //注意;这行代码不在动画范围内
      }
      .width('100%')
    }
    .height('100%')
  }
}
Note: The .animation animation only takes effect on properties added before the code. Properties after it won’t be affected. Property animation official documentation
Explicit Animation (animateTo)
Anyone who has studied iOS development knows that the explicit animation in iOS is [UIView animateWithDuratio...]
1
+ (void)animateWithDuration:(NSTimeInterval)duration animations:(void (^)(void))animations API_AVAILABLE(ios(4.0));
In HarmonyOS development, this type of animation is called animateTo.
Let’s look at the demo. I want to rotate an image 90 degrees, then rotate it back. In iOS, you’d just modify the transform and put the modification code inside the UIView animation block:
1
2
3
4
5
CGAffineTransformRotate(transform, M_PI_2); //旋转90°
...

CGAffineTransformIdentity;

Here’s the HarmonyOS ArkUI example code:
1
2
3
4
5
6
7
8
9
10
11
12
13
14
15
16
17
18
19
20
21
22
23
24
25
26
27
28
29
30
31
32
33
34
35
36
37
38
39
40
41
42
43
44
45
46
47
48
@Entry
@Component
struct MTAnimation2 {
  @State message: string = '显式动画(animateTo)';
  @State rotateValue: number = 0;
  @State color: Color = Color.Blue;
  @State isStart: boolean = false;
  build() {
    Row() {
      Column() {
        Text(this.message)
          .fontSize(50)
          .fontWeight(FontWeight.Bold)
        Divider()
          .height(20)
        Image($r('app.media.sunyazhou'))
          .width(333)
          .height(333)
          .rotate({
            angle:this.rotateValue, //表面上是旋转功能, 实际上需要配合 x轴y抽z轴
            x:0,
            y:0,
            z:1,
          })
          .onClick(() => {
            animateTo({
              duration: 1000, //ms
              curve : Curve.EaseInOut, //动画速率
              onFinish:() => {
                this.message = "动画执行完成"
                this.color = Color.Green
              }
            }, ()=> {
              if (this.isStart) {
                this.rotateValue = 0
              } else  {
                this.rotateValue = 90
              }
              this.isStart = !this.isStart
            })
          })
      }
      .width('100%')
    }
    .height('100%')
  }
}
If you change x, y, z in .rotate all to 1 and rotate 625 degrees, it looks like this:

When we click continuously during the animation, it’s very responsive — just like UIView Animation in iOS, if interrupted mid-animation, it directly executes the next explicit animation. The following demo shows the responsive effect: 
For more details, visit the HarmonyOS official documentation - Explicit Animation (animateTo)
Keyframe Animation
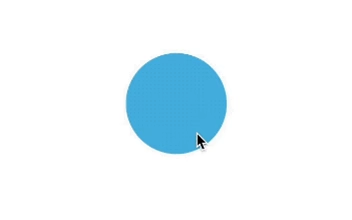
Keyframe animation in HarmonyOS development is implemented using UIContext:
1
2
3
4
5
6
7
8
9
10
11
12
13
14
15
16
17
18
19
20
21
22
23
24
25
26
27
28
29
30
31
32
33
34
35
36
37
38
39
40
41
42
43
44
45
46
47
// xxx.ets
import { UIContext } from '@ohos.arkui.UIContext';
@Entry
@Component
struct KeyframeDemo {
  @State myScale: number = 1.0;
  uiContext: UIContext | undefined = undefined;

  aboutToAppear() {
    this.uiContext = this.getUIContext?.();
  }

  build() {
    Column() {
      Circle()
        .width(100)
        .height(100)
        .fill("#46B1E3")
        .margin(100)
        .scale({ x: this.myScale, y: this.myScale })
        .onClick(() => {
          if (!this.uiContext) {
            console.info("no uiContext, keyframe failed");
            return;
          }
          this.myScale = 1;
          // 设置关键帧动画整体播放3次
          this.uiContext.keyframeAnimateTo({ iterations: 3 }, [
            {
              // 第一段关键帧动画时长为800ms,scale属性做从1到1.5的动画
              duration: 800,
              event: () => {
                this.myScale = 1.5;
              }
            },
            {
              // 第二段关键帧动画时长为500ms,scale属性做从1.5到1的动画
              duration: 500,
              event: () => {
                this.myScale = 1;
              }
            }
          ]);
        })
    }.width('100%').margin({ top: 5 })
  }
}
Component Transition Animation
Component transition animation:
As shown below: 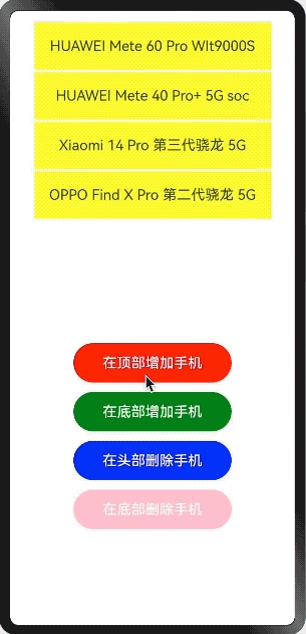
Implementation code:
1
2
3
4
5
6
7
8
9
10
11
12
13
14
15
16
17
18
19
20
21
22
23
24
25
26
27
28
29
30
31
32
33
34
35
36
37
38
39
40
41
42
43
44
45
46
47
48
49
50
51
52
53
54
55
56
57
58
59
60
61
62
63
64
65
66
67
68
69
70
71
72
73
74
75
76
77
78
79
80
81
82
83
84
85
86
87
88
89
90
91
92
93
94
95
96
97
98
99
100
101
102
103
104
105
106
107
108
109
110
111
112
113
114
@Entry
@Component
struct MTAnimation1 {
  @State phones: string[] = [
    'HUAWEI Mete 60 Pro WIt9000S',
    'HUAWEI Mete 40 Pro+ 5G soc',
    'Xiaomi 14 Pro 第三代骁龙 5G',
    'OPPO Find X Pro 第二代骁龙 5G'
  ]

  @State topIndex: number = 0
  @State bottomIndex: number = this.phones.length

  build() {
    Column({space:12}) {
      Column() {
        ForEach(this.phones, (item:string)=> {
           Text(item).ft_text()
             .transition(
               TransitionEffect.asymmetric(
                 // 1.出现时做从指定的透明度为0变为默认的透明度1的动画,该动画时长为1000ms,
                 // 以及做从指定的绕z轴旋转180°变为默认的旋转角为0的动画,该动画1000ms后播放,时长为1000ms
                 // 2.消失时做从默认的透明度为1变为指定的透明度0的动画,该动画1000ms后播放,
                 // 时长为1000ms,以及做从默认的旋转角0变为指定的绕z轴旋转180°的动画,该动画时长为1000ms
                 TransitionEffect.OPACITY.animation({ duration: 1000 }).combine(
                   TransitionEffect.rotate({ z: 1, angle: 180 }).animation({ delay: 1000, duration: 1000 })),
                   TransitionEffect.OPACITY.animation({ delay: 1000, duration: 1000 }).combine(
                    TransitionEffect.rotate({ z: 1, angle: 180 }).animation({ duration: 1000 })
                    // TransitionEffect.translate({x: 600, y: 0}).animation({duration: 1000})
                 )
               )
             )
             // .transition(TransitionEffect.OPACITY.animation({duration: 2000, curve: Curve.Ease})
             //   .combine(TransitionEffect.rotate({z: 1, angle: 180})
             //   ))

             // .transition(
             //   TransitionEffect.asymmetric(
             //     TransitionEffect.translate({x: 333, y: 333}),
             //     TransitionEffect.IDENTITY
             //   )
             // )
        }, (item: string) => JSON.stringify(item))
      }.ft_column()

      Button('在顶部增加手机').ft_btn(Color.Red,() => {
          animateTo({}, ()=> {
            if (this.topIndex == 0) {
              this.phones.unshift('iPhone 15 Pro Max')
            } else {
              this.phones.unshift('iPhone 15 Pro Max'+ '(' + this.topIndex + ')')
            }
            this.topIndex++
          })
      })
      Button('在底部增加手机').ft_btn(Color.Green, ()=> {
          animateTo({}, ()=> {
            if (this.bottomIndex == 0) {
              this.phones.push('iPhone 14 Pro Max')
            } else {
              this.phones.push('iPhone 14 Pro Max' + '('+ this.bottomIndex +')')
            }
            this.bottomIndex++
          })
      })

      Button('在头部删除手机').ft_btn(Color.Blue, ()=> {
        animateTo({}, ()=> {
          this.phones.shift()
        })
      })

      Button('在底部删除手机').ft_btn(Color.Pink, () => {
        animateTo({}, ()=> {
          this.phones.pop()
        })
      })
    }
    .width('100%')
    .height('100%')
  }
}

@Extend(Column) function ft_column() {
  .margin(10)
  .justifyContent(FlexAlign.Start)
  .alignItems(HorizontalAlign.Center)
  .width('90%')
  .height('50%')
}

@Extend(Text) function ft_text() {
  .width(300)
  .height(60)
  .fontSize(18)
  .margin({top: 3})
  .backgroundColor(Color.Yellow)
  .textAlign(TextAlign.Center)
}

@Extend(Button) function ft_btn(bgColor: Color, click: Function) {
  .width(200)
  .height(50)
  .fontSize(18)
  .backgroundColor(bgColor)
  .onClick(()=> {
    click() //此处的cLick是一个形参。具体代表的是调用除传进来的函数。后方跟小括号代表执行传进来的函数。
  })
}

function item(item: string, index: number): string {
  throw new Error('Function not implemented.')
}
Here’s the core code:
1
2
3
4
5
6
7
8
9
10
11
12
13
14
15
16
17
18
19
20
21
22
23
24
25
Text(item).ft_text()
	 .transition(
	   TransitionEffect.asymmetric(
	     // 1.出现时做从指定的透明度为0变为默认的透明度1的动画,该动画时长为1000ms,
	     // 以及做从指定的绕z轴旋转180°变为默认的旋转角为0的动画,该动画1000ms后播放,时长为1000ms
	     // 2.消失时做从默认的透明度为1变为指定的透明度0的动画,该动画1000ms后播放,
	     // 时长为1000ms,以及做从默认的旋转角0变为指定的绕z轴旋转180°的动画,该动画时长为1000ms
	     TransitionEffect.OPACITY.animation({ duration: 1000 }).combine(
	       TransitionEffect.rotate({ z: 1, angle: 180 }).animation({ delay: 1000, duration: 1000 })),
	       TransitionEffect.OPACITY.animation({ delay: 1000, duration: 1000 }).combine(
	        TransitionEffect.rotate({ z: 1, angle: 180 }).animation({ duration: 1000 })
	        // TransitionEffect.translate({x: 600, y: 0}).animation({duration: 1000})
	     )
	   )
	 )
	 // .transition(TransitionEffect.OPACITY.animation({duration: 2000, curve: Curve.Ease})
	 //   .combine(TransitionEffect.rotate({z: 1, angle: 180})
	 //   ))

	 // .transition(
	 //   TransitionEffect.asymmetric(
	 //     TransitionEffect.translate({x: 333, y: 333}),
	 //     TransitionEffect.IDENTITY
	 //   )
	 // )
I found the documentation: Component Transition (transition) — there’s a detailed introduction here.
This animation is somewhat similar to iOS’s affine animation, just on a different platform. The animations here are also very rich. I’ll continue implementing other animations and recording them here.
Summary
I’ve learned HarmonyOS development 3 times now. Sometimes I need to record some animations and content as study notes. Hope it helps other developers.