
Preface
It’s been a long time since I last updated my blog (too many family matters, tight time, and limited working hours). Today I bring you Douyin’s scrolling caption — the album name of a music album. Enough talk, here’s the picture.
Douyin’s version: 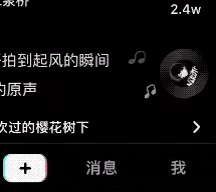
The system’s scrolling caption:
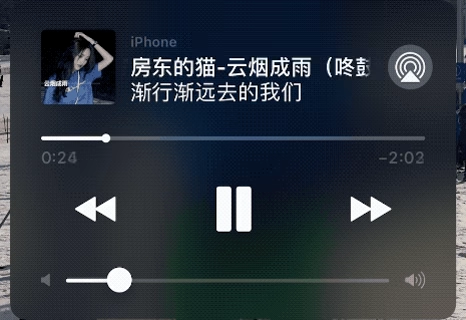
After finishing this article, it looks like this: 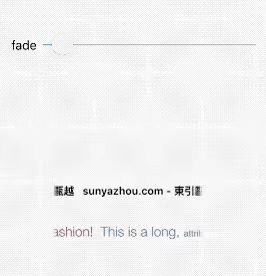
- Supports adjustable mask gradient blur
- Supports attributed strings for displaying emoji or images
Getting Started
The whole implementation is fairly simple — no more than 200 lines of code.
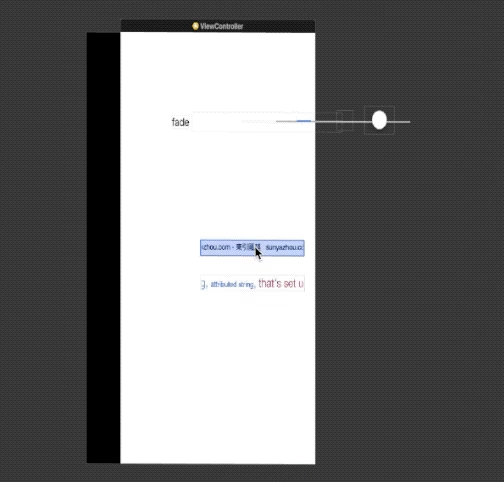
First, we need two CALayers:
CATextLayerfor displaying textCAGradientLayerfor adding a mask to the text
Then we create a UIScrollTextView that inherits from UIView (I used the UI prefix just for fun; you can wrap it however you like.)
1
2
3
4
5
6
7
8
9
10
11
12
13
14
15
@interface UIScrollTextView : UIView

@property (nonatomic, copy  ) NSString           *text;   //1
@property (nonatomic, strong) UIColor            *textColor; //2
@property (nonatomic, strong) UIFont             *font;  //3

@property (nonatomic, strong) NSAttributedString *attrString; //4

/**
 The distance at which the gradient starts (0~0.5), recommended around 0.0x, e.g. 0.026.
 If set to 1, the view may overflow when it's not long enough; it's not recommended to exceed the range.
 */
@property (nonatomic, assign) CGFloat            fade; //5

@end
The public API exposed:
- The text content to display
- The text color
- The text font
- The attributed string, fully controlling color, font, and style yourself
- The gradient length of the mask blur
First, you can ignore these public APIs and look at the implementation in the .m file:
1
2
3
4
5
6
7
8
9
10
11
12
@interface UIScrollTextView ()

@property (nonatomic, strong) CATextLayer  *textLayer; //文本layer
@property (nonatomic, strong) CAGradientLayer *gradientLayer; //蒙版渐变layer

@property (nonatomic, assign) CGFloat      textSeparateWidth; //文本分割宽度
@property (nonatomic, assign) CGFloat      textWidth;   //文本宽度
@property (nonatomic, assign) CGFloat      textHeight;  //文本高度
@property (nonatomic, assign) CGRect       textLayerFrame; //文本layer的frame
@property (nonatomic, assign) CGFloat      translationX; //文字位置游标

@end
In the initWithFrame: and awakeFromNib methods, initialize some member variables:
1
2
3
4
5
6
7
8
9
10
11
12
13
14
15
16
17
- (instancetype)initWithFrame:(CGRect)frame {
    self = [super initWithFrame:frame];
    if (self) {
        [self configProperty];//初始化成员变量 //1
        [self initLayer]; //2
    }
    return self;
}

- (void)configProperty {
    _text = @"";
    _textColor = [UIColor whiteColor];
    _font = [UIFont systemFontOfSize:14.0];
    self.textSeparateWidth = [kSeparateText calculateSingleLineSizeFromFont:self.font].width;
    _fade = 0.026;

}
- The configProperty method initializes the default values
- The initLayer method creates the 2 layers we need
In the configProperty method, when initializing member variables, it’s best to use the
_underscore so that thesetterisn’t triggered, since a lot of our code lives in setters and getters.
- The initLayer method creates the 2 layers we need
Initializing the Layers
Below, let’s focus on initLayer:
1
2
3
4
5
6
7
8
9
10
11
12
13
14
15
16
17
18
19
20
21
22
23
24
25
- (void)initLayer {
    //The text layer  1
    if (self.textLayer == nil) {
        self.textLayer = [[CATextLayer alloc] init];
    }
    self.textLayer.alignmentMode = kCAAlignmentNatural; //设置文字对齐模式 自然对齐
    self.textLayer.truncationMode = kCATruncationNone;  //设置截断模式
    self.textLayer.wrapped = NO; //是否折行
    self.textLayer.contentsScale = [UIScreen mainScreen].scale;
    if (self.textLayer.superlayer == nil) {
        [self.layer addSublayer:self.textLayer];
    }

    //The gradient  2
    self.gradientLayer = [CAGradientLayer layer];
    self.gradientLayer.shouldRasterize = YES;
    self.gradientLayer.rasterizationScale = [UIScreen mainScreen].scale;
    self.gradientLayer.startPoint = CGPointMake(0.0f, 0.5f); //3
    self.gradientLayer.endPoint = CGPointMake(1.0f, 0.5f);  //4
    id transparent = (id)[UIColor clearColor].CGColor; // 5
    id opaque = (id)[UIColor blackColor].CGColor; //5
    self.gradientLayer.colors = @[transparent, opaque, opaque, transparent]; // 6
    self.gradientLayer.locations = @[@0,@(self.fade),@(1-self.fade),@1]; // 7
    self.layer.mask = self.gradientLayer; //8
}
At code 1, creating the CATextLayer is the same as creating any other CALayer — nothing special to say. We set wrapping, alignment, truncation, etc.
At code 2, let me focus on this CAGradientLayer.
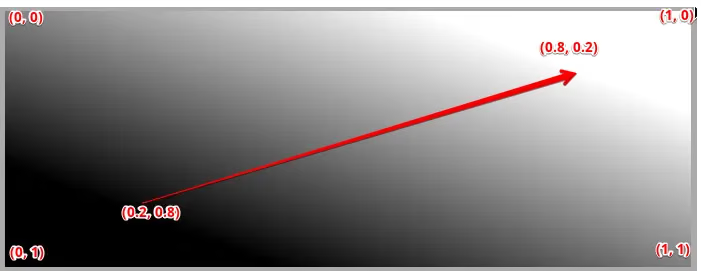
At code 3 and 4, we set the start and end directions of the mask gradient. (Using the bottom-left corner of the screen as origin 0,0 and the top-right corner as 1,1.)
If the start point is (0.0,0.5) and the end point is (1.0,0.5), it’s a horizontal gradient. If the start point is (0.5,0) and the end point is (0.5,1), it’s a vertical gradient. These two points determine the direction of the gradient.
We can remove the mask code and run it to see the effect without the mask, as shown below:
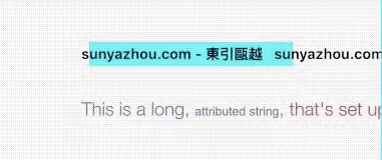
Here I used the cyan-colored area to represent the size of the view; without the mask, the text actually extends beyond the display area.
Note: the animation isn’t built into this layer; it’s code we add ourselves. Keep reading — there’s code for it.
At code 5, we add gradient colors to the current gradient layer to achieve the mask blur effect.
At code 6, the corresponding color array is assigned to gradientLayer.colors.
At code 7, used together with code 6, it achieves the gradient-masking effect on both sides.

The image above shows the effect of the code below; we added 4 points:
1
2
self.gradientLayer.colors = @[transparent, opaque, opaque, transparent]; // 6
self.gradientLayer.locations = @[@0,@(self.fade),@(1-self.fade),@1]; // 7
Updating the Layer Layout
Here we need to compute the correct layout coordinates in the layoutSubviews method, because the outside might use autolayout.
1
2
3
4
5
6
7
8
9
10
- (void)layoutSubviews {
    [super layoutSubviews];

    [CATransaction begin];
    [CATransaction setDisableActions:YES];
    CGFloat textLayerFrameY = CGRectGetHeight(self.bounds)/2 - CGRectGetHeight(self.textLayer.bounds) / 2;
    self.textLayer.frame = CGRectMake(0, textLayerFrameY, CGRectGetWidth(self.textLayerFrame), CGRectGetHeight(self.textLayerFrame));
    self.gradientLayer.frame = self.bounds;
    [CATransaction commit];
}
This code mainly updates the frames of gradientLayer and textLayer.
Why Use CATransaction?
Because we want to manually change the animation parameters while the animation is in progress. For details, see Setting Animation Parameters.
The Remaining Three Tasks
- Draw the text layer, i.e., assign the string to be displayed to
self.textLayer.string - Add the scrolling animation
- Call the draw-text-layer and scrolling-animation methods in the setters of the member variables
Adding the Private drawTextLayer Method
1
2
3
4
5
6
7
8
9
10
11
//Assemble the text
- (void)drawTextLayer {
    self.textLayer.foregroundColor = self.textColor.CGColor;
    CFStringRef fontName = (__bridge CFStringRef)self.font.fontName;
    CGFontRef fontRef = CGFontCreateWithFontName(fontName);
    self.textLayer.font = fontRef;
    self.textLayer.fontSize = self.font.pointSize;
    CGFontRelease(fontRef);
    // 1
    self.textLayer.string = [NSString stringWithFormat:@"%@%@%@%@%@",_text,kSeparateText,_text,kSeparateText,_text];
}
Note that the code at 1 does two things:
- Concatenate the text
- Assign it to layer.string
The format concatenation is text + 3 spaces + text + 3 spaces + text
1
NSString * const kSeparateText          = @"   ";   //3个空格
kSeparateText is a constant.
Adding the Text Scrolling Animation
1
2
3
4
5
6
7
8
9
10
11
12
13
14
15
- (void)startAnimation {
    if ([self.textLayer animationForKey:kTextLayerAnimationKey]) {
        [self.textLayer removeAnimationForKey:kTextLayerAnimationKey];
    }
    CABasicAnimation *animation = [CABasicAnimation animation];
    animation.keyPath = @"transform.translation.x"; //沿着X轴运动
    animation.fromValue = @(self.bounds.origin.x);
    animation.toValue = @(self.bounds.origin.x - self.translationX);
    animation.duration = self.textWidth * 0.035f;
    animation.repeatCount = MAXFLOAT;
    animation.removedOnCompletion = NO;
    animation.fillMode = kCAFillModeForwards;
    animation.timingFunction = [CAMediaTimingFunction functionWithName:kCAMediaTimingFunctionLinear];
    [self.textLayer addAnimation:animation forKey:kTextLayerAnimationKey];
}
Here we add a CABasicAnimation to self.textLayer so it moves along the X axis. Of course, if you’d like, I could add more directions later, similar to MarqueeLabel scrolling text. But I think MarqueeLabel’s scrolling text implementation is too complex and not down-to-earth enough. This simple animation effect is better written by yourself.
Just add the animation to self.textLayer. I’m sure you’re all very familiar with iOS animations, so I won’t go through them one by one.
Calling the Draw-Text-Layer and Scrolling-Animation Methods in the Setters
1
2
3
4
5
6
7
8
9
10
11
- (void)setText:(NSString *)text {
    _text = text;
    //Calculate the size of a single line of text
    CGSize size = [text calculateSingleLineSizeWithAttributeText:_font];
    _textWidth = size.width;
    _textHeight = size.height;
    _textLayerFrame = CGRectMake(0, 0, _textWidth * 3 + _textSeparateWidth * 2, _textHeight);
    _translationX = _textWidth + _textSeparateWidth;
    [self drawTextLayer];
    [self startAnimation];
}
Here, every time the relevant text is set on the current view, the setter calls the text rendering and animation. This exposes the relevant APIs so that changes take effect in real time. As for the other properties like the attributed string, font, etc., we also need to append these calls:
1
2
[self drawTextLayer];
[self startAnimation];
Because those changes affect the text size.
For computing the text size, I use CoreText here, which supports both multiline and single-line text.
The attributed string is handled the same way, so I won’t write it out here. I’ve put the detailed code demo below the article; feel free to download and study it.
Final result:
Summary
Because my spare time is limited, I couldn’t manage to post two articles a month steadily. I hope everyone understands. The Douyin animation series requires writing a demo first and then studying it carefully before turning it into an article. It takes real effort to make. This article also references open-source code and some scrolling-caption libraries. Since the demo isn’t perfect, some classes still have room for extension — for example, exposing the start/end animation to the outside, or naturally adding an animation group like the system does. This article thanks the open-source author qiaoshi, because the author’s implementation wasn’t perfect, so I studied it and added gradient effects and attributed string support.