
Preface
This article is strongly personal in tone. If you find it uncomfortable to read, please close it as soon as possible. This article is only a personal learning record. You are welcome to repost or share it within the scope of the license agreement, but please respect the copyright and keep the original link. Thank you for your understanding and cooperation. If you find this site helpful, you can subscribe via RSS. Thanks for your support!
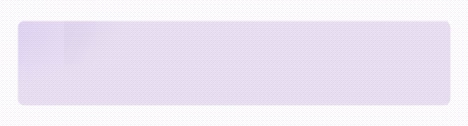
Let’s show the final result first.
Deep Dive into CAGradientLayer
Recently, while developing features, the visual designer on our team was very interested in the fluid gradient animation of QQ Music’s desktop lyrics preview and asked us developers to implement this effect.

Looking closely at the lyrics background — if it weren’t for my 5.0 vision in both eyes, the first time I saw the QQ Music effect I’d have thought there was no animation; how naive, I’ve been schooled — there’s a soft-light-like effect that shines and moves like a lamp. The visual designer calls this effect the fluid transition animation.
To research this effect, I studied CAGradientLayer in depth and found a few important types I’d like to introduce.
CAGradientLayer has a member variable called type.
1
@property(copy) CAGradientLayerType type; //objc中的成员变量
1
open var type: CAGradientLayerType  //swift中的成员变量
Here I’ll use Objective-C as an example.
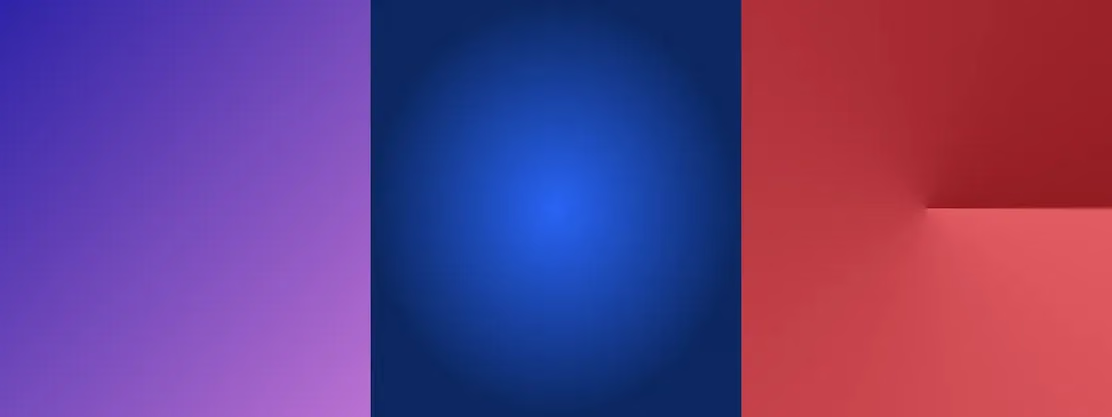
- kCAGradientLayerAxial: This is called an axial gradient or linear gradient
- kCAGradientLayerRadial: This is called a radial gradient
- kCAGradientLayerConic: This is called a conic gradient
kCAGradientLayerAxial
This Linear (Axial) Gradient looks like this: 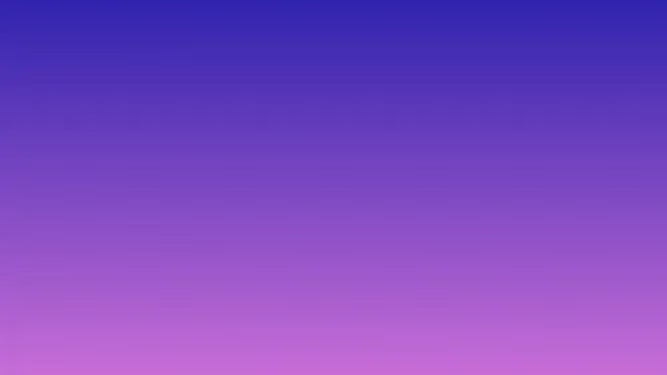
1
2
3
4
5
6
7
8
9
// Objective C

gradientLayer.type = kCAGradientLayerAxial;
gradientLayer.colors =
@[
    (id)[UIColor colorWithRed: 48.0/255.0 green: 35.0/255.0 blue: 174.0/255.0 alpha: 1.0].CGColor,
    (id)[UIColor colorWithRed: 200.0/255.0 green: 109.0/255.0 blue: 215.0/255.0 alpha: 1.0].CGColor
];
1
2
3
4
5
6
7
// Swift
gradientLayer.type = .axial;
gradientLayer.colors =
[
    UIColor(red: 48.0/255.0, green: 35.0/255.0, blue: 174.0/255.0, alpha: 1.0).cgColor,
    UIColor(red: 200.0/255.0, green: 109.0/255.0, blue: 215.0/255.0, alpha: 1.0).cgColor
]
Before studying the differences among these types, let’s review the start point and end point of a gradient layer.
Start Point and End Point
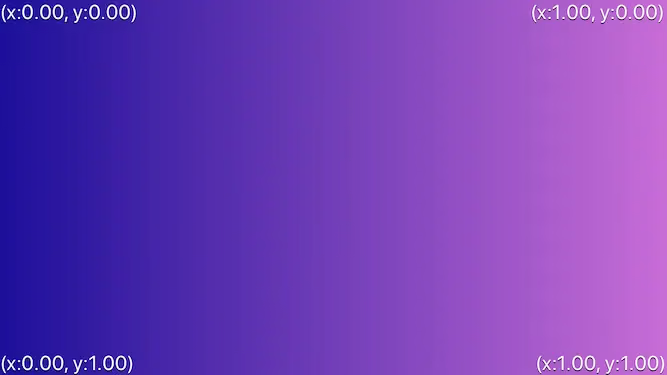
The start point and end point can change the gradient direction. Default
startPoint = (0.5, 0),endPoint = (0.5, 1.0)
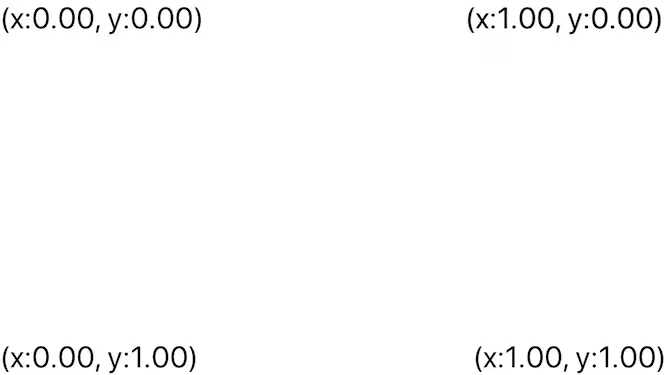
To make this gradient horizontal (left to right), refer to the diagram and code below.
Refer to the diagram below
Here’s the example code:
1
2
3
4
5
6
7
8
9
10
11
12
13
// Objective C

// Set type (Axial is already the default value)
gradientLayer.type = kCAGradientLayerAxial;
// Set the colors (these need to be CGColor's, not UIColor's)
gradientLayer.colors =
@[
    (id)[UIColor colorWithRed: 48.0/255.0 green: 35.0/255.0 blue: 174.0/255.0 alpha: 1.0].CGColor,
    (id)[UIColor colorWithRed: 200.0/255.0 green: 109.0/255.0 blue: 215.0/255.0 alpha: 1.0].CGColor
];
// Set the start and end points
gradientLayer.startPoint = CGPointMake(0, 0);
gradientLayer.endPoint = CGPointMake(1, 0);
1
2
3
4
5
6
7
8
9
10
11
12
13
// Swift

// Set type (Axial is already the default value)
gradientLayer.type = CAGradientLayerType.axial
// Set the colors (these need to be CGColor's, not UIColor's)
gradientLayer.colors =
[
    UIColor(red: 48.0/255.0, green: 35.0/255.0, blue: 174.0/255.0, alpha: 1.0).cgColor,
    UIColor(red: 200.0/255.0, green: 109.0/255.0, blue: 215.0/255.0, alpha: 1.0).cgColor
]
// Set the start and end points
gradientLayer.startPoint = CGPoint(x: 0, y: 0)
gradientLayer.endPoint = CGPoint(x: 1, y: 0)
Multiple Colors and Location Control
Now that you understand the gradient direction, don’t rush off — we also need to understand how multiple colors are controlled and how the positions of the gradient stops are set.
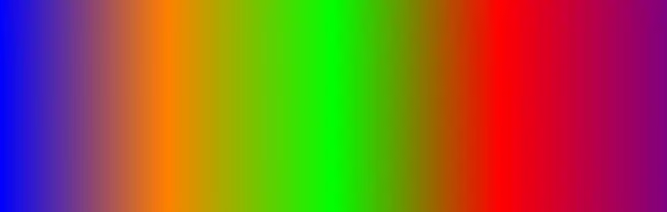
The gradientLayer’s member variable colors is an array that can accept multiple color values. Usually we use two colors for a gradient; for more complex cases, you can set multiple.
The code below demonstrates a multi-color gradient.
1
2
3
4
5
6
7
8
gradientLayer.colors =
@[
    (id)[UIColor blueColor].CGColor,
    (id)[UIColor orangeColor].CGColor,
    (id)[UIColor greenColor].CGColor,
    (id)[UIColor redColor].CGColor,
    (id)[UIColor purpleColor].CGColor
];
The diagram below demonstrates the key gradient location settings. 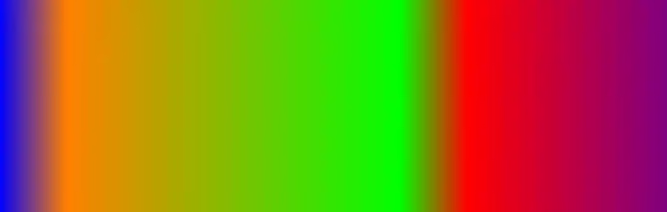
Here’s the location setting code:
1
2
3
4
5
6
7
8
// ObjC
gradientLayer.locations = @[
    @0,   // blueColor
    @0.1, // orangeColor
    @0.6, // greenColor
    @0.7, // redColor
    @1    // purpleColor
];
1
2
3
4
5
6
7
8
// Swift
gradientLayer.locations = [
    0,   // blueColor
    0.1, // orangeColor
    0.6, // greenColor
    0.7, // redColor
    1    // purpleColor
]
Simply put, locations actually controls the position/size of the gradient stops, as distances relative to those before and after (in any direction).
Radial Gradients
Now that we understand colors and locations, let’s look at what a radial gradient is.
When we use the kCAGradientLayerRadial type, we need to pay attention to the start point and end point required by a radial gradient. The diagram below shows an elliptical gradient layer; it can of course be set to a circle.
1
2
3
4
5
6
7
8
9
10
11
12
13
// Objective C

// Set the type
gradientLayer.type = kCAGradientLayerRadial;
gradientLayer.colors =
@[
    (id)[UIColor colorWithRed: 0.0/255.0 green: 101.0/255.0 blue: 255.0/255.0 alpha: 1.0].CGColor,
    (id)[UIColor colorWithRed: 0.0/255.0 green: 40.0/255.0 blue: 101.0/255.0 alpha: 1.0].CGColor
];
// Start in the center
gradientLayer.startPoint = CGPointMake(0.5, 0.5);
// End at the outer edge of the view
gradientLayer.endPoint = CGPointMake(0, 0.75);
1
2
3
4
5
6
7
8
9
10
11
12
13
14
// Swift

// Set type to radial
gradientLayer.type = CAGradientLayerType.radial
// Set the colors
gradientLayer.colors =
[
    UIColor(red: 0.0/255.0, green: 101.0/255.0, blue: 255.0/255.0, alpha: 1.0).cgColor,
    UIColor(red: 0.0/255.0, green: 40.0/255.0, blue: 101.0/255.0, alpha: 1.0).cgColor
]
// Start point of first color in the middle of the view
gradientLayer.startPoint = CGPoint(x: 0.5, y: 0.5)
// End points to the edges of the view
gradientLayer.endPoint = CGPoint(x: 0, y: 0.75)
Conic Gradient kCAGradientLayerConic
The conic gradient is only supported on
@available(iOS 12.0, *)
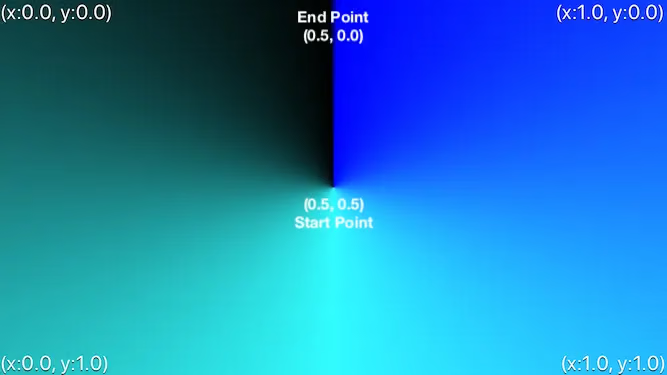
Note the start point and end point positions.
1
2
3
4
5
6
7
8
9
10
11
12
13
14
// Objective C

gradientLayer.type = kCAGradientLayerConic;
// Set the colors
gradientLayer.colors =
@[
    (id)[UIColor blueColor].CGColor,
    (id)[UIColor colorWithRed: 50.0/255.0 green: 251.0/255.0 blue: 255.0/255.0 alpha: 1.0].CGColor,
    (id)[UIColor blackColor].CGColor
];
// Start point of first color in the middle of the view
gradientLayer.startPoint = CGPointMake(0.5, 0.5);
// End points to the edges of the view
gradientLayer.endPoint = CGPointMake(0.5, 0);
1
2
3
4
5
6
7
8
9
10
11
// Swift

gradientLayer.type = CAGradientLayerType.conic
gradientLayer.colors =
[
    UIColor.blue,
    UIColor(red: 50.0/255.0, green: 251.0/255.0, blue: 255.0/255.0, alpha: 1.0).cgColor,
    UIColor.black
]
gradientLayer.startPoint = CGPoint(x: 0.5, y: 0.5)
gradientLayer.endPoint = CGPoint(x: 0.5, y: 0)
Approach to Implementing the QQ Music Effect
Let’s first observe the QQ Music effect.
Our approach:
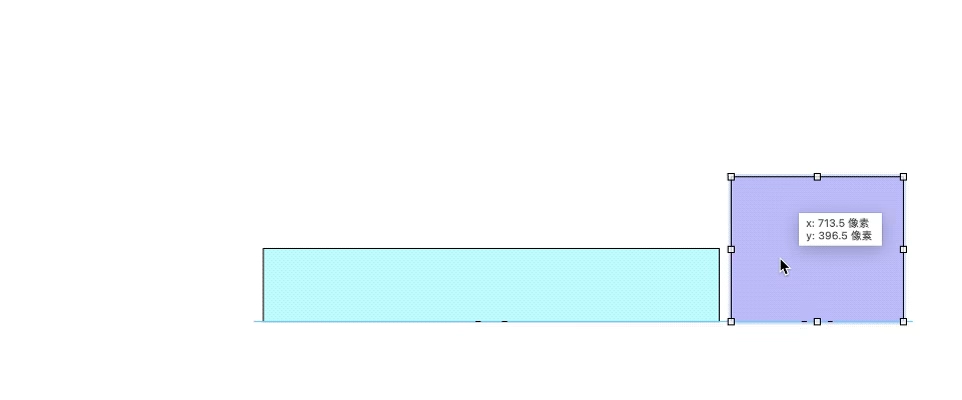
- Create a radial gradient layer
- Place it outside the view and use a
CABasicAnimationto animateposition.xmoving from right to left - Mind the color configuration
- The final position must be outside the screen
Below is a schematic of the implementation approach.
Here’s the code:
1
2
3
4
5
6
7
8
9
10
11
12
13
14
15
16
17
18
19
20
21
22
23
24
25
26
27
28
29
30
31
32

var backgroundView: UIView!
var gradientLayer: CAGradientLayer!

...

override func viewDidLoad() {
    super.viewDidLoad()
    self.backgroundView = UIView(frame: .zero)
    let bgColor = UIColor(red: 231.0/255, green: 223.0/255, blue: 239.0/255, alpha: 1) //要想过渡自然必须保证背景颜色和渐变主颜色一致
    self.backgroundView.backgroundColor = bgColor
    self.view.addSubview(self.backgroundView)
    self.backgroundView.snp.makeConstraints { make in
        make.centerX.equalTo(self.view)
        make.centerY.equalTo(self.view)
        make.size.equalTo(CGSize(width: 360, height: 70))
    }
    // Radial gradient layer
    self.gradientLayer = CAGradientLayer()
    self.gradientLayer.frame = CGRect(x: 360 * 1.15, y: -70, width: 360 * 1.15, height: 70 * 2)
    self.gradientLayer.contentsScale = UIScreen.main.scale
    self.gradientLayer.startPoint = CGPoint(x: 0.5, y: 0.5)
    self.gradientLayer.endPoint = CGPoint(x: 0, y: 1)
    self.gradientLayer.type = .radial
    self.gradientLayer.locations = [0.25, 1]
    self.gradientLayer.colors = [UIColor(red: 203.0/255, green: 190.0/255, blue: 224.0/255, alpha: 1).cgColor, bgColor.cgColor]
    self.backgroundView.layer.addSublayer(self.gradientLayer)
    self.backgroundView.layer.cornerRadius = 5
    self.backgroundView.layer.maskedCorners = [.layerMinXMinYCorner,.layerMinXMaxYCorner,.layerMaxXMinYCorner,.layerMaxXMaxYCorner];
    self.backgroundView.layer.masksToBounds = true
}
Adding the animation effect:
1
2
3
4
5
6
7
8
9
10
11
12
13
14
15
private func addPositionAnimation ()
{
    if ((self.gradientLayer.animationKeys()?.contains("kAnimationKey")) != nil) {
        return;
    }
    let width = CGRectGetWidth(self.backgroundView.frame)
    let gradientWidth = CGRectGetWidth(self.gradientLayer.frame)
    let locationAniamtion: CABasicAnimation = CABasicAnimation(keyPath: "position.x")
    locationAniamtion.fromValue = gradientWidth + self.gradientLayer.anchorPoint.x * width
    locationAniamtion.toValue = -gradientWidth
    locationAniamtion.duration = 7
    locationAniamtion.repeatCount = Float.infinity
    locationAniamtion.fillMode = .forwards;
    self.gradientLayer.add(locationAniamtion, forKey: "kAnimationKey")
}
The implementation took no more than 80 lines of code; after removing the redundant code, it’s just about 40 lines.
Problems Encountered
- The different colors look weird
- Need to clip it when it goes out of bounds
Solving Problem 1: The Different Colors Look Weird
1
2
3
4
5
6
7
let bgColor = UIColor(red: 231.0/255, green: 223.0/255, blue: 239.0/255, alpha: 1) //要想过渡自然必须保证背景颜色和渐变主颜色一致
self.backgroundView.backgroundColor = bgColor

...

self.gradientLayer.colors = [UIColor(red: 203.0/255, green: 190.0/255, blue: 224.0/255, alpha: 1).cgColor, bgColor.cgColor]
Solving Problem 2: Clipping When It Goes Out of Bounds
1
2
3
self.backgroundView.layer.cornerRadius = 5 //设置倒角半径
self.backgroundView.layer.maskedCorners = [.layerMinXMinYCorner,.layerMinXMaxYCorner,.layerMaxXMinYCorner,.layerMaxXMaxYCorner]; //设置圆角方向
self.backgroundView.layer.masksToBounds = true //超出屏幕截掉
Here I used an iOS 11+ API, maskedCorners, which can round corners in different directions. Many people wonder whether setting the corner radius and masksToBounds easily triggers offscreen rendering and causes extra overhead. If you have this question, please refer to my article on rounding different corners of a UIView.
Below is the finished effect.
Summary
First, let me be clear: this isn’t about showing off. This technique doesn’t have much technical depth — what’s missing is our spirit of continuously exploring. In this example, we learned how to use radial gradients to achieve a fluid-light-like effect in 2D. I hope everyone can pick up some useful technical knowledge along the way. Alright, that’s the end of the article. I’ve put the Demo and references in the links below — check them out if you’re interested. Thanks for watching.